Catching Up With Casey’s Backlog

You are probably sick of hearing about how much Covid has really made a mess of schedules this year but how about hearing it one more time…

Because of Covid lockdowns I havent been able to take photos of everything that I have finished over the past year, as our photo studio has been super busy playing catchup, so here are some photos of my recently finished Katyushas and, BA-64s and T-34s.

~Casey


Churchill By Name, Churchill By Nature!

Very early on in the Big Four Project I painted up a platoon of Crocodiles for my British army. They were a great model to practice my technique on but ever since they have been crying out for some friends. After our first Lockdown period I managed to squeeze in a little garage time and get these big boys painted. With an HQ and two platoons, along with the obligatory AVREs (and Crocodiles) I feel like I have the start of a decent Churchill based force. For completeness sake I would like to paint a third Platoon and a Company of the earlier Churchill III tanks, but that’s something to aspire too….

The “Army”

The HQ Platoon

First Platoon

Second Platoon

AVRE Platoon

One of the things I really enjoyed, and you may not be able to see it from the photos, is that each tank is different in the two platoons – one uparmoured “late” Churchill, one 6pdr armed Churchill and one 75mm armed Churchill. This means I can run the platoon with all the options, but I don’t feel like the complexity I can keep it to myself and not worry my opponent. I will say though, if you plan on doing the same thing, to be very diligent with your planning and assembly… lets just say I may have gotten mixed up at least once and had to remove parts and glue new ones on…

~Chris


Casey’s Tank Killers

I’ve had my SU-85’s almost finished for a few weeks now, and managed to spend some time last week doing the finishing touches like the saws and exhausts.

I’m very happy with these have come out. When I was painting them I though I had gone a little bit heavy with the final white oil paint step and thought that I had lost a lot of the colour depth that the earlier stages added, but the matt varnish brought it all together and darkened out greener areas and added some of the contrast back in.

For those of you with eyes for details, you’ll notice that there is a mix of SU-85s and SU-85M tank killers here. I deliberately painted a mix of models for 2 reasons.

1. I thought it would be more interesting to paint slightly different models.

2. It fit my overall theme of a cobbled together regiment of whatever was found at the depot.

Besides, they look so similar that I feel comfortable fielding them as either/or and will just tell my opponent what they are on the day. With these completed I’ve now started working on the core of my force, my T-34s, and should have the first platoon finished in a couple of weeks.

~ Casey

Carry On Sergeant

It feels like it has been a very long time since I’ve put up a post talking about what I’ve been painting and with such a big gap it would make sense that whatever I’m showing today should be impressive, have lots of models, and be very complex!

Yeah… well… about that. Today I am happy to share that I have finally finished my Universal Carrier Platoon. Yep, that’s right, a whole Universal Carrier Platoon of three vehicles. Now it isn’t that these were hard models to build or paint (quite the opposite in fact) but rather I’ve kept having other projects pushing in front.

These three models are a definite must have in any British force so I really should have knocked them out a bit sooner but I was getting distracted by all the tanks.

Now that they are done I can look forward to painting some more Churchills – everyone needs a company of them right. Of course I will need to paint up another Platoon of Carriers at some point because the D-Day: British book and Command Cards have some interesting options that mean I will want another unit.

~ Chris

Stalin’s Little Tank – T-70 Showcase

Since I finished my first platoon and finalised my painting process, my painting has become a bit quicker.

I really enjoyed painting these T-70s, they are a beautiful kit to but together and have lots of detail, with some nice large areas for streaking and weather effects for such a small tank.

Game-wise the T-70s fill the same role in the Soviet army as Stuarts do in American Armies, they are there to harass light armour and infantry. With Front Armour 4 the enemy has to dedicate some decent anti-tank to take them out, which means that they aren’t shooting my T-34s. With Side Armour 2 they will also be okay in assaults as well as long as I’m careful.

At only one point each its quite easy to fit a small platoon into an army.

In my list I’m going to take a Hero T-70 Platoon of three as support. I would take them in my formation except that I am going to fill out all of my tank options in my formation with Hero T-34 Tank Platoons.

Hero T-70 platoons only have the option for three tanks, but I ended up painting four as that’s what came in the Soviet Starter Set. I’ll probably make the fourth tank into an objective at some point.

Next up on the painting block are some SU-85s

~ Casey

Tiffies vs Kittyhawks

Over the past couple of years I have been playing a lot of Team Yankee and one of the things that I’ve found quite fun, is building and painting aircraft / helicopters. They give you a chance to paint something quite different, use (generally speaking) a new colour pallete, and try out some different techniques.

For the British, the aircraft of choice in Fortress Europe is the good old P-40 Warhawk. For me, this did not feel like an iconic aircraft choice (for the British) which meant I could either, paint something else in the short term, or, paint something in advance…

I decided to paint something a little early, grabbing a pair of Typhoons (which are in D-Day: British) and putting my much delayed Carriers on hold for a bit longer. The Typhoons (or Tiffy / Tiffies) pack a lot of firepower with 20mm cannons as well as rockets that are more than capable of taking care of heavy  armour.

The models were fun to paint, especially since I was able to play around with some masking tapes to try and get the invasion stripes on the wings and fuselage vaguely straight. Having painted them there are a few things I would do differently if I were to paint some more, but overall I think they add a really interesting unit to my army.

~Chris

Holy Smoke!

Another unit down! I finished these armoured mortars in time for some games this past weekend, and it was fun to try my scheme on some halftracks before I fully commit to the Armoured Rifles.

I used the camo template found in the camouflage field manual (see all my camo research here…). It uses desert colours as an example, but I figured the same pattern would apply for the western front.

These give me another platoon in my tank formation, and they’re great for a smoke bombardment, or pinning infantry. I’ll be putting them through their paces at FlamesCon in a couple weeks.

Click on the thumbnail to the right for a bigger version.

– Victor

Murder, Stonk and Mike Target!

For many years these terms have struck fear in to Flames Of War opponents as British artillery pounded them in to submission – I even recall a play test game around 10 years ago where my artillery gun line spent 90 minutes plastering the opposition. Oh what fun we had – “we” being me, and a couple of people watching!

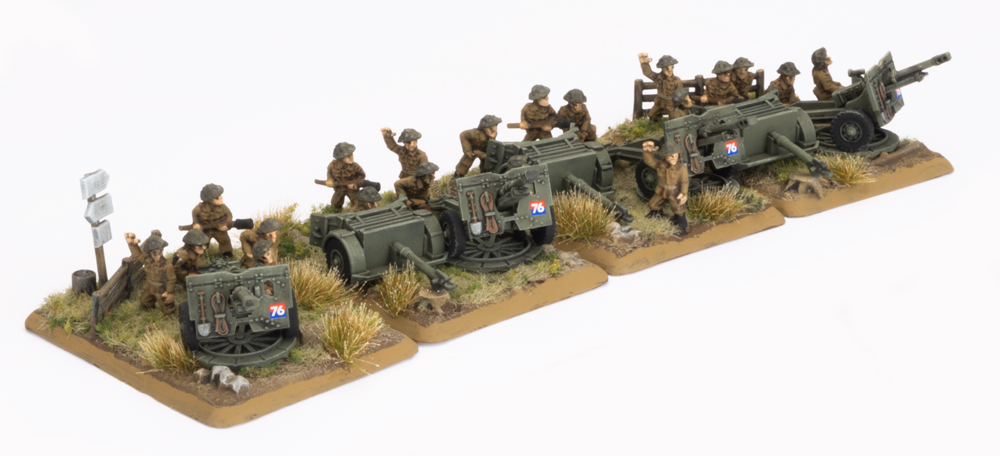
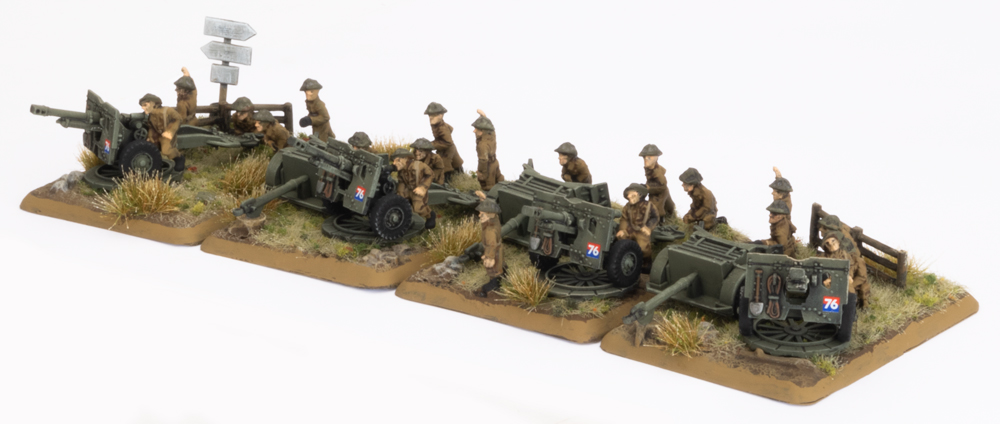
The 25 pdr battery represents the last models I need to paint for FlamesCon, as well as the first 100 points of my official list!

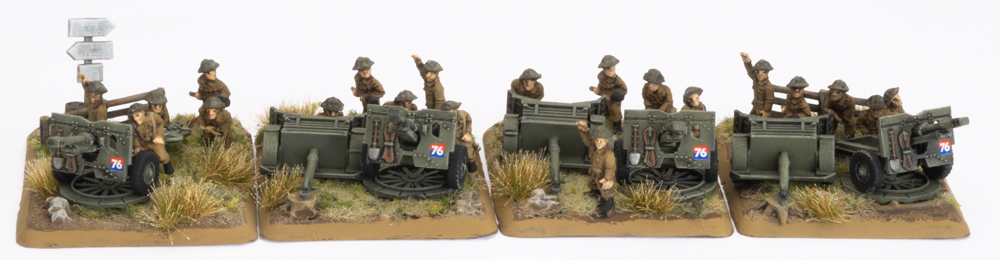
I’d be lying if I said I was 100 percent happy with how these turned out – the guns and limbers look great (if I do say so myself), but of course they are not that different to tanks and I’m really happy with how my process is working for those.

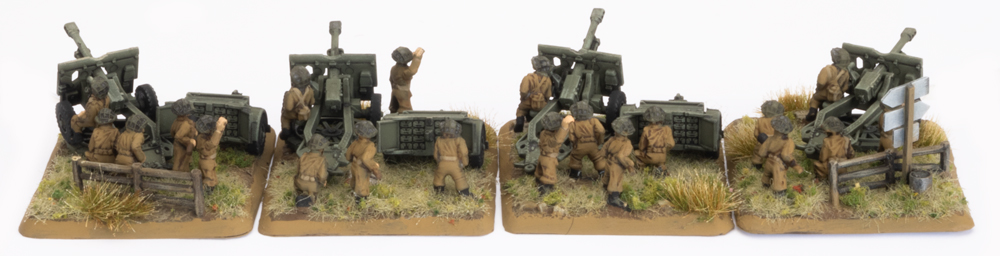
The bases has come out better than expected. Combining two of the the plastic Rural bases together to make gun bases worked out well, and thanks to some thin plastic card and milliput they are nice and durable. I really like all the cool details on them (tree stumps, tire marks, fences etc), and they made the detailing of the bases very simple.

I was initially a bit unsure about my selection of flocks – I like to mix up custom mix for armies and I was going for a darker tone to represent the coming winter months at the end of 1944. In the light of day though I was quite happy with how the colours (a dark green static grass, and a couple of GF9 flock blends) all came together.

The weak point is certainly my painting ability when it comes to the gun crews. Ales, our sculptor, did a lovely job on them and I don’t think I have really done them justice. However I am very happy with the overall result and think that the whole army will look great on the table.

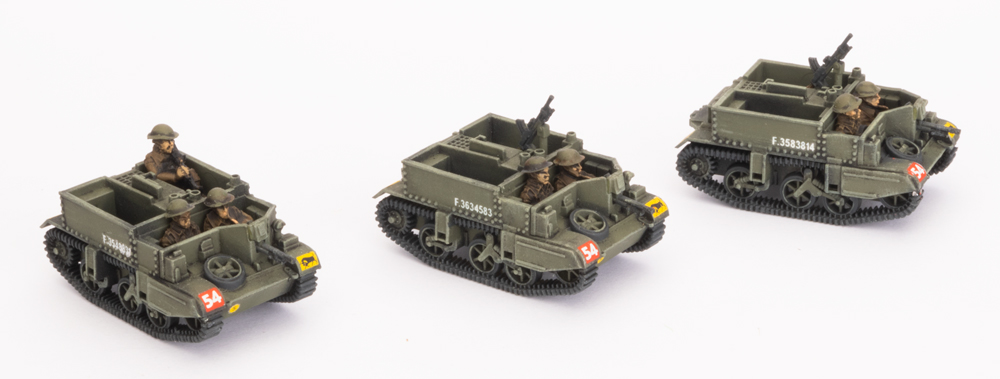
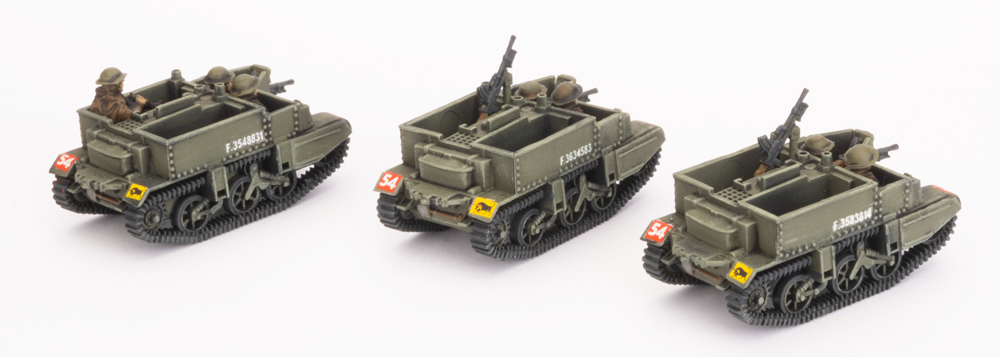
Time to get my Universal Carrier crews painted and I’ll be able to put another unit in the “Done” column…

~Chris

Red Steel Rising

It’s taken a while, but I’ve finally finished my first platoon.

As I said one of my previous posts, I’ve decided to tackle my own personal white whale – a winter washed army. I’m really happy with the results (despite the rest of the Big Four painting 100 points in the same time) and I think that it sets a really good standard for me to keep whilst I work on the rest of my army.

For me though its all about the journey, and I don’t mind spending a lot of time on a few models.

I had a lot of fun painting these and learnt a lot, which should make painting the rest of the army faster.

I’ve put together a painting guide for how I completed the whole whitewash effect and will post it up later this week.

The next platoon on my painting table will be some T-70s.

~ Casey

Thunder In The Skies

My American army is growing nicely and I have a few unit options now for list building. To add something new to the arsenal I decided to complete some air support; a pair of P-47 Thunderbolts!

As with most historical painting projects I tackle, I first spend a lot of time in Google image search. I hadn’t looked into American WW2 aircraft much before, and only really had the Flames Of War box cover examples to go by. I wanted to see what else was out there, and found quite a few examples with a simple yellow canard and not many other markings.

I liked the bare metal look which made these a nice break from painting olive drab vehicles.

I did however learn that the anti reflective strip down the top of the fuselage was sometimes olive drab instead of black, so this was a nice way of tying them in to the rest of my force.

I’ve never used aircraft in a game before so I’m looking forward to trying them out and seeing if they can help me deal with those pesky Tigers!

– Victor