Practicing for Panzerschreck – Live Stream!
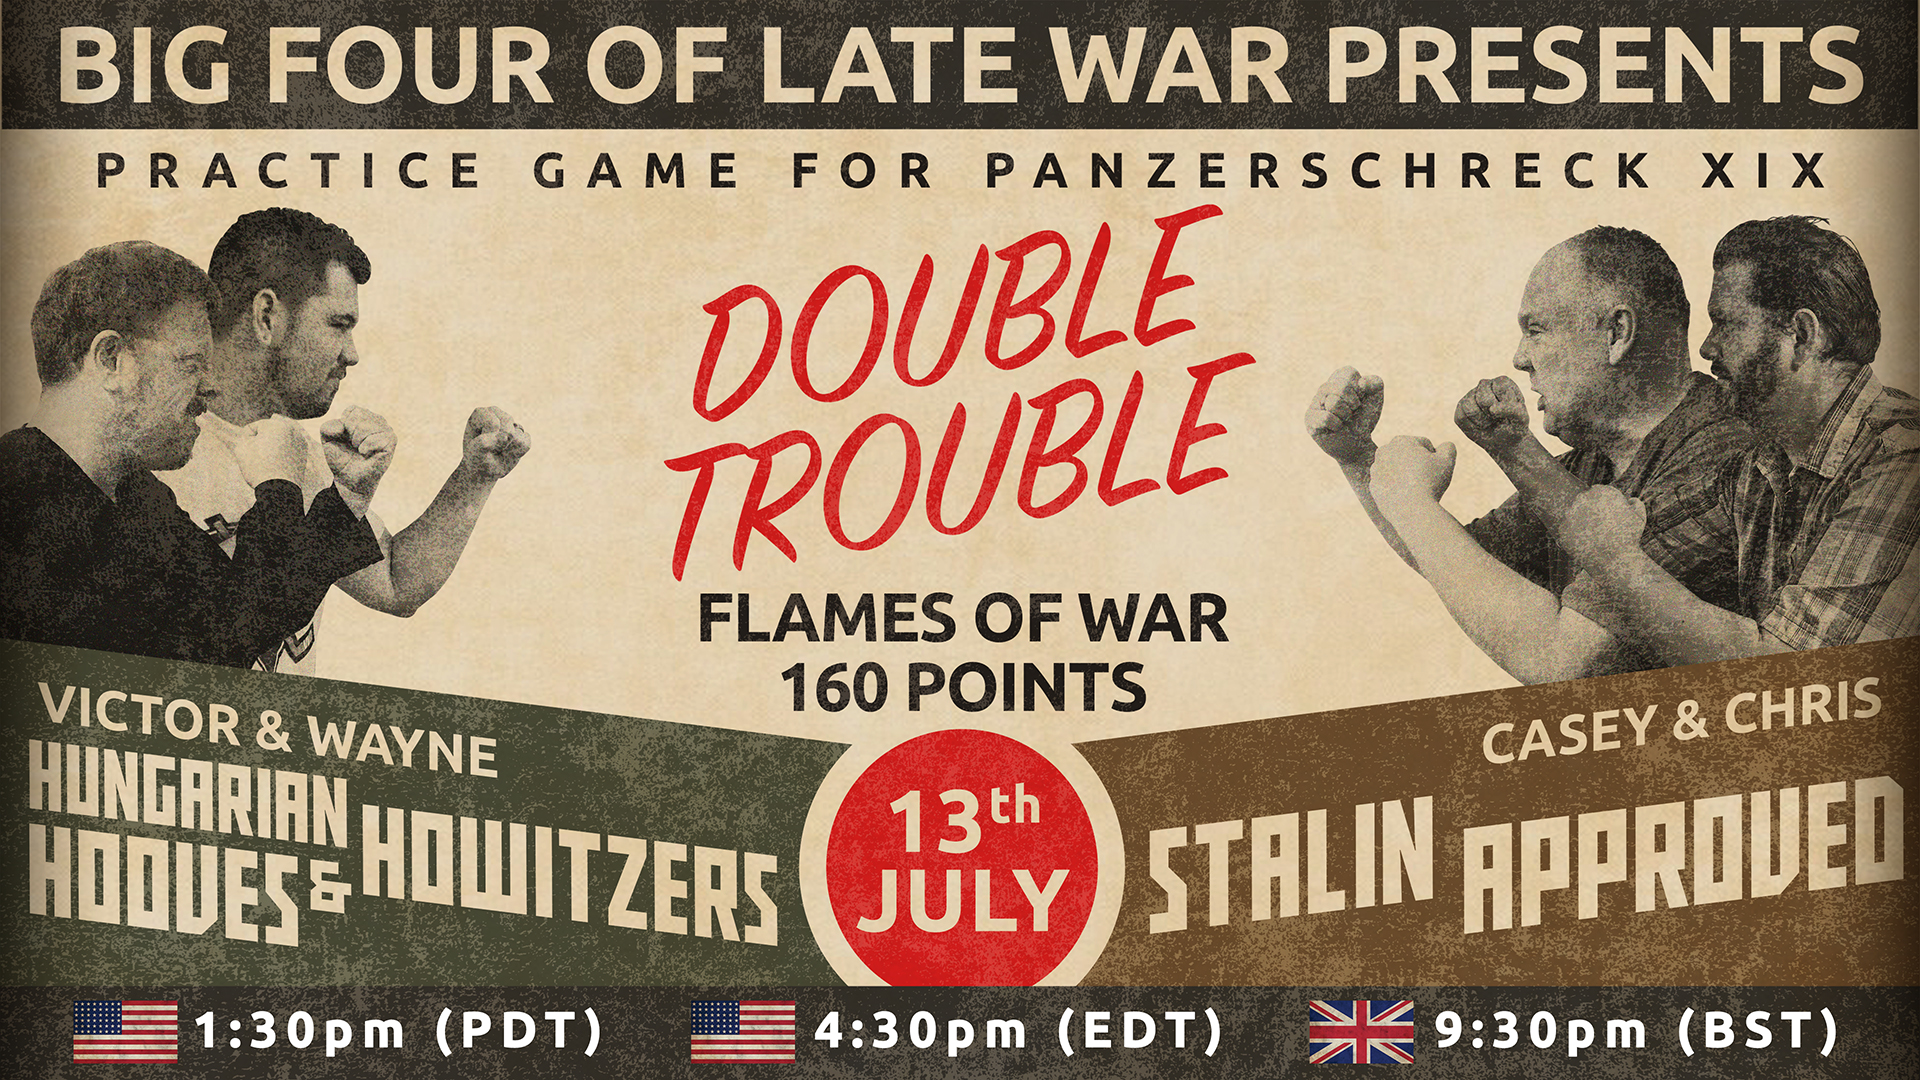
Panzerschreck is only a week away and we are getting ready for a big weekend away! In preparation we thought it would be a good idea if we actually played a game with our armies… and best of all we thought it would be a great idea to invite you all along to watch and give us some tactical feedback!
The Armies
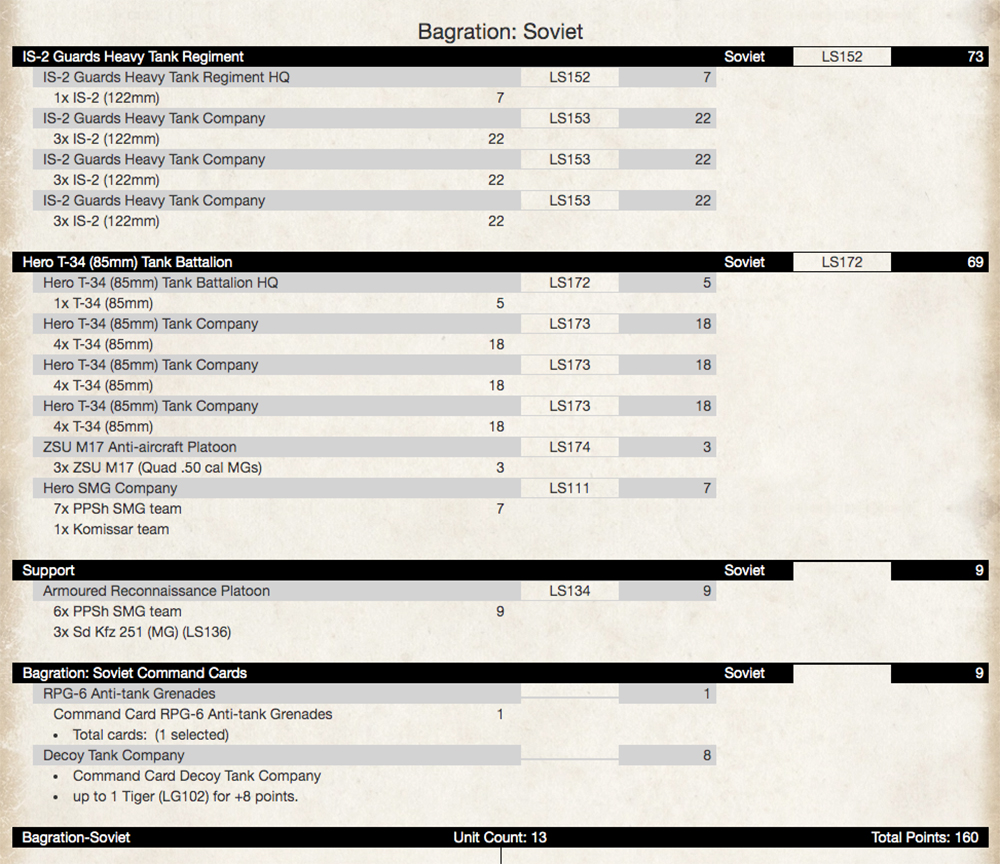
Casey and Chris… Stalin Approved

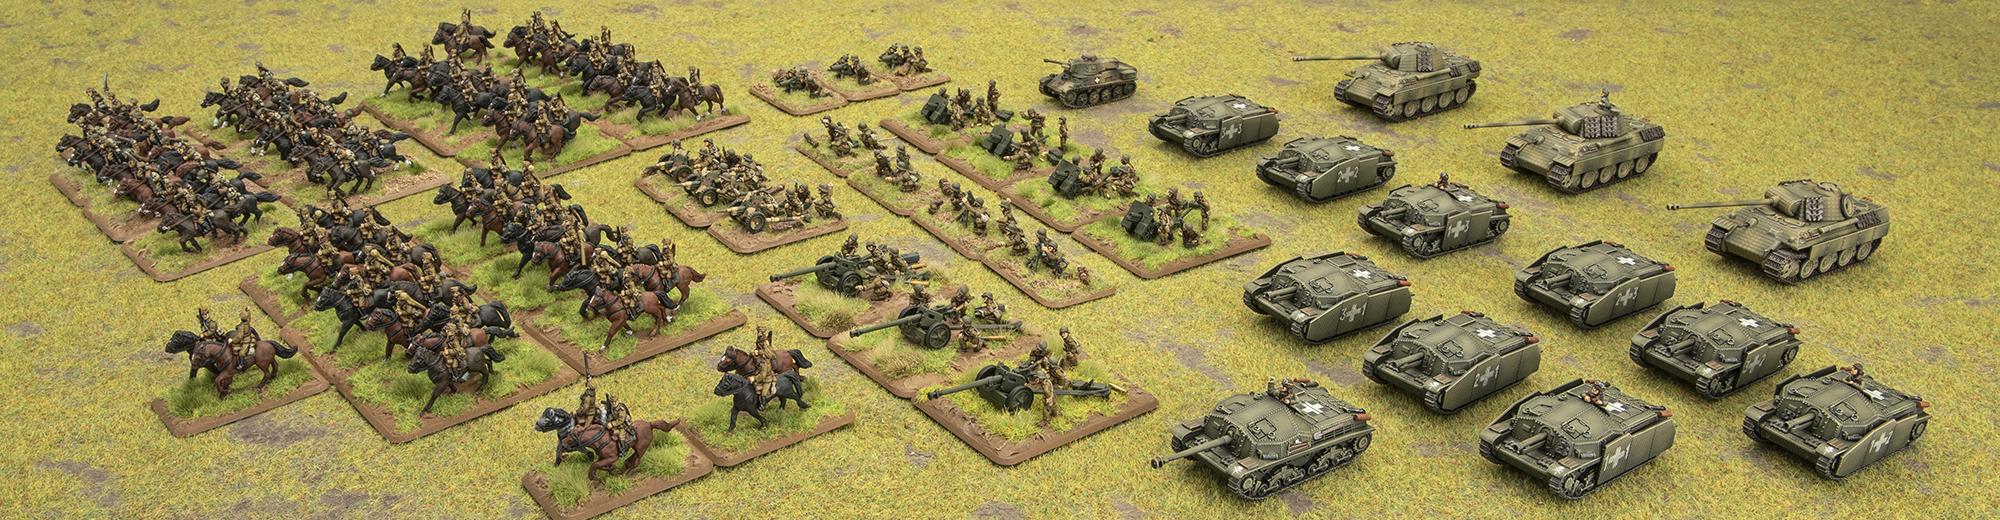
Wayne and Victor – Hungarian Hooves and Howitzers
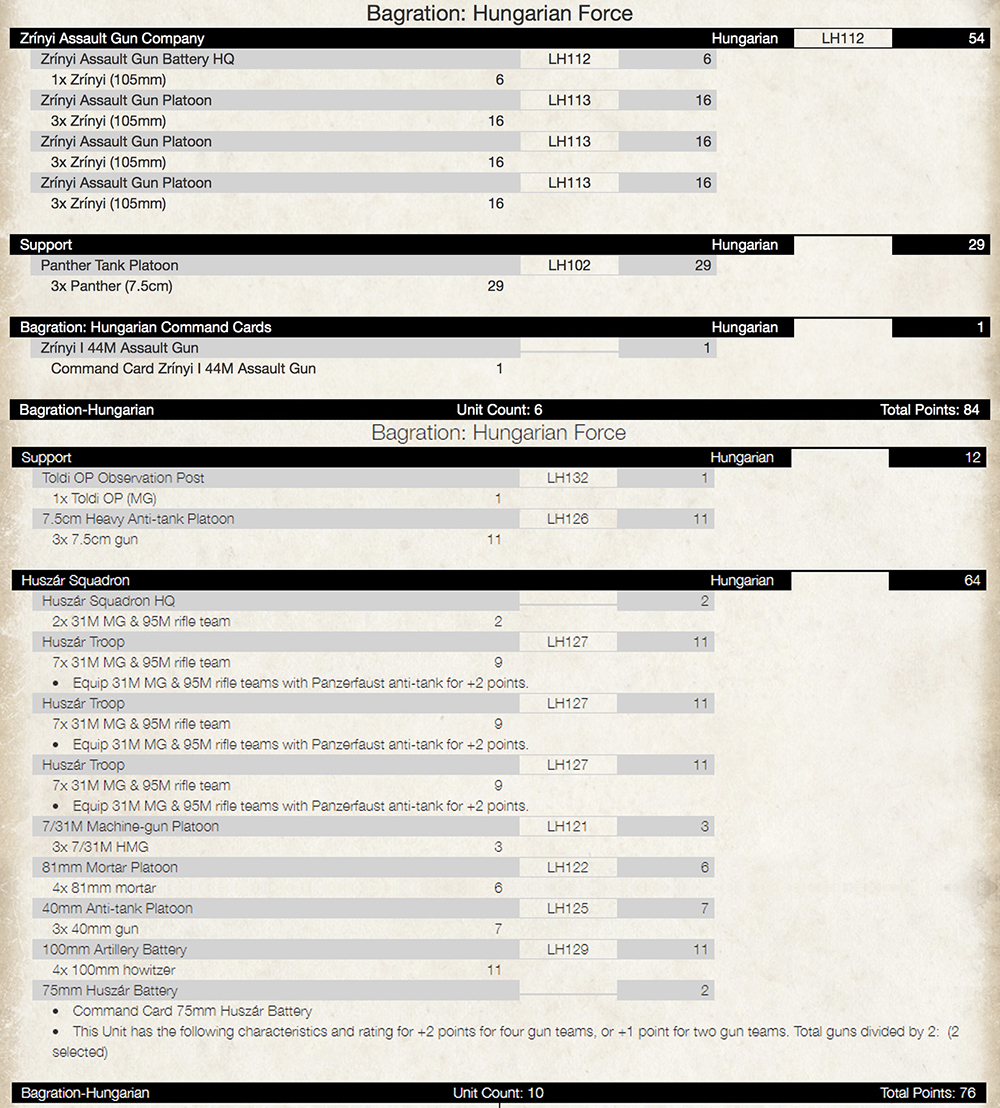
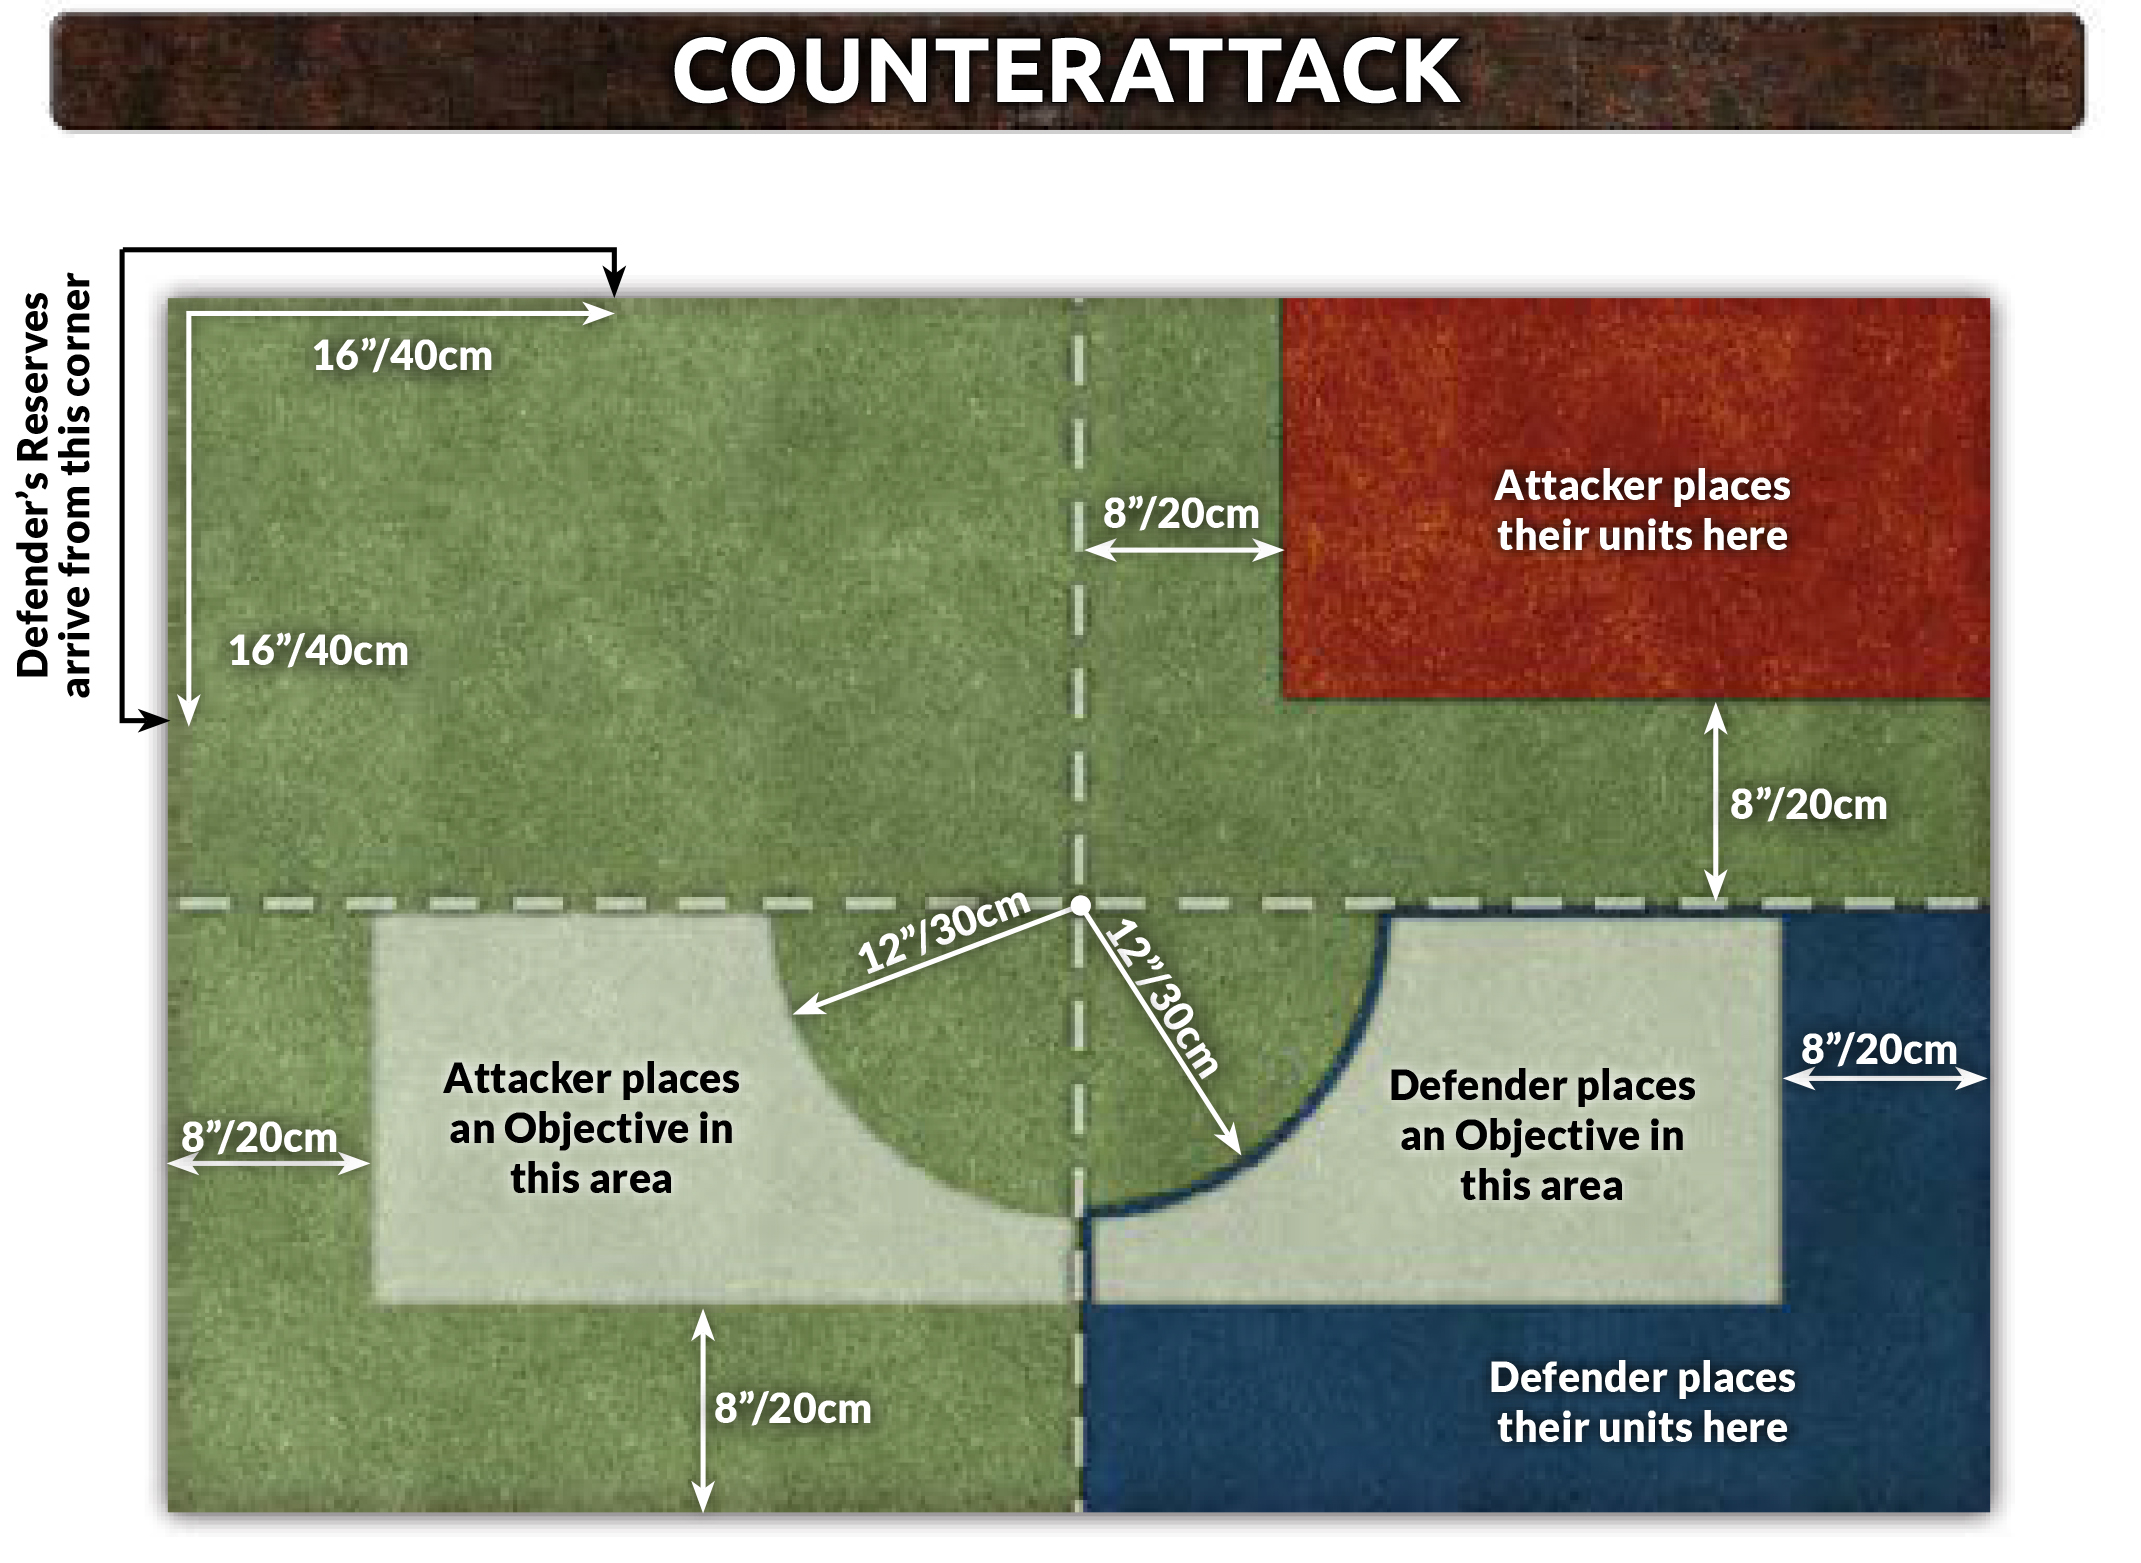
We thought it would be fun to play the Counterattack Mission as it really gives us a chance to maneuver the armies and have some fun. Plus it means one team will need to make hard decisions about what to put into their Reserves!
Don’t forget to join us over on the Battlefront Twitch channel, it should be a lot of fun!
~The Big Four
Autumn Snows – A Twitch Battle Report
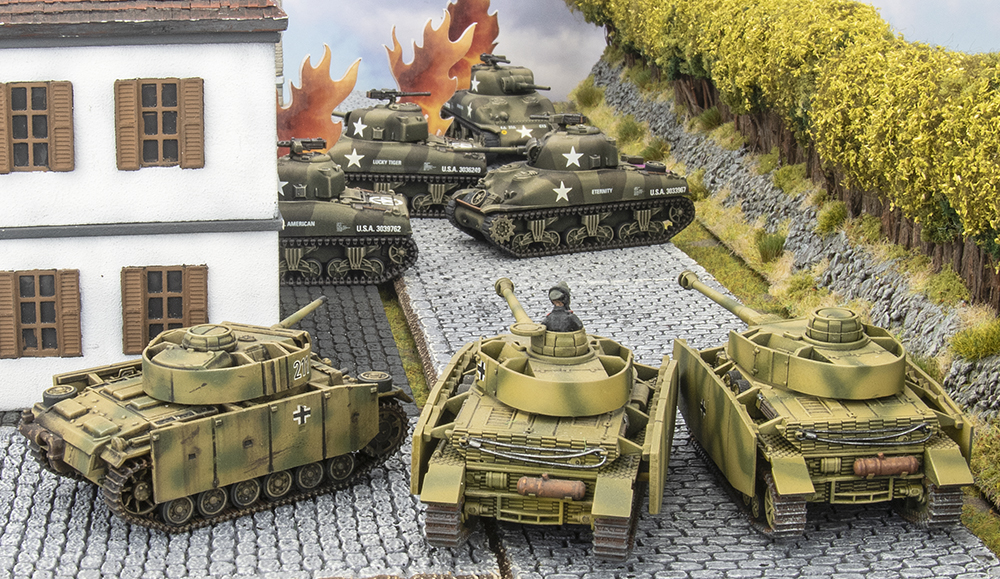
Casey, using his Big Four Soviet army, and Victor, with his brand new Hungarians, threw down in a game of Free For All on Casey’s freshly finished table.
Can the Hungarians hold back the tide?
Did Somebody Say “Live Stream On Sunday Night?”
The Big Four Of Late War are back on Twitch this Sunday for a Flames Of War Battle! New armies. New terrain. New experience for us as we bring you a live battle. Casey will be storming his white horde toward Victor’s newly raised assault guns (and cheeky Panthers). Who do you think will be Victorious?
Tune in at twitch.com/battlefrontminiatures
Detour: Wayne vs Chris, a WWIII: Team Yankee Battle Report
For the launch of the WWIII: Soviet book, Wayne and Chris went head to head in a nail biting game. Wayne’s latest army (a Soviet T-80 based force) took on the Studio West German army.
The first half of the game was played and shot in advance, with the exciting conclusion live streamed over on the Battlefront Twitch channel. Check out the two halves below…
(sorry about the low audio levels in the first part…)
We’ve already started discussing how we can put a few more of our games up on Twitch in the future. Stay tuned…
~The Big Four Of Late War
The Heavy Hitters Battle Report
 With the D-Day: British Live Launch coming up tomorrow, it seemed like a perfect excuse to hang around one afternoon and play a game. Needless to say Chris was anxious to get his Churchill Armoured Squadron of the tabletop for its first game. Casey quickly volunteered to play against him as they have a long running gaming rivalry / partnership that stretches back about 15 years. Casey also saw it as a great change to dust off an old German army that had been sitting on the shelf and take it out for a spin!
The Forces:
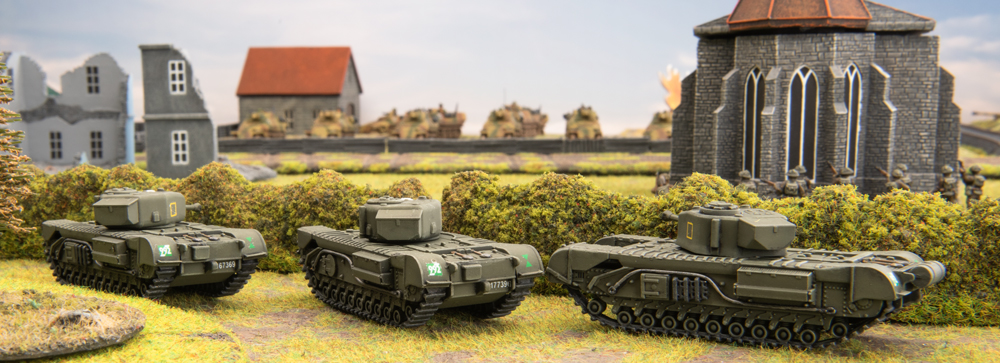
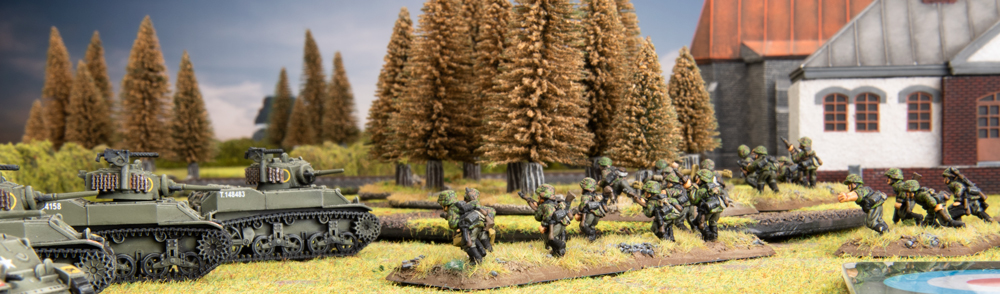
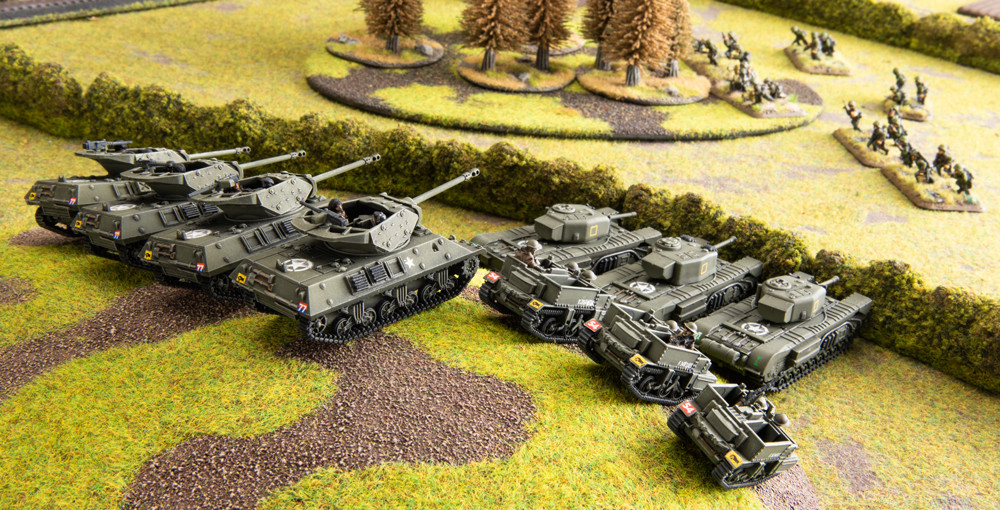
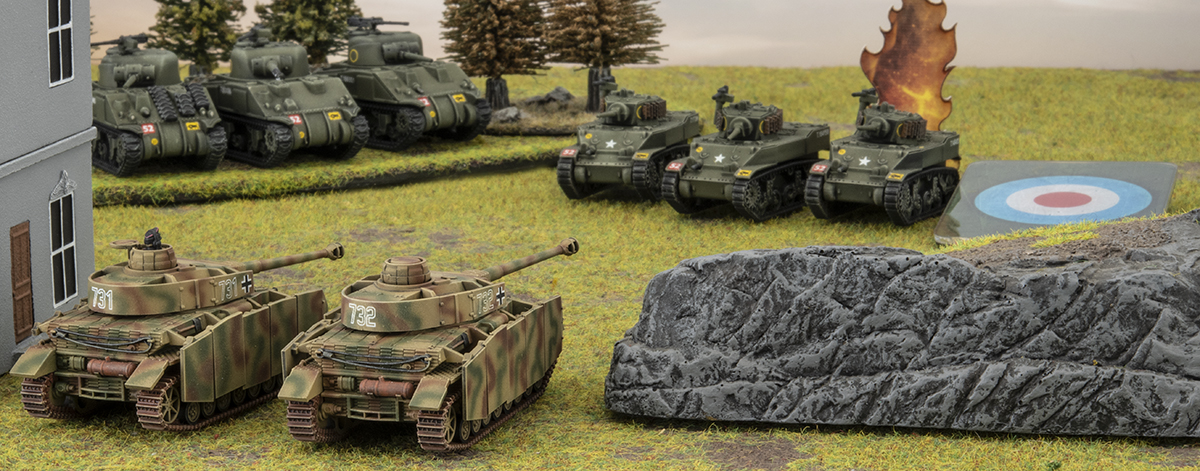
Chris had just finished his Churchill army the week before so it was no surprise that the core of the force was based around an HQ and two platoons of Churchills. Since he never leaves home without some M10s they were an obvious choice, especially since he knew Casey would have Tigers. Rounding out the force were Stuarts, Infantry, Carriers and Crusader AA (a cheap option to pad out the Formation and a useful way to cut down infantry).

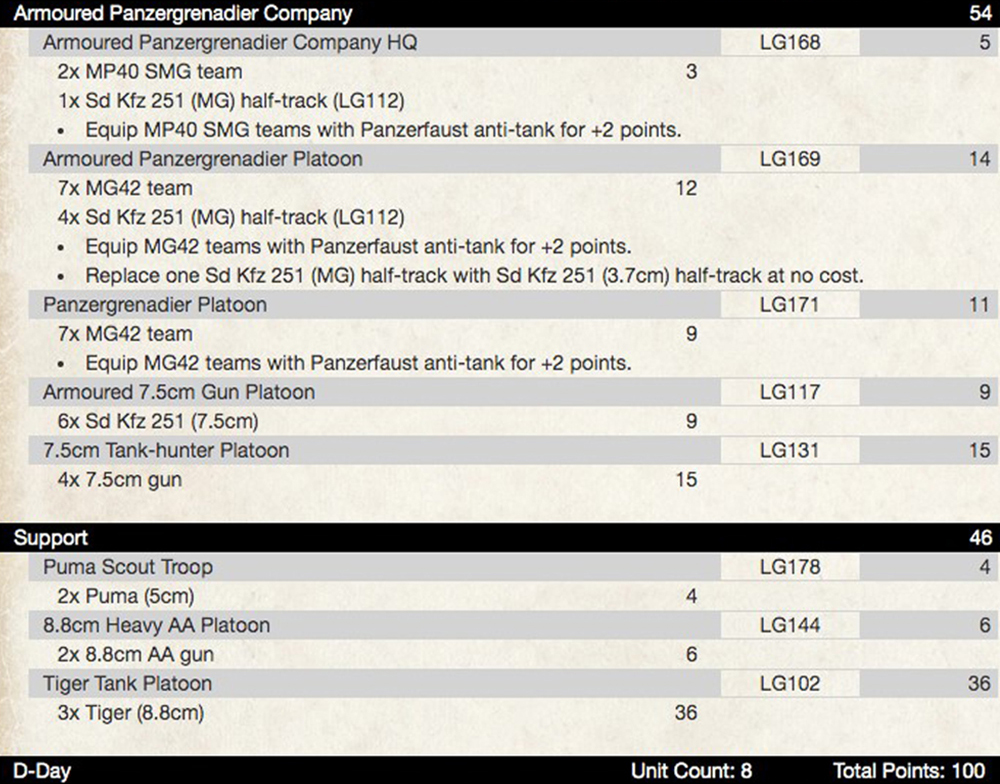
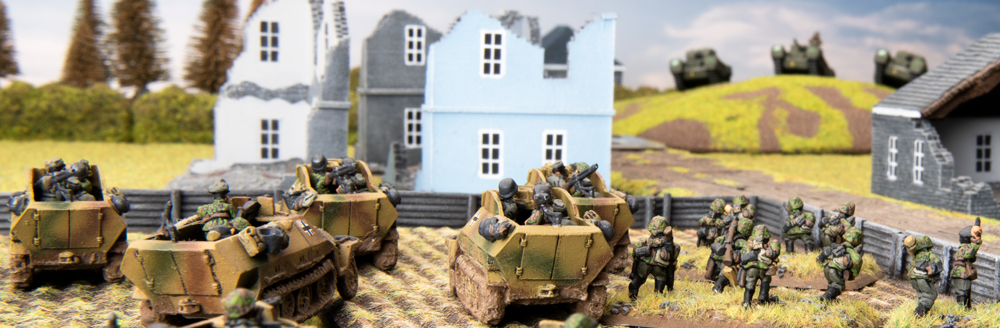
Casey went for a Panzergrenadier force, painted in an SS scheme, but using the normal D-Day: German book. The list was packed with heavy hitting guns including 75mm Anti-tank guns (PaK40s), 88s and Tigers, as well as a local favourite, the Sd Kfz 251 with 75mm cannon.
Setup and Deployment:
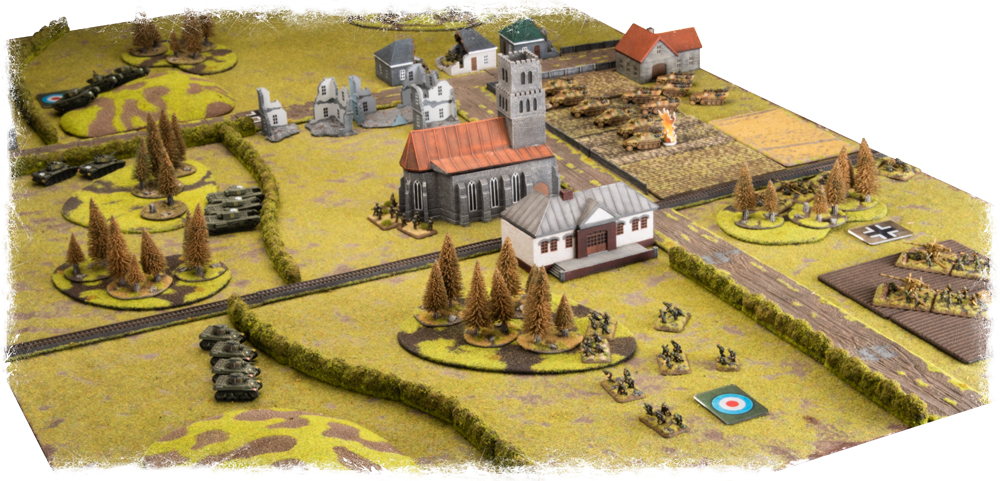
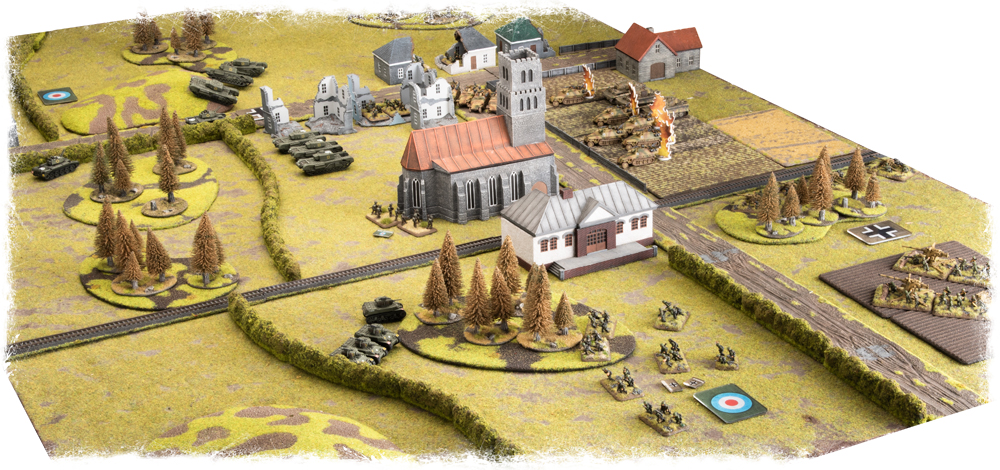
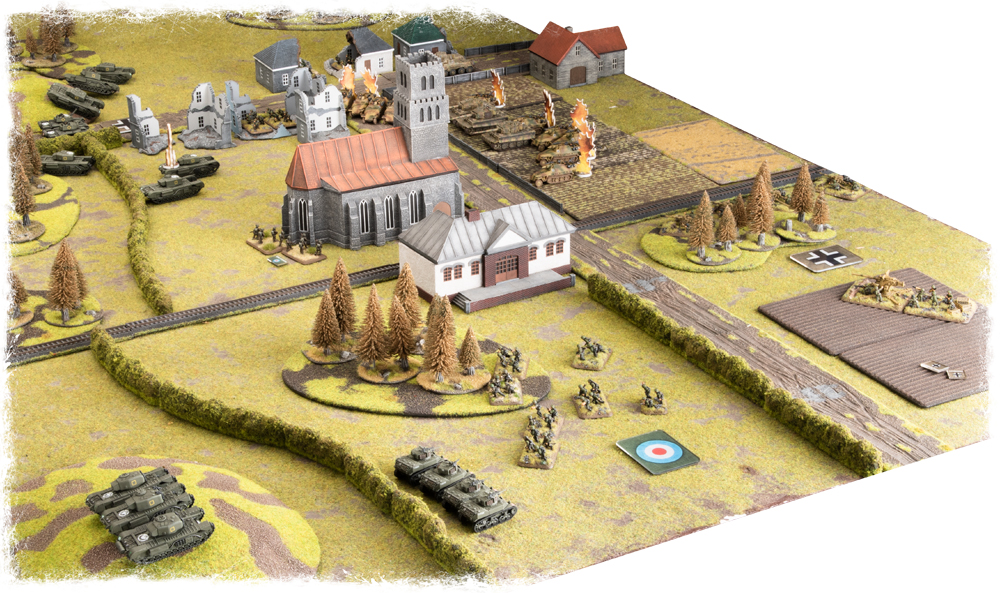
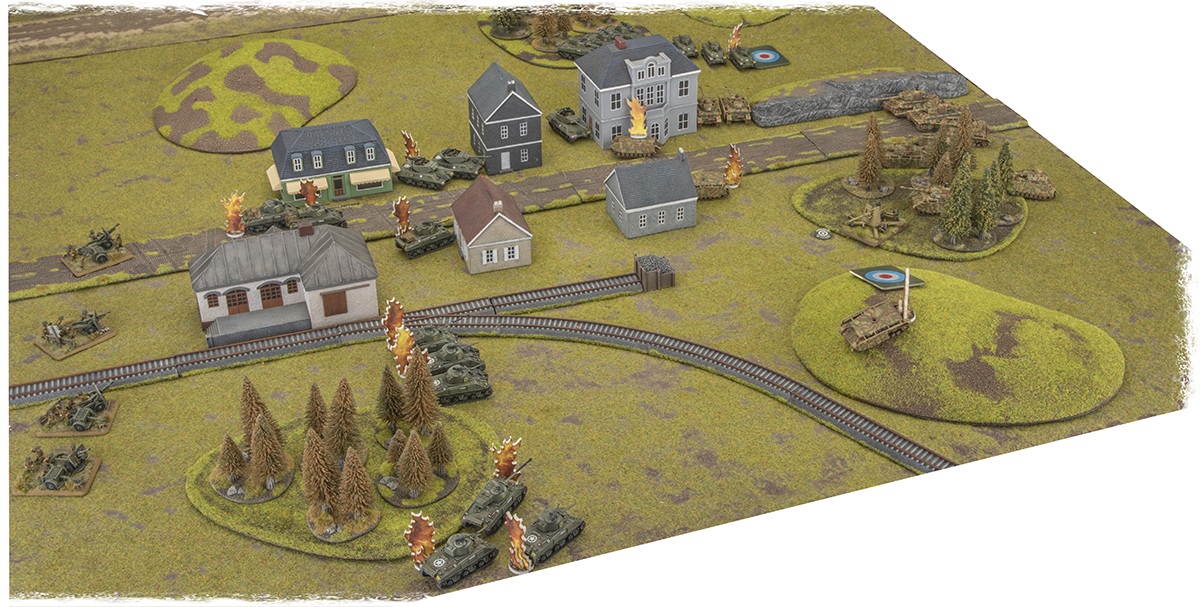
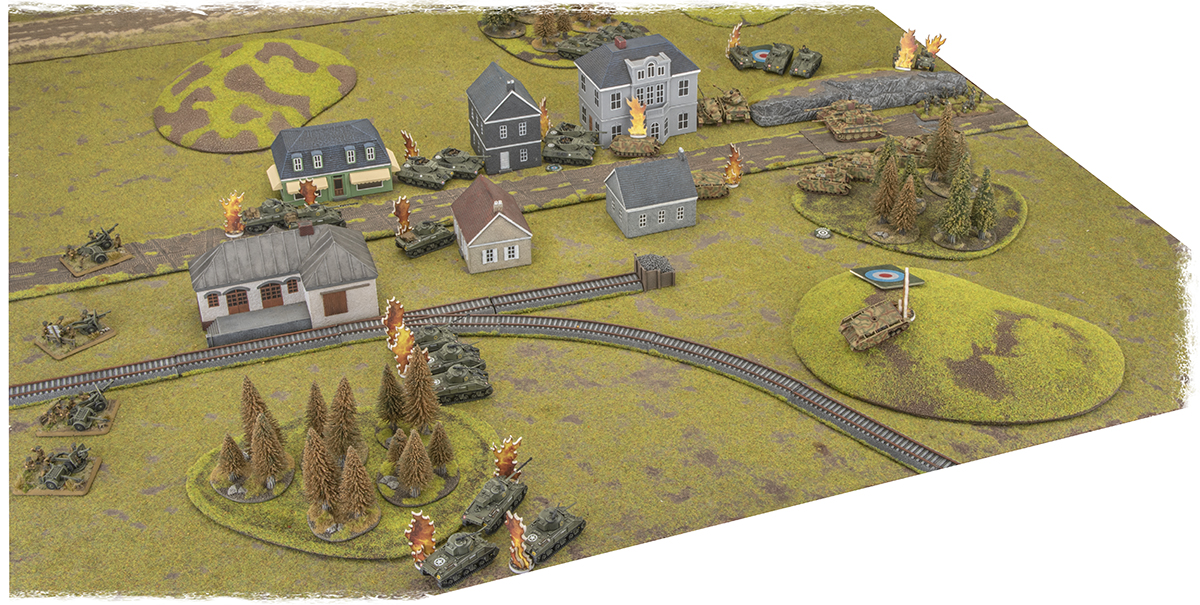
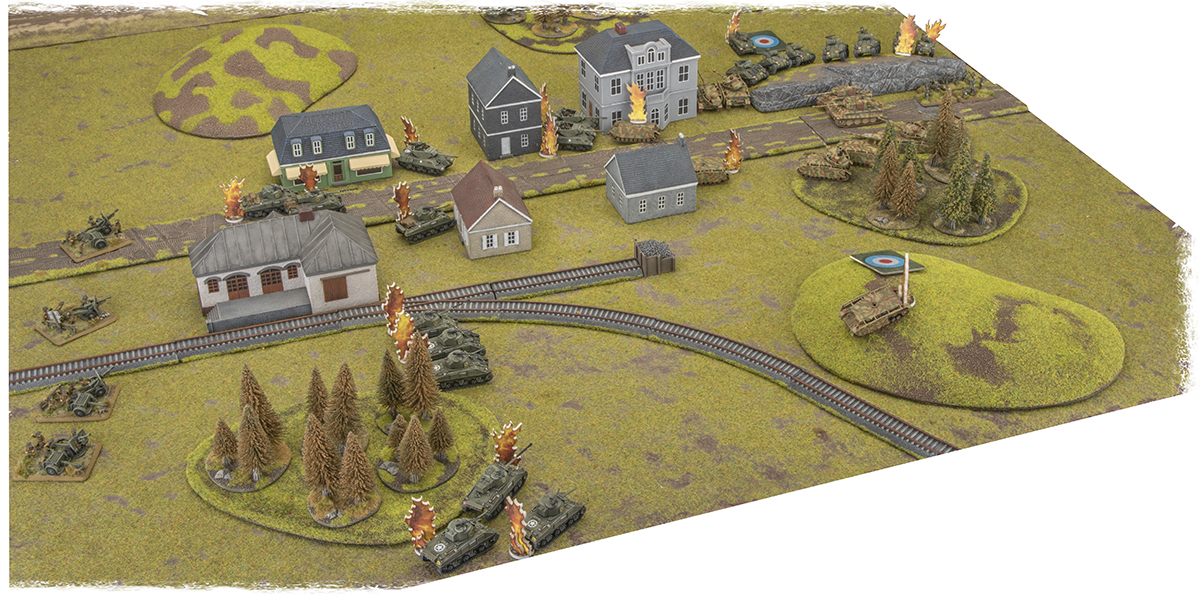
The table was set up with a small, rather ruined village off set from the middle of the table, surrounded by roads, woods and hedges. This meant that there were plenty of fields of fire, but they were often limited, and advancing troops could generally rely on some cover.
The mission selected was Dust Up, so Chris deployed in the left corner, whilst Casey had the right corner.
 Casey’s Plan:
Normally I’m quite a defensive player, but against Chris’ Churchill list I think I’ll need to be more aggressive and push towards the far objective before Chris gets too many reserves. Hopefully this will disrupt his plans so he has to not attack one of my objectives with the majority of his force.
My plan is to hold my back objective with the Panzergrenadier Platoon. On the other flank I plan to push up through the ruined houses with the Armoured Panzergrenadier platoon, use the Sd Kfz 251 (7.5cm) half-tracks to cover them, and ready to hit the objective once my Tigers turn up.
Chris’ Plan:
My plan was simple. Hold the rear objective with my HQ platoon as the CS tanks and their 90mm guns can engage targets anywhere on the board (with indirect fire). In the centre, my infantry will push up to try and take the church to split the board in to two halves and make it difficult for Casey to send troops back to defend the objectives.
Whilst this is happening my tanks will hook around to hit the back objective. Any reserves that turn up will be well placed to support, or with a quick dash, could head over to reinforce my objectives.
Turn 1:
 Casey’s force dashed laterally along the table, seeking the cover of the fields and ruined village, whilst his guns went to ground and waited for targets. His Panzergrenadier Platoon advanced on foot to secure the back objective.
Chris pushed up his Stuarts to start heading for the same objective, hoping to catch the infantry in the open and not dug-in, whilst the infantry dashed up the hedge planning to head for the Church next turn. The Churchills supporting them engaged the 7.5cm halftracks, managing to bail one, whilst the HQ bombarded the dismounted Armoured Panzergrenadiers, killing two teams.
First blood to the Churchills!

Turn 2:
Casey’s Armoured Panzergrenadiers un-pinned and continued their advance up the road, using the ruins for cover. In the middle, the halftracks opened up on the advancing Rifle Platoon with everything they had, but only managed a single kill. The 88s and PaKs tried to knock out some tanks, but found the Churchill armour too tough to penetrate at long range. Meanwhile on the other flank the Panzergrenadiers found themselves too concerned with the advancing Stuarts and failed to dig in…
With infantry in the open the Stuarts blazed away… and only got one hit (which was saved). The Churchills failed their Blitz move so moved up to the hedge line but failed to achieve anything with their fire, whilst the infantry pushed up to the Church, planning to push forward and hit the anti-tank gun line in a couple of turns.
All round it was a fairly unspectacular turn, but did the ground work for both sides to keep the pressure on.
Turn 3:
With no sign of Reserves, Casey decided to be a little cautious this turn, finally digging in his Panzergrenadiers, advancing his other platoon further up the table and absolutely hosing down the infantry in the Churchill, killing two and pinning the Platoon.
Failing to unpin his infantry, Chris found himself with limited offensive options, especially since he too failed to get Reserves. The Churchills pushed up and engaged the 7.5cm halftracks, knocking out three of them, reducing Casey’s options to defend his PaKs if the Rifle Platoon decided to move forward and hit the PaKs, or flank the infantry via the Train Station. The Stuarts kept threatening the back objective but failed to actually do anything substantial.
Turn 4:
Tigers! Casey looked visibly relieved as he moved the Tigers on to the table. They failed to penetrate the tough armour of the Churchills – or more accurately Chris shifted the single hit on to the late Churchill and chuckled as he rolled yet another save. The PaKs and 7.5cm halftracks continued turning the church into rubble, killing another infantry team.
Chris brazenly left his Churchills in the centre of table, confident that the armour that had kept them safe would continue to do so. Their fire knocked out yet another cannon halftrack but failed to hit any of the PaKs. The HQ Platoon decided to advance and harass the infantry and Sd Kfz 251 halftracks, as well as securing the all important forward objective, but otherwise failed to achieve anything. The Stuarts shuffled around and continued to fire their MGs as fast as possible, but other than raining some brass on the ground they failed to even pin the Panzergrenadiers in front of them.
Turn 5:
BOOM goes the Churchill! Good dice can only keep your tanks alive for so long and eventually a high speed 88mm round (or two) punch through, killing one and bailing another. Casey also found his Pumas coming in from reserve and they quickly pushed up the road to distract the HQ Churchill Platoon, and prepare to threaten both objectives simultaneously. It wasn’t all bad news for Chris though as the late Churchill continued to find fire being moved onto it where its armour could easily stop PaK 40 rounds.
They say it is always darkest before the dawn and it was certainly feeling that way for Chris, but luckily a platoon of Churchills arrived to support the Stuarts, considerably changing the odds at that end of the table. Their combined fire knocked out an 88 (Casey would comment later that perhaps that platoon had been under utilised but hindsight is 20/20). In the centre the Rifle Platoon continued to hide behind the solid brick walls of the church and remained pinned down, the Churchills decided that Tigers would win any gun-fight and attempted to withdraw back over the hedge, although one did fail it’s cross check.
Turn 6:

The arrival of Chris’ Reserves pushed Casey into action, knowing that he was running out of time to overrun the defending forces. The Pumas stalked the Crusader AA tanks, knocking them out, whilst the Tigers tried (and failed) to finish off the Churchills in the centre. On the other side of the table things went from bad to worse as the 88 ran off, forcing the PaKs to try to push their way through the small woods to put fire down on the Stuarts and Churchills.
Chris was certainly feeling the pressure on the far flank (especially since he failed to kill anything with the combined fire of the two platoons) but he knew he had Casey on ropes on the other side as M10s and Carriers turned up to really double down on the poor Panzergrenadier Platoon sitting lonely and isolated around the objective. Despite all the fire they only managed to kill a single team, but with the stage now set for an epic Turn 7 assault, time was running out for Casey unless he could kill the Stuarts that were now within 4″ of the objective!
Turn 7:

Knowing that it was now or never, Casey launched a desperate attack on the HQ Platoon guarding the objective. The Tigers failed to kill anything, but the Armoured Panzergrenadiers still went in for the assault (after both of their flank shot Panzerfausts bounced off the Churchills armour!). Chris looked excited at the opportunity to gun down the infantry in the open, but was less enthusiastic when he only got three (yes 3!) hits. The infantry knocked out the two CS tanks with their ‘fausts and forced the remaining tank to back off. The objective was now in Casey’s hands, assuming he could keep it for a turn.
Of course it wasn’t all roses and chocolates for Casey down the other end of the table… Yes, he had managed to knock out a Stuart with the fire from the PaK 40s, but with so much incoming fire, and then a pair of assaults from the Churchills and Stuarts there was only so much the Panzergrenadier Platoon could do. They found themselves pushed back, leaving the Stuarts contesting the Objective at the start of the turn, and holding it at the end…
Chris (and the Churchills) Win!

Casey’s Thoughts:
Churchills are really tough, especially if your opponent only rolls 5s and 6s for armour saves (Chris literally chuckled as he read this comment by Casey). If the Tigers had done a bit more damage on turn 4 or 5 I would have been able to launch my assault on the objective a turn earlier.
One thing I was pleasantly surprised about was how good Panzerfausts are!
All in all it was a close, fun game to play. I think I’ll have to paint some Churchills up for myself at some stage.
Chris’ Thoughts:
I was probably (definitely) quite lucky with a few of my dice rolls here. I think Casey’s comments about being a defensive player probably cost him the win here. A bit more aggression, or just pushing up a team a bit further to contest the objective prior to the assault could have made all the difference.
Not sure I used my infantry particularly well, I had a plan for them, but in hindsight I could have just parked them on the objective and really lowered my mid-game stress levels!
I will say though… Churchills for the win! They really were awesome, and the ability to upgrade one model per platoon to the late version was excellent. Front Armour 11 leading the way definitely saved me a couple of casualties during the course of the game.
The Carentan Clash Battle Report
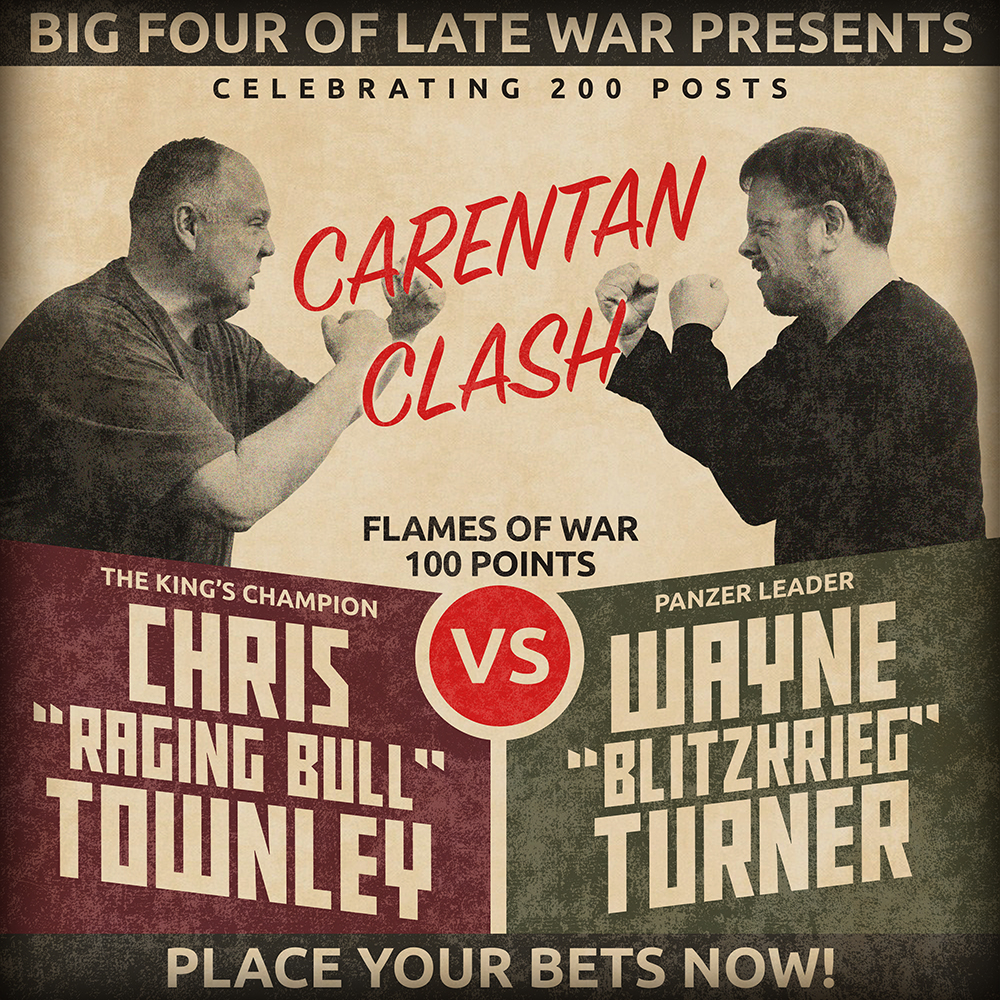 Here in the Battlefront Studio we have been counting down to a couple of very exciting events, first up is the Global Online Campaign. This is being run in conjunction with the guys at OnTableTop (formally known as Beasts of War) and is a chance to play games over 6 weeks and recreate the fighting on D-Day and beyond. The other is FlamesCon, the annual Flames Of War tournament. This year the Big Four are making a big push, with Victor, Wayne and I (Chris) taking our armies along for a weekend of fun gaming. With all of this going on Wayne and I thought it would be a great opportunity to play a practice game, at the same time getting a battle for the Campaign under our belts.
The Forces:
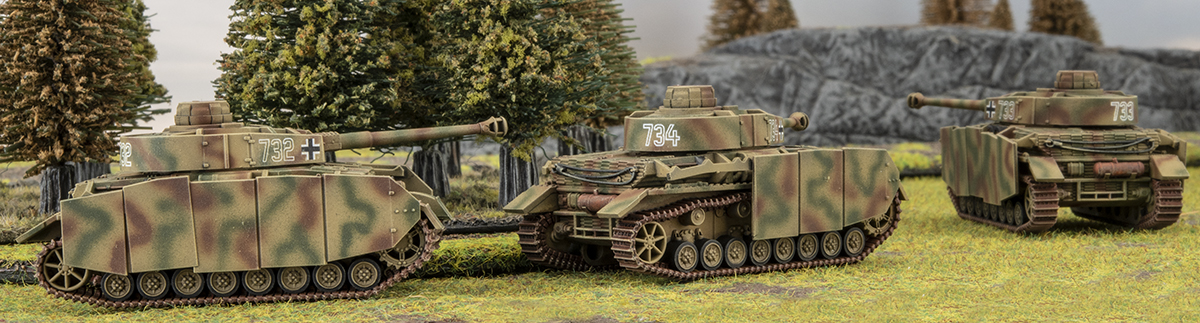
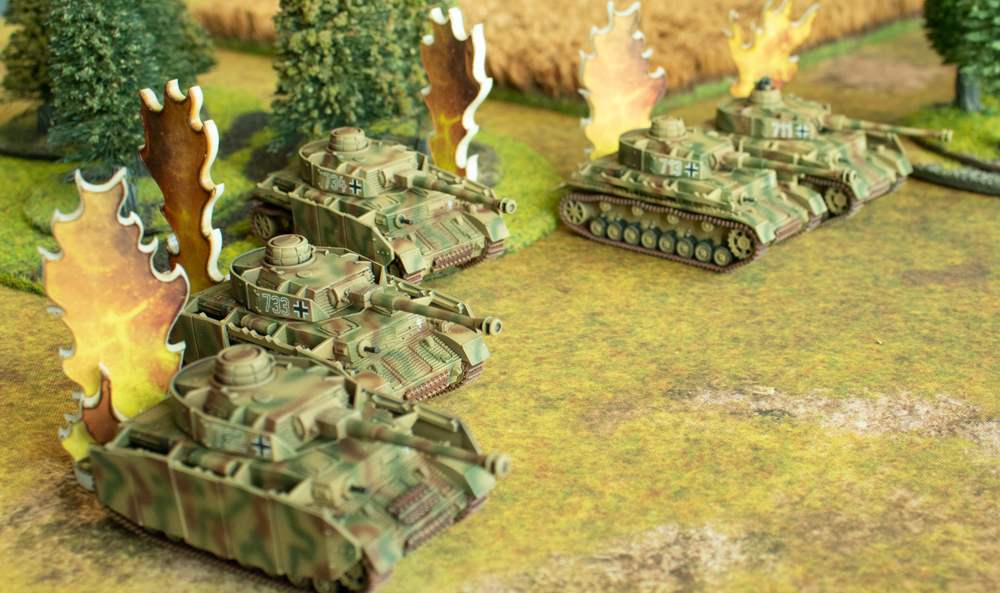
We both used the first 100 points that we painted during the Big Four Journey, with Wayne’s army based around a Panzer IV Company with Tigers, Panzer Grenadiers and 88s in support.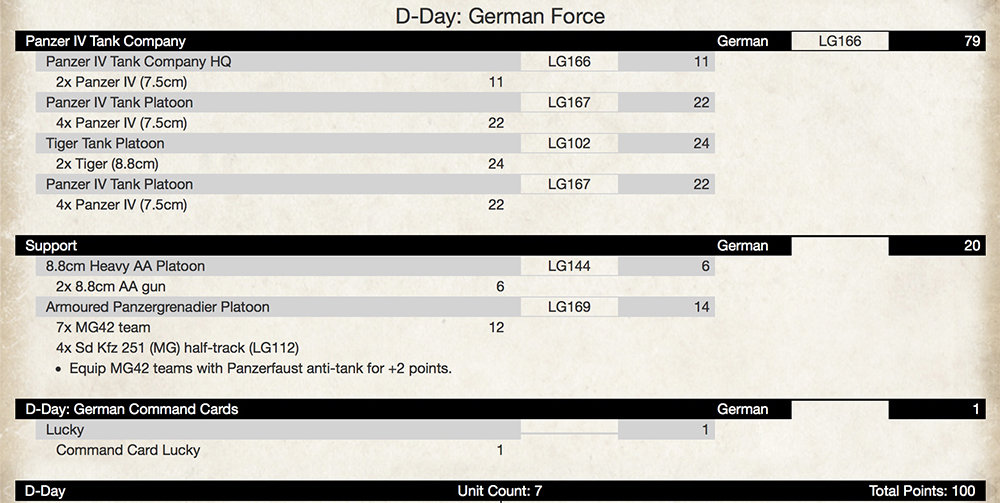
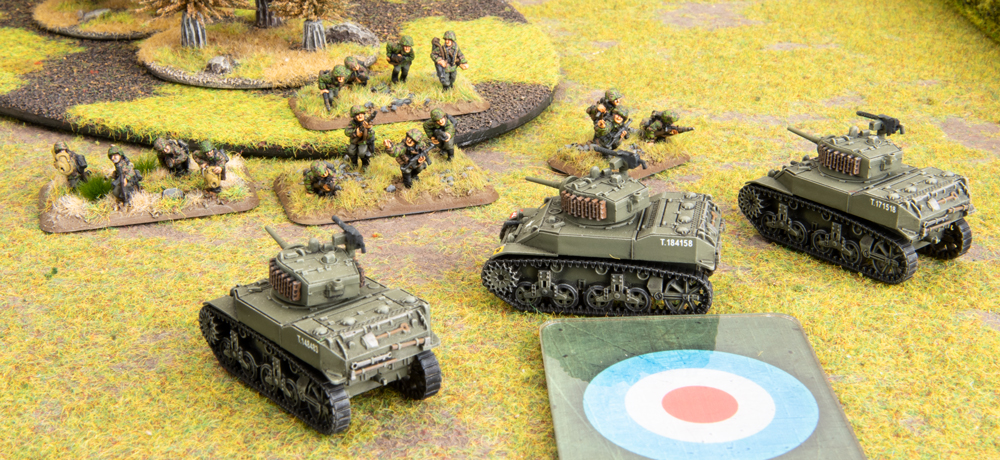
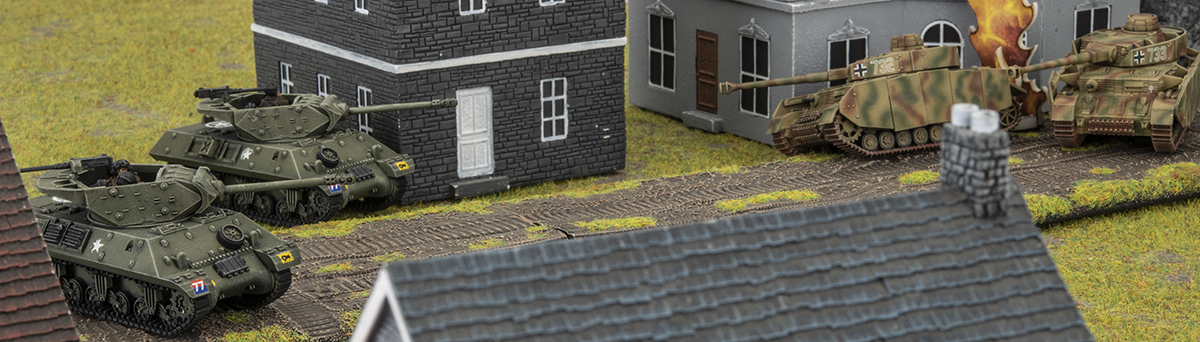
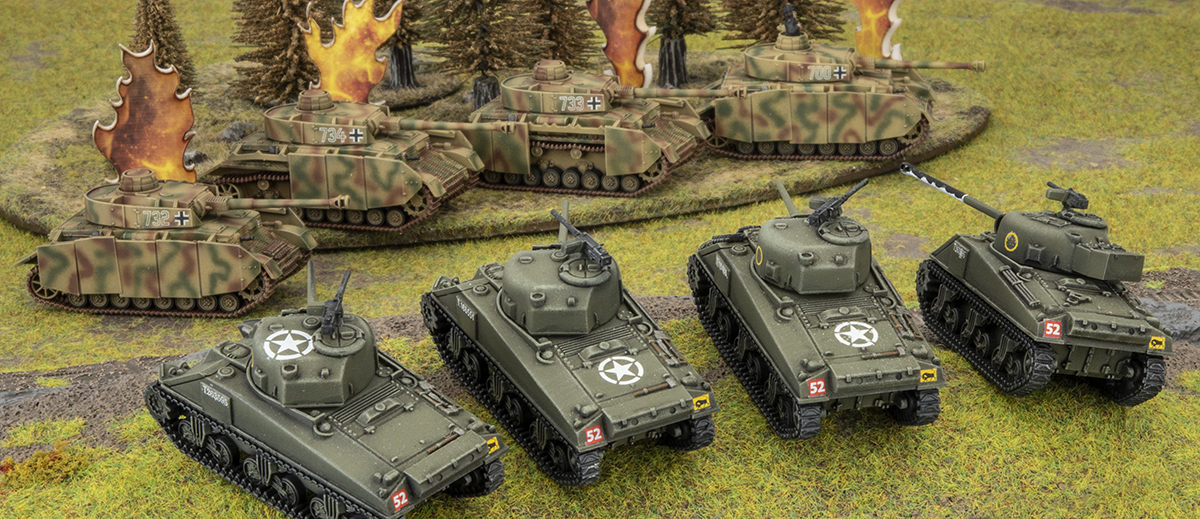
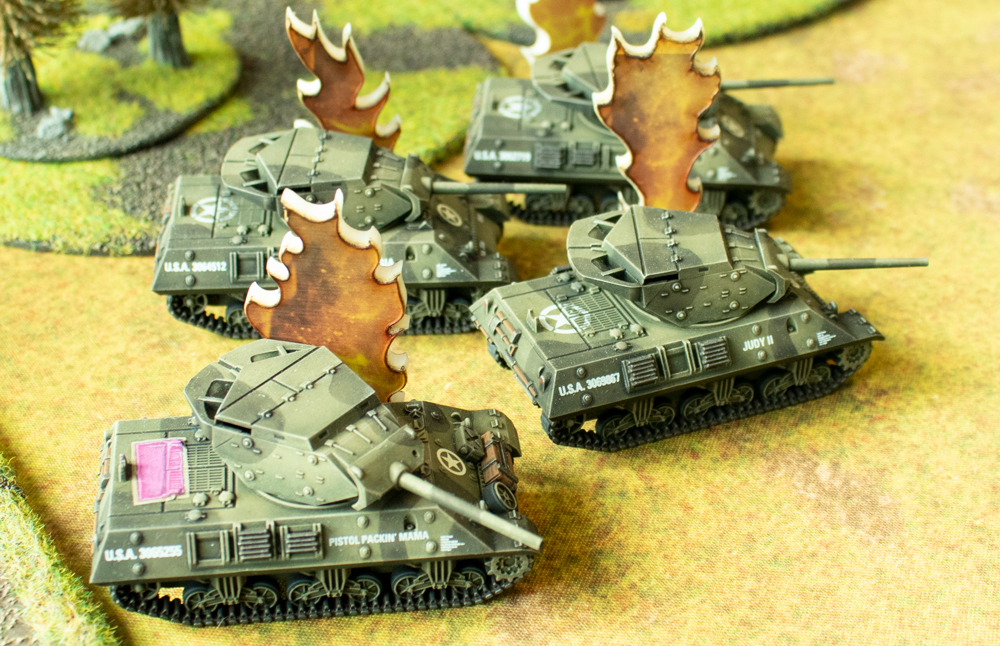
I used my Sherman Company, packed with Firefly tanks and their excellent 17pdr guns. In support are Stuarts (for their Spearhead), 25pdrs and (of course) M10s.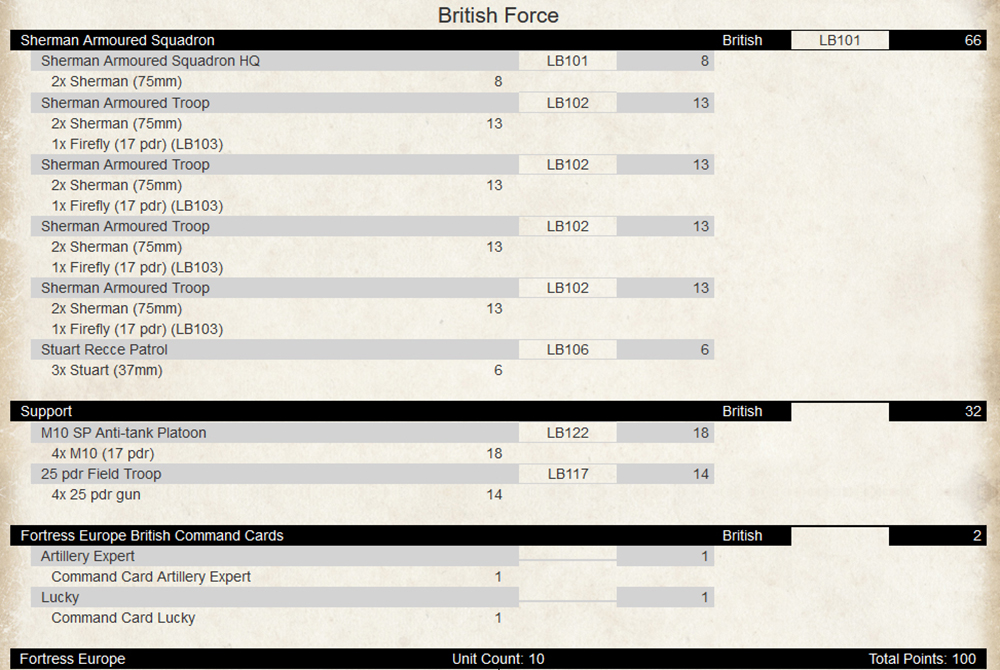
Setup and Deployment:
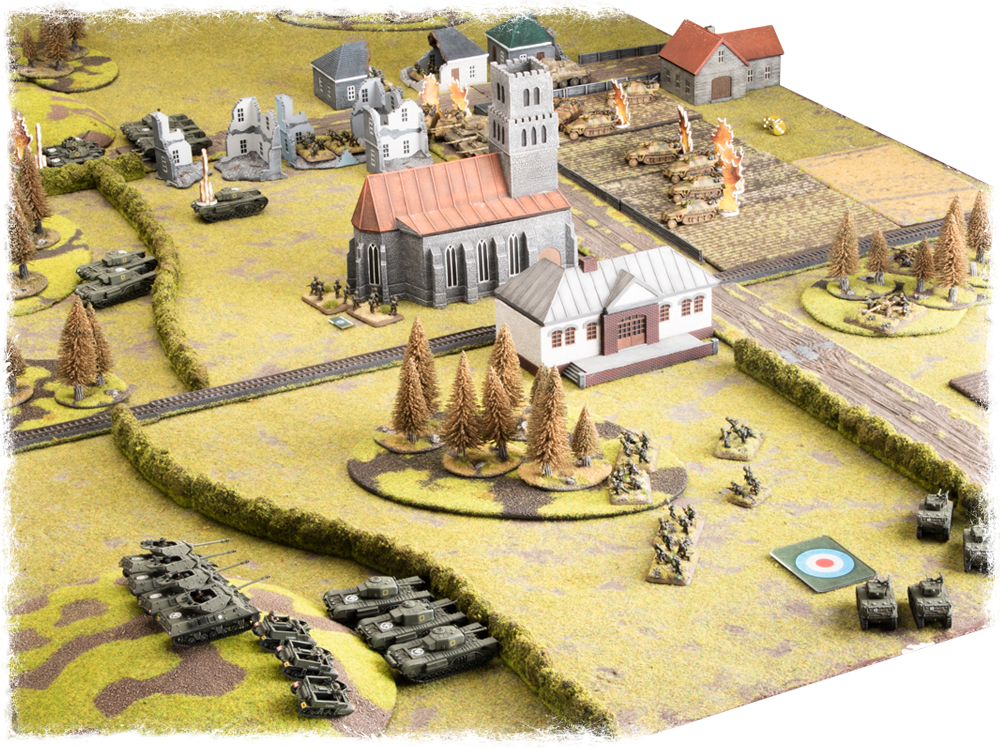
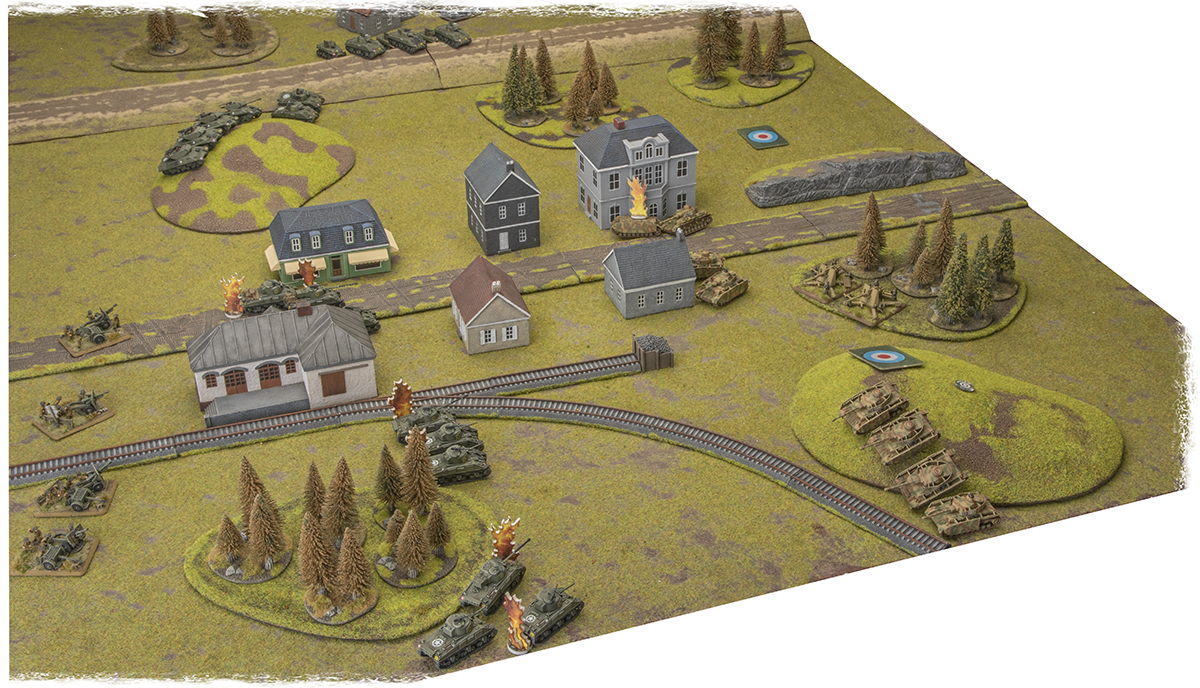
We decided to play Outflanked, one of the new missions in the D-Day: German book. This meant Wayne’s forces would start in a corner of the battlefield, trying to hold out till his reserves arrived. My forces would come on from my side of the table, as well as a little dog-leg section up to the middle of the table near No-Man’s Land.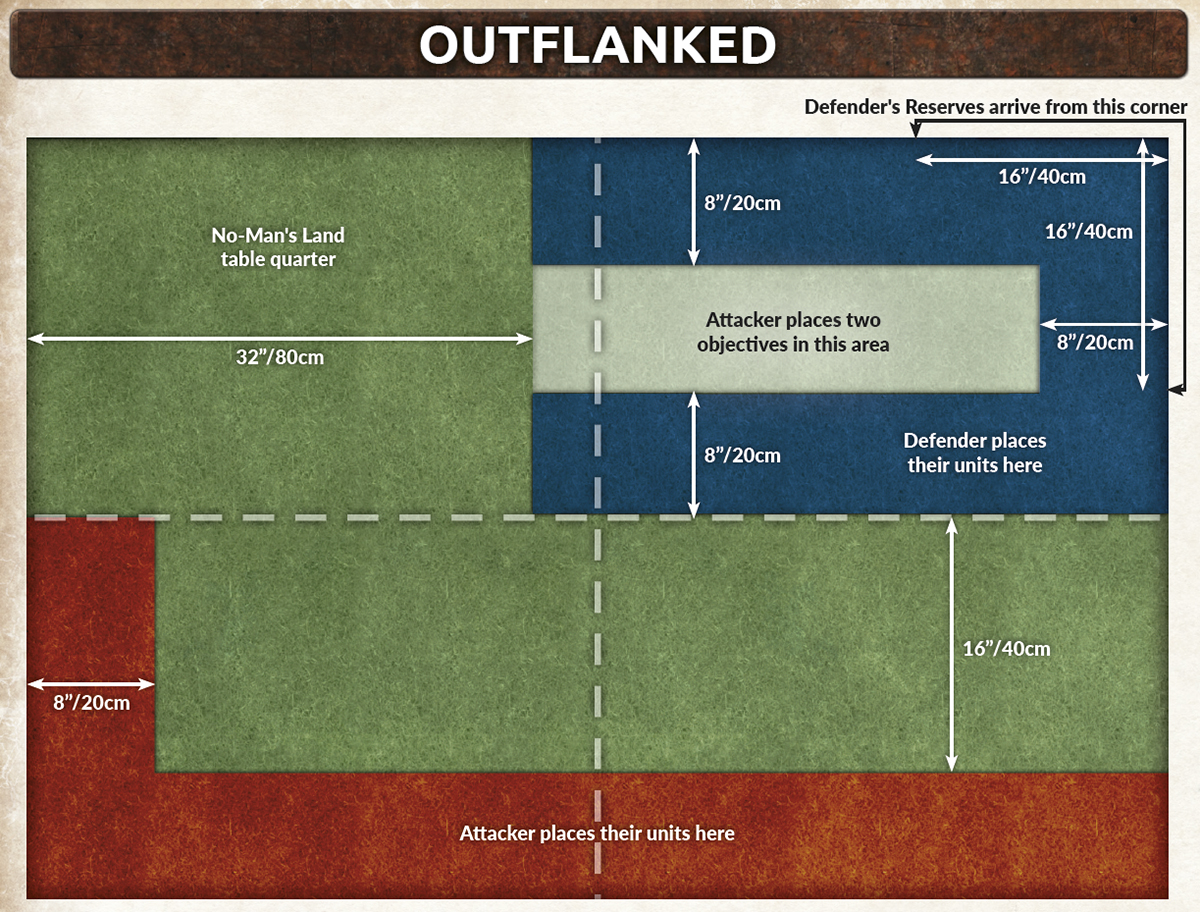
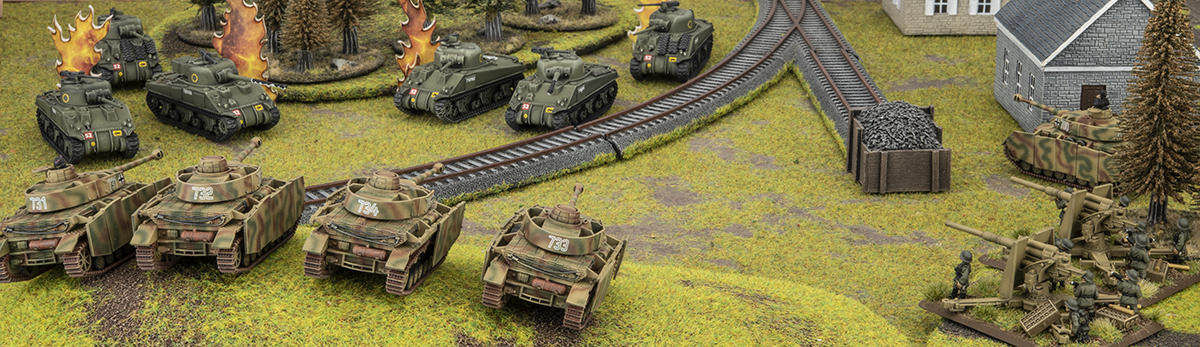
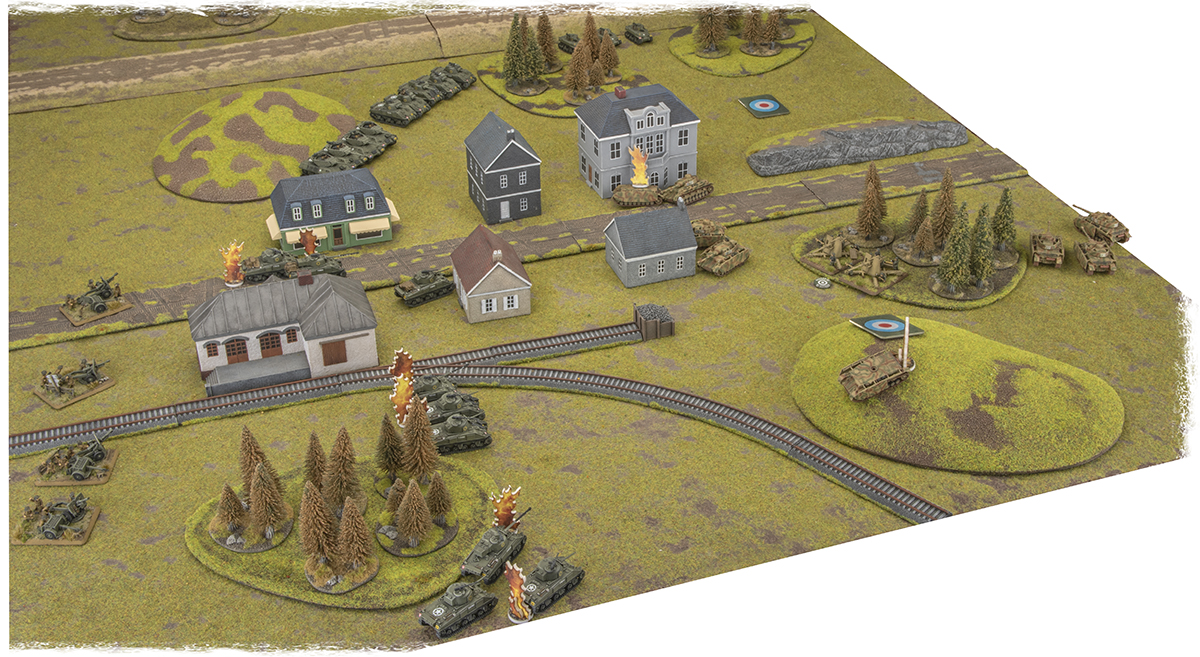
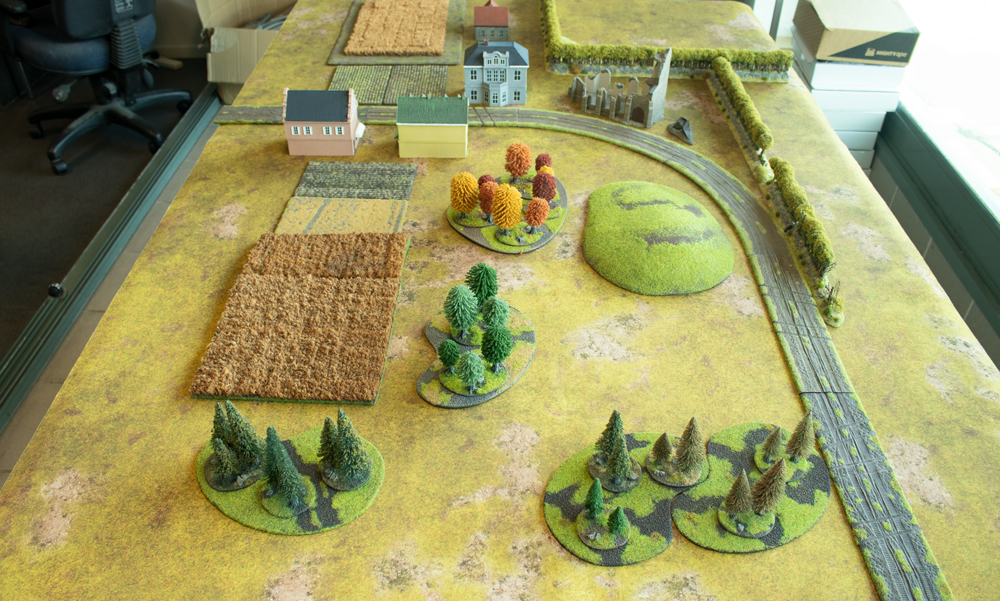
The table had a raised road and small village, each splitting the table into thirds. Wayne chose the corner where the village would help shield him from my flanking forces and deployed in concealed positions. I spread my forces out along the deployment area, wanting to push across a broad front, as well as taking a small Spearhead on the side to give my flanking troops a head start.
Turn 1: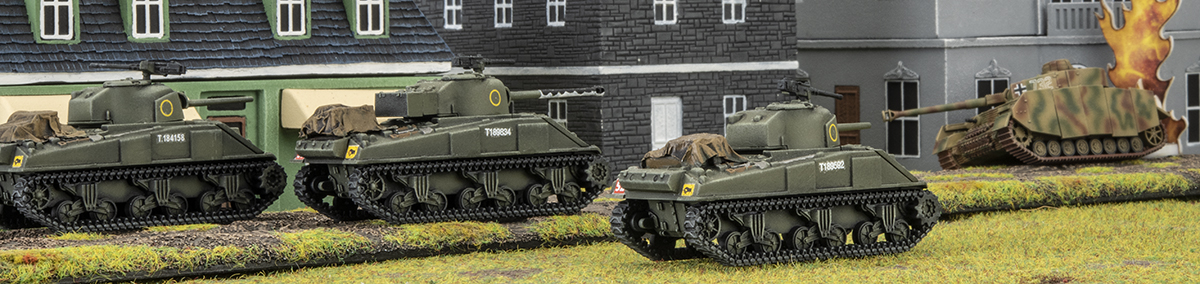
I aggressively pushed up, hoping that the dice would help me to overcome Wayne’s concealed and gone-to-ground status. I, of course, regretted that decision as the fire from my entire army only knocked out a single Panzer IV inside the town. Wayne ambushed his 88s in a small forest, but failed to get reserves, and then proceeded to fail his Blitz on the Panzer IV platoon. Undaunted by these setbacks his fire was accurate and deadly, knocking out 6 tanks and bailing 1 more. A lesson for new players – don’t get caught in the open, especially at close range!
Turn 2:
The surviving British tanks pushed up and took cover where possible, whilst the M10s lined up some Panzers, only killing one for their troubles. The 25pdrs dropped a barrage on the 88’s, pinning them down. Wayne, feeling pretty happy coming through the turn with relatively few casualties failed to get reserves, or unpin his 88’s, rethought his levels of happiness! He proceeded to dash his flanking Panzer IV platoon around the back of the table to reinforce the middle, and then managed to knock out another Sherman with the combined fire of his units.
Turn 3:
The remaining Sherman in the village found itself in Bad Spirits and ran off the table – three-tank platoons can get a little dicey under heavy fire! The flanking Shermans and Stuarts pushed up aggressively, with the Stuarts parking themselves on the objective (not live yet, but it was still a threat that Wayne needed to plan for), managing to knock out a Panzer IV in the side. The M10s continued moving up, knocking out another Panzer, whilst the repeat bombardment from the 25pdrs accounted for an 88. Wayne’s reserves finally turned up, with a Panzer IV Platoon and Tiger Platoon making an appearance. Being forced to fire on the move they only managed to knock a Stuart and M10 with their collective fire.
Turn 4:

The Stuarts decided to continue their advance, driving up the escarpment to flank the newly arrived Panzers, knocking out one, whilst the M10s killed another and bailed a Tiger. The ever reliable 25pdrs knocked out the remaining 88. The few remaining Sherman (and Firefly) tanks also accounted for another Panzer IV. Faced with such heavy firepower the Panzer IVs ran off the table, leaving the Panzer Grenadiers (newly arrived from reserve) and Tigers to hold down the middle.
Wayne managed his first Blitz move of the game with the Tigers, allowing them to kill an M10, whilst the Panzer IVs make it a double and knocked out a second. The infantry conducted a stunning assault, after losing three teams (!) to defensive fire, bailing a Stuart and killing a second one. With no way for the British to continue the assault, the infantry finished off the second Stuart and retreated back.
Turn 5:
The remaining M10 decided that discretion is the better part of valour and ran away, but the remaining Sherman tanks were up to the job, killing Wayne’s Company HQ.
With no way to pass his Company morale test, the remaining forces quietly retreated off the table, leaving the very battered British troops in control of the battlefield.
Closing Thoughts:
This was really a battle of two halves – some poor planning on my part meant that I lost a lot of troops in the first couple of turns, whilst Wayne’s dice were uncharacteristically average (normally Waynes dice can be counted on to stab him in the back), allowing him to land a decent number of hits. The second half was a little different as the slow accumulation of German casualties took effect and allowed the more numerous British to close (and flank) the Germans.
Based on tactics I think Wayne was a little hard done by, but I’ll take the win!
Big Four Battle Time – Wayne vs Victor
 With the completion of Wayne’s first 100 points, Wayne and Victor thought they would have a game to celebrate another Big Four of Late-war army passing the 100 point mark and the release of D-Day: German.
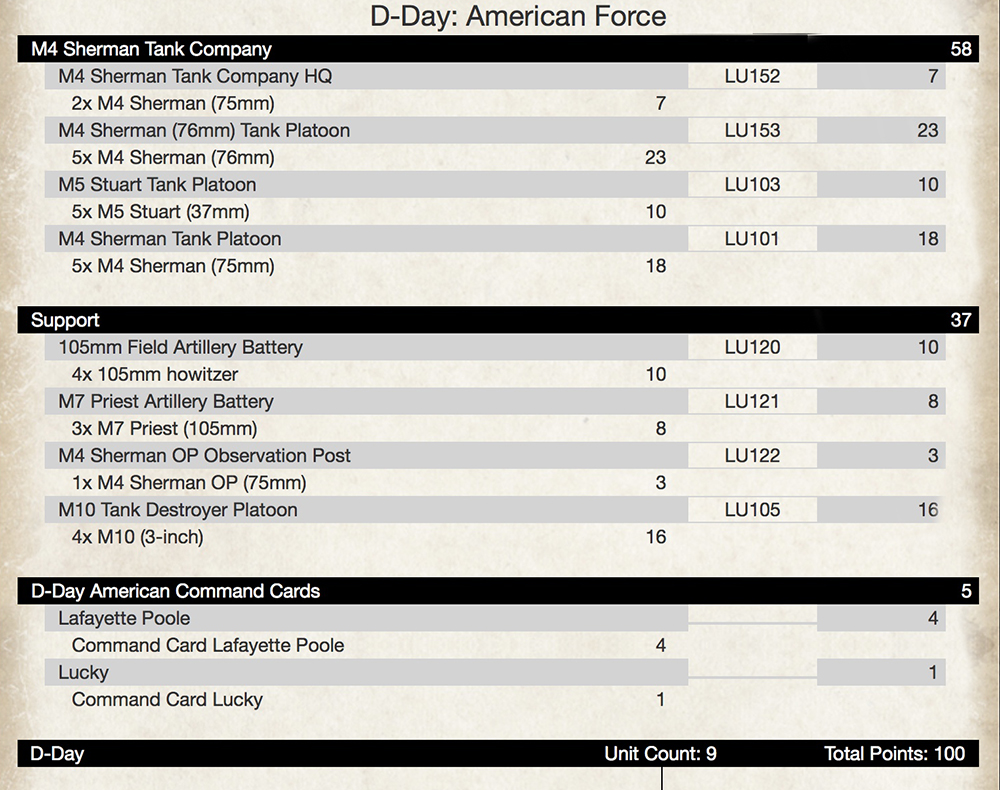
Victor took a modified version of his US force he took against Casey on the release of D-Day: American. Wayne took his Panzer IV Tank Company.

They decided to play Free-for-All. Victor started deployment and Wayne won the dice off to see who goes first. Deployment was evenly spread, with both players concentrating their tank units on the forested side of the battlefield.

Turn 1: The first turn saw Wayne push his Panzer IV platoons forward to engage the M10s and Shermans, but with only moving ROF just one Sherman was destroyed. Victor’s retaliation was swift and deadly three Panzer IVs were destroyed and one bailed out, all from flank platoon.
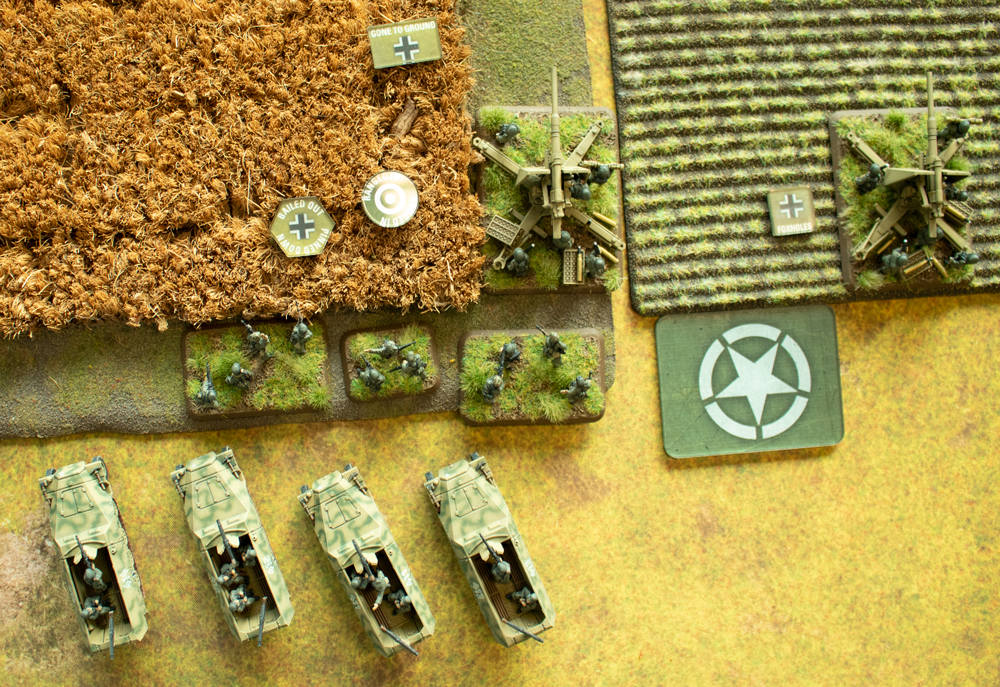
Turn 2: The morale of the devastated Panzer IV platoon didn’t hold, and despite the last tank remounting, their Last Stand roll wasn’t so successful and he beat as hasty retreat. However, Wayne “88” began engaging the M4 Shermans on the hill knocking out two tanks. The last Panzer IV Platoon and the Tiger concentrated their fire on the M10 platoon which had advanced from behind the forest, destroying one and bailing out another. The HQ Panzer IVs knocked another two Shermans on the hill.

Victor returned fire on the flank, but only managed to destroy a single Panzer IV in the forest to the front of the M10s. On the other flank the M5 Stuart Tank Platoon pushed up and began machine-gunning the Panzergrenadier who had dismounted near the 88s and the objective. Despite massive firepower (25 MG dice), they only managed to kill the one team after on scoring four hits! Meanwhile, Victor’s artillery has been ineffectually peppering the Panzergrenadiers and 88s.

Turn 3: The Stuart had done enough to attract the attention of one of the 88s, it swung around and destroyed two Stuarts. The other 88 took aim at the American HQ Shermans who had also moved to the hill and knocked out one tank. The Tigers and Panzer IV Platoon concentrated on the M10 tank destroyers, knocking out all but one. The HQ fired on the last M4 Sherman Tank Platoon tank on the hill, but failed to hit it.
Victor managed to pass the Last Stand for his M4 Sherman Tank Platoon, but failed for his M10s. Re-ranging in both his batteries he managed to knock out three more Panzergrenadier teams, then destroyed one more with his Stuarts. His 76mm Shermans destroyed two more Panzer IVs.
Turn 4: With only one Panzer IV left the second platoon also failed last stand and quit the field. The Panzergrenadiers also gave up. The 88s killed two more Stuart and bailed out American commander. The Tigers continued to fire at the 76mm Shermans, destroyed one and bailed two. The HQ took a long range snipe at the Sherman OP and the last stubborn Sherman on the hill.
Victor remounted his 76mm Shermans, but the Stuart ran off. The repeat bombardment on one 88 had no effect. However, on the other flank the game was one. Wayne failed to save two 76mm hits on the Tigers and Victor made the Firepower rolls. With only the HQ left in Wayne’s formation they are not in Good Spirit and are destroyed.

A Victory to Victor.
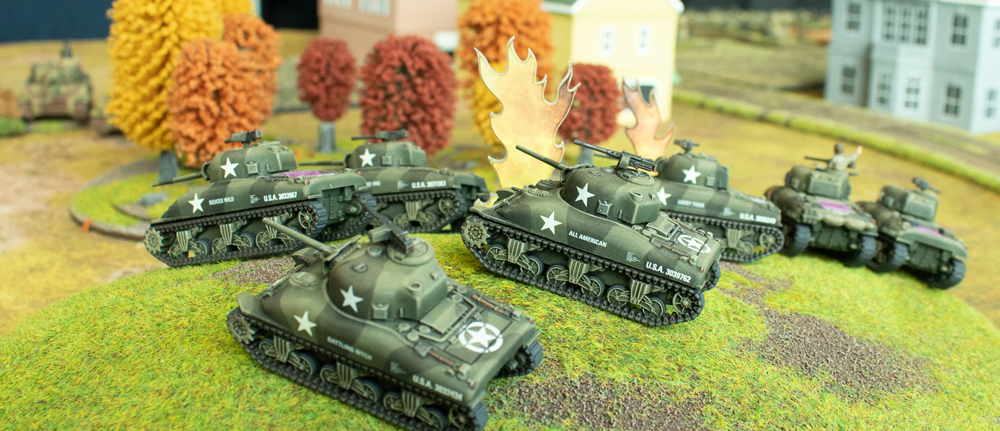
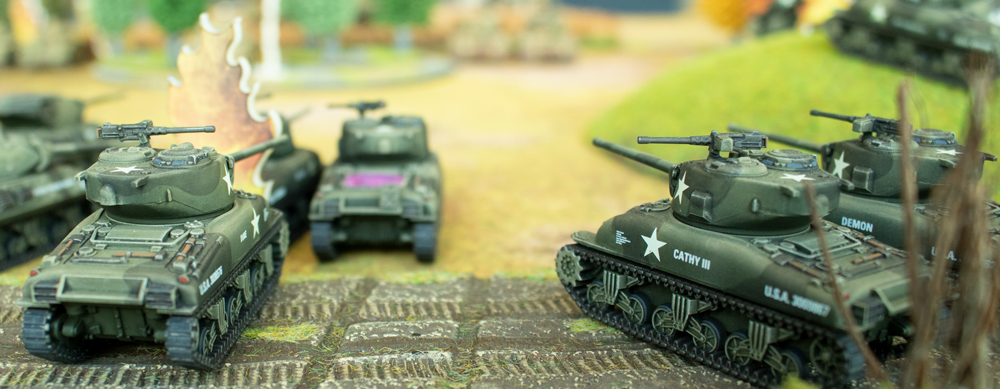
Battle Report – Casey VS Victor
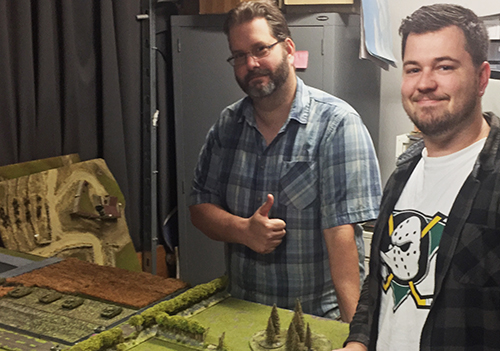 The first battle of the Big Four took place this weekend, both to celebrate the launch of D-Day: American, and a good excuse for Victor to put his new army to the test.
The Forces:
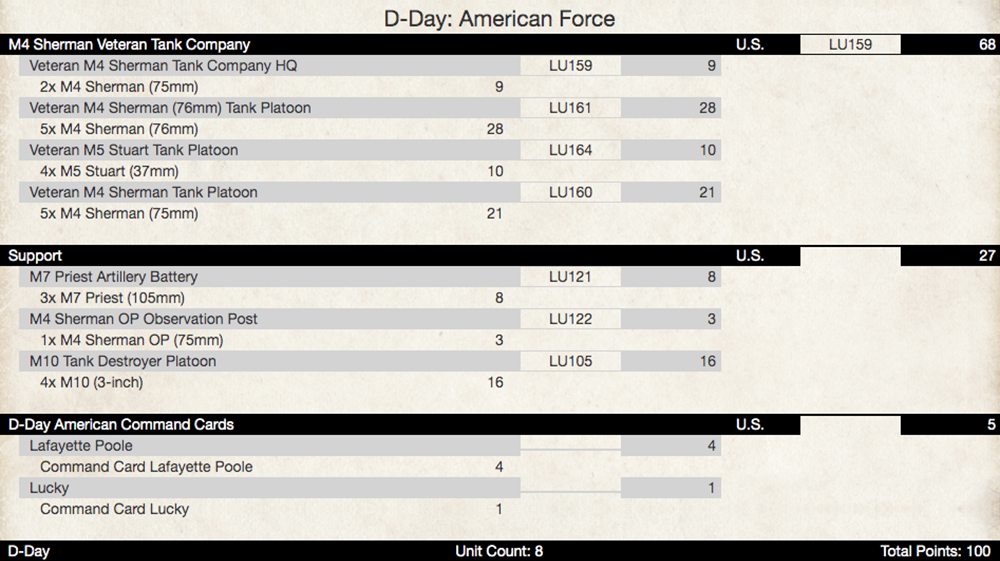
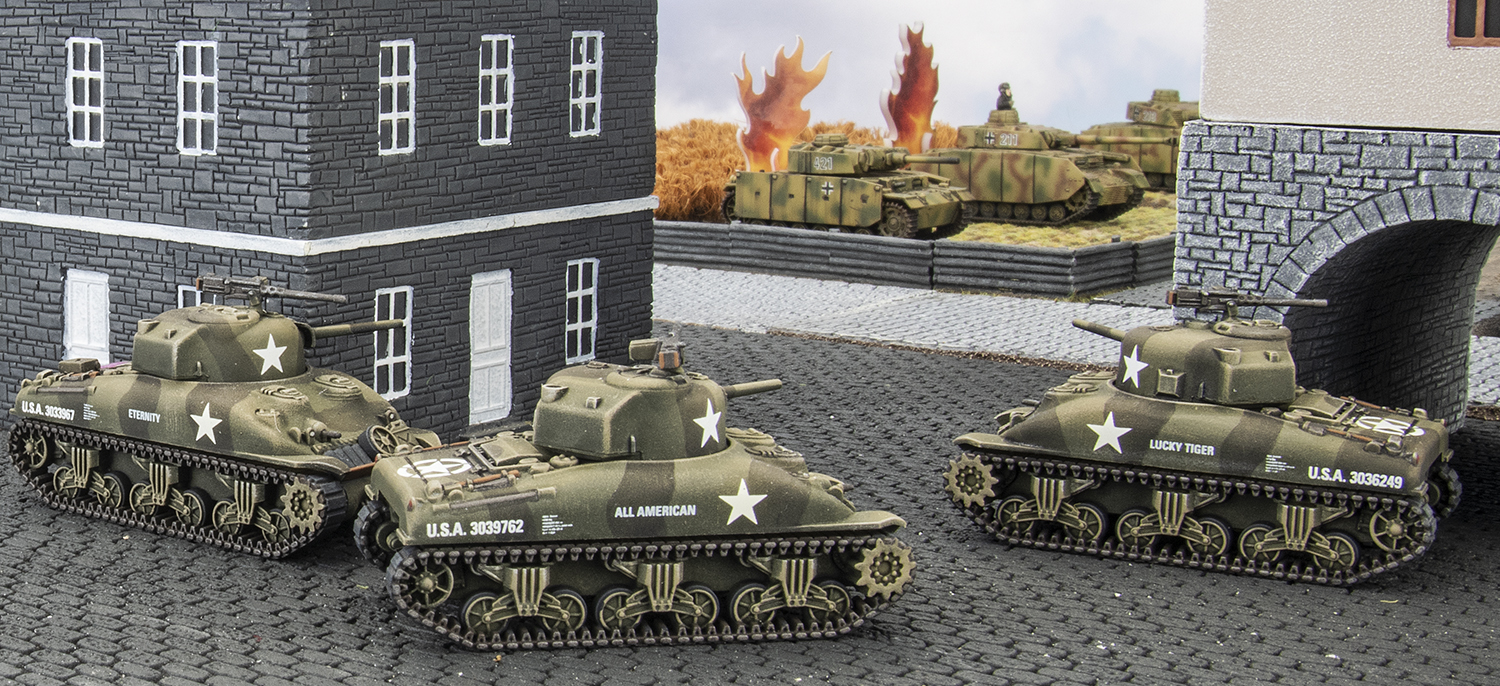
Victor used his recently finished American tank force. He’s hoping it will provide a good mix of tools, and the veteran status 4+ to hit should help mitigate any poor tactical choices.
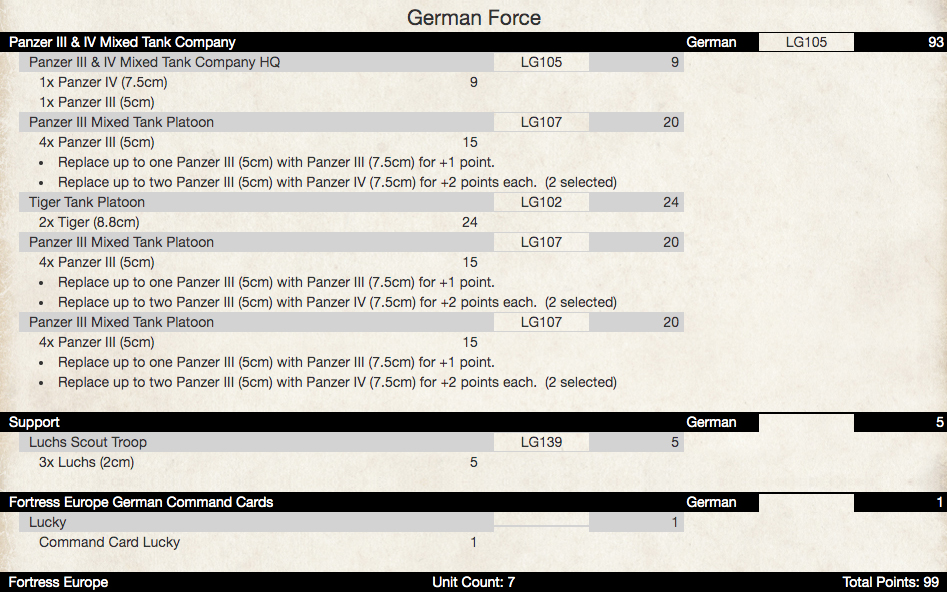
Casey revisited an old force he used to run, based around Hermann Goring Division in Italy. Fortress Europe allows you field a mix of Panzer III & IV’s, so Casey came up with the below list using Battlefronts Studio models.
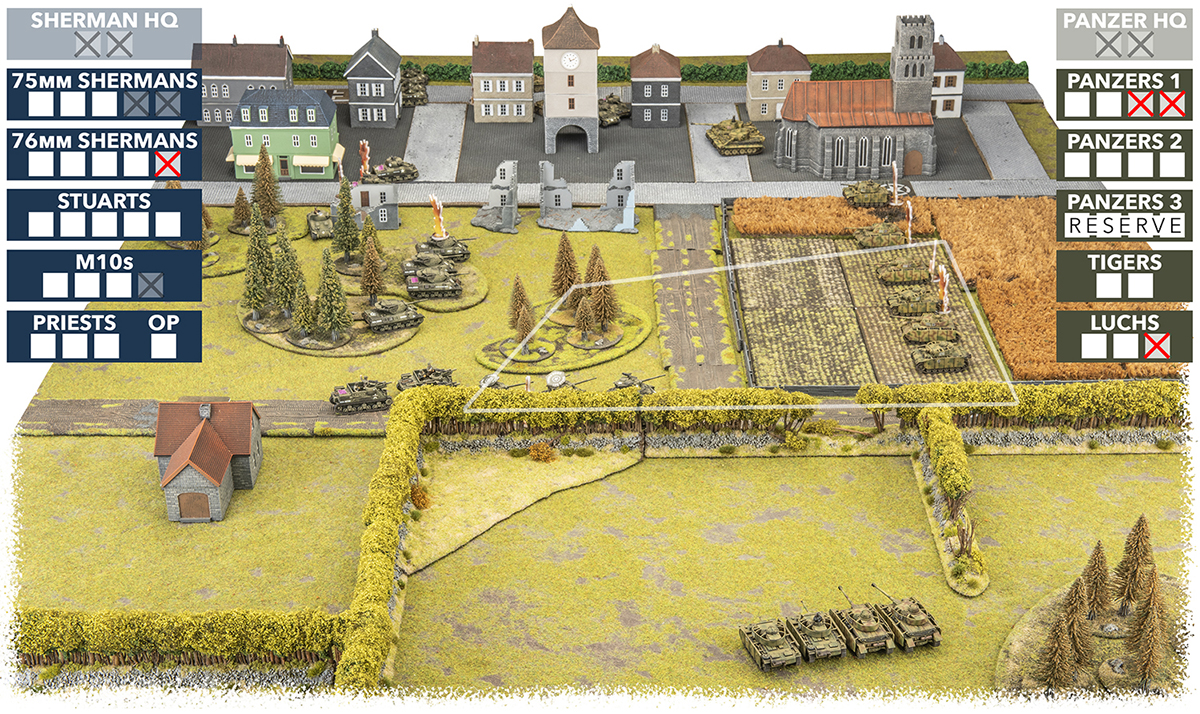
Setup and Deployment:
The table was set up with a third being a small town, the opposite third bocage, and the middle forest and fields. The bocage was just played as hedges, but when Casey finishes more of his terrain it would be cool to do a full bocage battle.
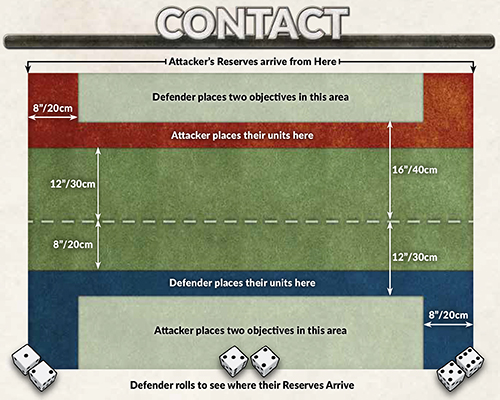
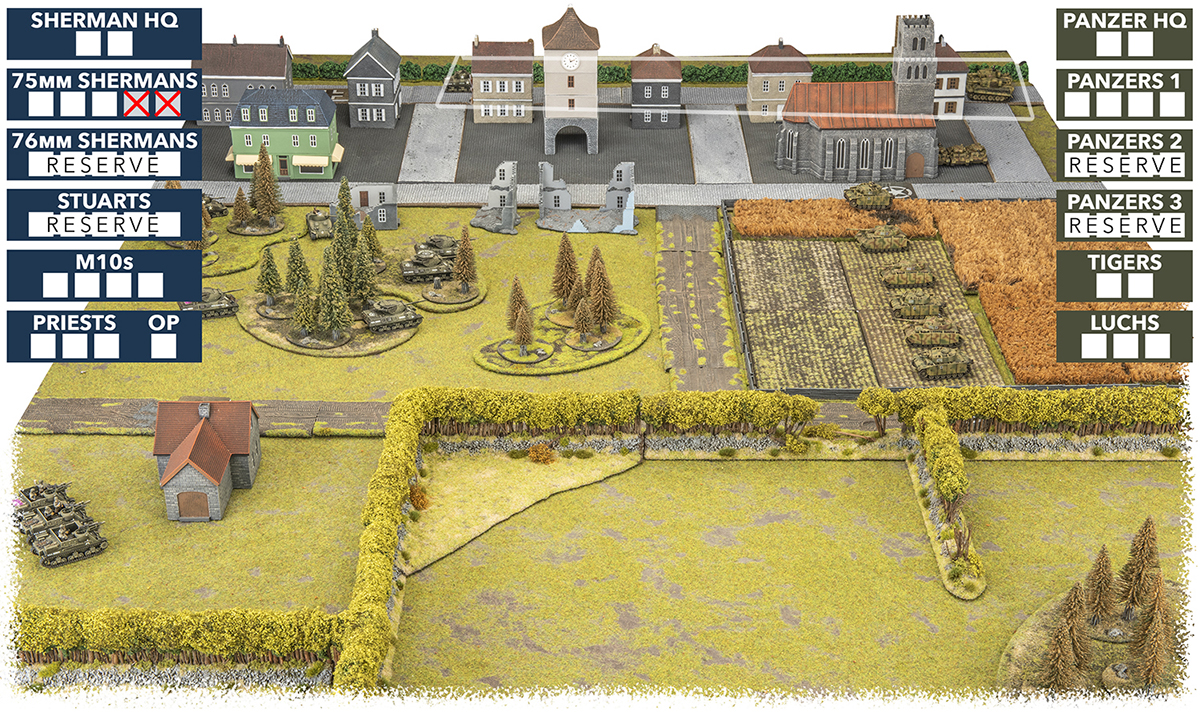
Contact was decided as the mission, and Casey chose to defend from the fields, with the Tigers in Ambush and two Panzer Platoons in reserve. Victor spread his units out to cover both objectives, but he would need his reserves, 76mm Shermans and Stuarts, to arrive quickly to reinforce his initial units.

Turn 1:
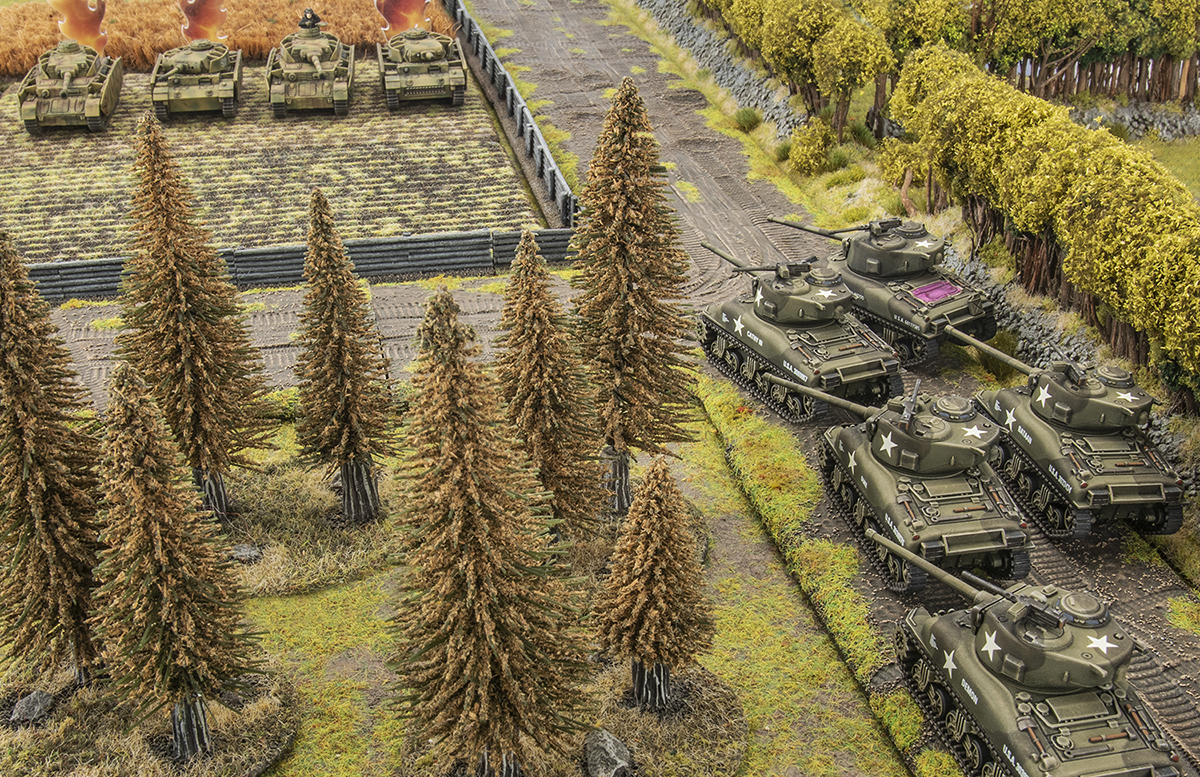
Victor failed to bring a reserve unit on, so simply moved his M10’s and 75mm Shermans forward for better firing positions next turn.
He may have been forgetting something though, as Casey pounced on the Shermans with his ambushing Tigers. They eliminated two of them, while the Panzers in the fields chose to remain Gone To Ground.

Turn 2:
Again no reserves for Victor. The 75mm Shermans were forced to get out of the sights of the Tigers, and instead aiming for the Panzer HQ, as did the M10’s, but both units were unsuccessful in scoring any hits.
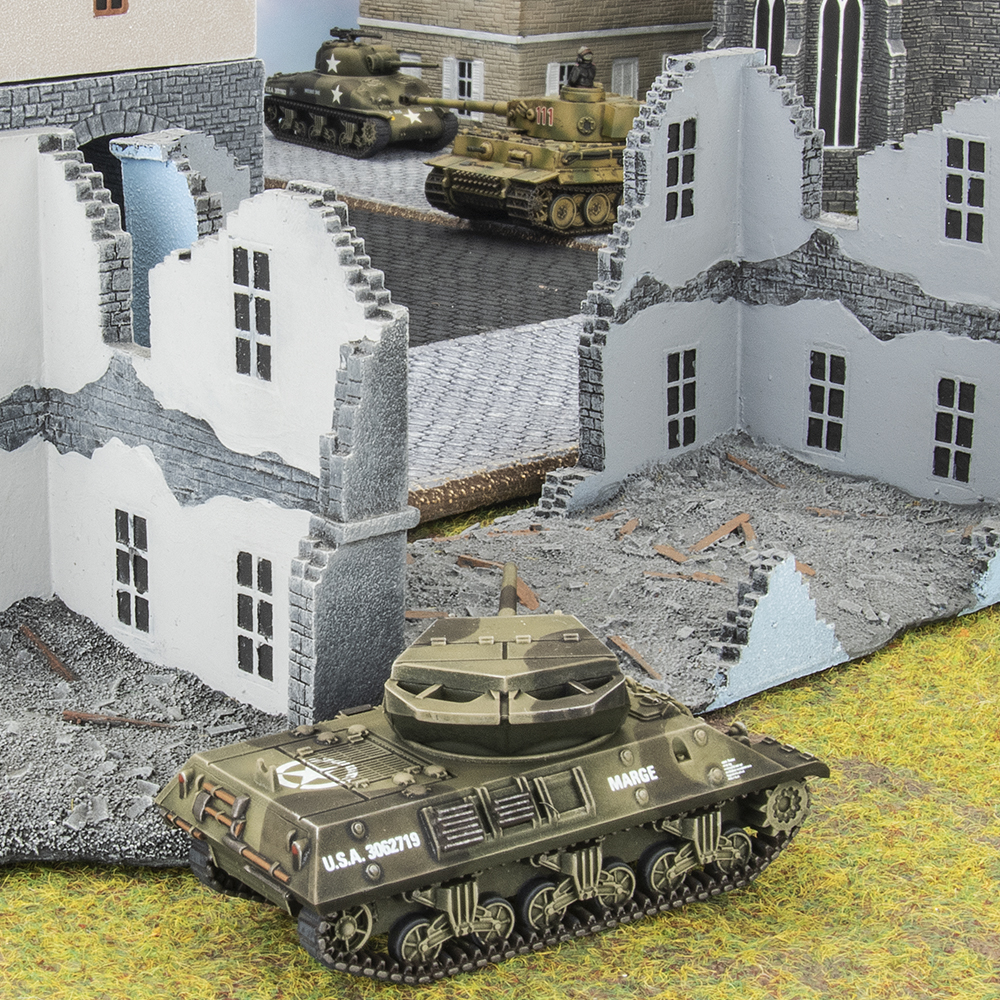
Casey’s Tigers, having tasted blood advanced forward and fired on the Sherman HQ but were not as deadly this time. Meanwhile the Luchs pushed for the objective on the far side of the town, and the Panzers in the field punished the M10s for revealing themselves and scored one kill.

Turn 3:
Victor now got his automatic reserve, and choose to bring on the 76mm’s, dashing them up the road to pressure the Panzers. The three remaining 75mm Shermans now in position opened fire on the Panzer HQ and destroyed both tanks. The M10’s however continued to miss the Panzers. It’s also worth mentioning that the Priests had been trying to range in on the Panzers every turn but no luck.
Casey started rolling for his Delayed Reserves now but he’d have to continue to wait. The Tigers returned the favour and killed Victors Company HQ, leaving both forces leaderless. The Luchs drove even closer to the objective.
Turn 4:
The American’s last reserve unit arrived and not a moment too soon. The Stuarts moved on to the objective and engaged the Luchs, killing one. Victor tried something different with the Priests and dashed them up to backup the 76mm Shermans. He used the 76mm Shermans to great effect and killed two Panzers and bailed a third. The 75mm Shermans and M10’s decided to fire on the Tigers, but their armour proved too much.
Casey got his first reserve Panzers and rolled the corner in the bocage. They immediately got to work and killed a 76mm through the hedges, and bailed two more. His Tigers moved forward to get a better angle on the M10s but missed with their 2 shots. The Luchs were also unlucky with the newly arrived Stuarts.
 Turn 5:
Victor knew he needed to close on the Germans, and so moved his M10’s forward. Luckily they delivered, and killed a Tiger. The Priests Blitzed up to the hedges to direct fire on the fresh Panzer Platoon, and scored one kill. The Stuarts and 76mm Shermans were also hot with their shooting, killing a Luchs and a Panzer respectively.
At the beginning of Casey’s turn he had to make Last Stand tests for both the Panzer platoon in the field, and the Luchs. Unfortunately they both failed and sent their tanks and crews running.
However Casey still had one unit to come on from Reserve, his third Panzer Platoon, which arrived in the perfect spot to finish off all 3 remaining 75mm Shermans. The rest of his force wasn’t so lucky, only managing to bail a 76mm.

Turn 6:
The 76mm Shermans drove up the road to contest the objective, and to get shots through the gap in the hedges. They fired on the Panzer Platoon and scored two kills, thanks in part to Lafayette Pool ignoring the +1 to hit with Stabilisers. The M10’s repeated what worked for them before, and eliminated the last Tiger. This left two out of four of Casey’s Formation units destroyed, with a third on the brink.
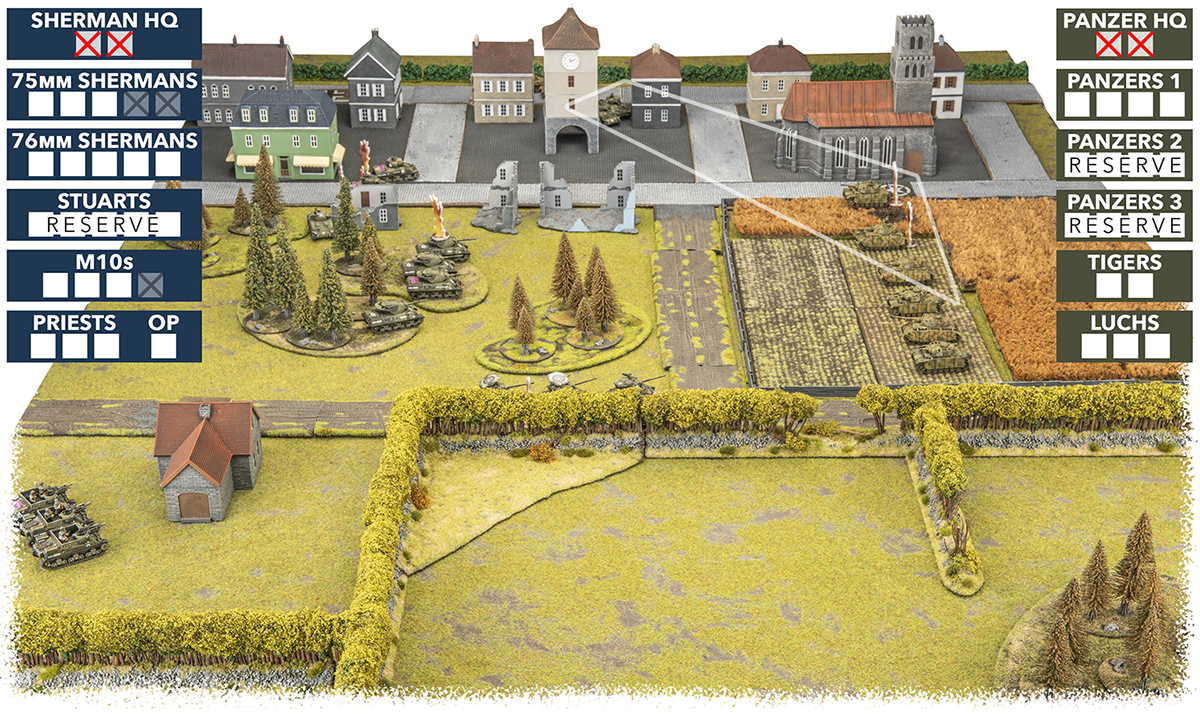
Casey was forced to make another last stand check, this time for the second Panzer Platoon. Their fate was the same was the others, so with all but one Panzer Platoon destroyed, Casey’s Formation broke. Pool’s platoon was also on the objective, so a convincing American win.


A close game that looked to be in Casey’s favour in the first few turns, but turns 5 and 6 really swung it to the Americans.
 I was glad to get the win here, but I would say I have a lot to learn about running American armour. In a battle like this the Priests would’ve probably been better served laying down smoke while my tanks pushed forward to out flank. Long range and concealment made scoring hits tough going, but the M10’s getting lucky with the Tigers really helped. And of course the hero of the day was Lafayette Pool (when he finally turned up), breaking the German company and securing an objective.
 Well that was a blast. I knew the game was going to come down to getting reserves at the right time in the right place. I was quite happy with the performance of the Panzers that started on the table. I always figured they were going to have a difficult time against the sheer number of tanks on the table. I think if my first reserve had of turned up on the first turn of rolling, and if the second platoon had of come onto the table in a more use full place then I think I would have won.
In hindsight I should have probably waited until the 76mm Shermans arrived and sprung my ambush against them. I was just too eager to get some runs on the board.