Twelve Flavours, All Of Them Churchills

Having finished my Shermans I found myself with plenty of painting options sitting on the table, from the 25 pdr artillery, to a Motor Platoon and the Churchill tanks in the Army Deal. A smarter person would have picked the 25 pdrs to work on, primarily because I am planning on taking them to FlamesCon in a couple of months, I however picked the Churchills.

The Churchill frame is packed with options when it comes to how to assemble it. I decided to plan ahead and go a little off script and build them as Crocodiles. Having been terrorised by a friends models, I thought that having some of my own would be fun – their impossibly heavy armour, deadly flamethrower, and useful 75mm gun makes them a powerful weapon in arsenal.

Of course they are of limited use right now, since they are not included in Fortress Europe… I solved that issue by not gluing the flame trailers on to the model. This way I can leave the trailers in my box for the next few months and just field them as the 6 pdr armed versions in the book. None of the team in the office will mind and I get some great tanks right now.

With these complete I now need to turn to… the 25 pdrs and (more importantly) figuring out how I am going to paint the crews.

~Chris

p.s. stay tuned for some step by step photos and how-to guide for my British  tanks.

Customising your Schürzen

While I was building my Panzer IVs for my German: D-Day force for the Big Four Of Late-War project I thought I would customise my Schürzen bazooka skirts a little more. One of the great things about the late-war Panzer IV kit is that it already comes with a three options for modelling your Schürzen, a clean undamaged set, a miss-aligned set with some of the plates not sitting level, and a set of rails with no plates hanging from them. You could also mix these up to give your tanks a variety of looks.

I thought I’d take things a step further, and model some of my tanks with a few plates missing. This requires no extra parts, as the kit comes with all the part you need. For this example I will use the separate rails and the plain undamaged Schürzen.

Find the matching rails and Schürzen. Like the full Schürzen, there are left and right blank rails. Look carefully, you will see the little triangles on the top of the rail are arranged differently on the left and right. There is a single triangle followed by a pair at the front of the rails, while the rear of the rails have a single triangle, followed by another single triangle.

When you have your matching pair, carefully clip off the rail moulded to the full Schürzen.

Then cut off the excess rail with your hobby knife. If doesn’t matter if you can still see the impression of where the old rail was, as this will be helpful later when gluing on the new rail. Make sure you keep pairs together, putting the wrong rail on will mean the Schürzen won’t mount properly.

Now you can cut up your Schürzen. You don’t need to cut between every single plate, just around the ones you plan to remove. Score with a sharp knife between the plates on both sides, then you can simple bend them at the join until they come apart.

Next glue the rail to the plates you want to keep. Make sure you keep the discarded plates around to help you get the spacing of the gaps right. This is where the shadow or outline of the old rail will be helpful. You can see when the triangular tags on the top of the rails were and you can line the same bits on the new rail up with these. This will help you locate the rail in the correct position.

Finally you either attach your Schürzen bazooka skirts, or like myself paint the tank and skirts separately first, before gluing them on.

~Wayne

Wayne’s 100 Points Ready For Deployment

I’ve now complete my initial target of 100 points (actually 101 but whos counting!).

This is by no means the end of the journey for this force. At the moment I’m just finishing off my three 15cm Nebelwerfer rocket launchers.

I also plan to paint another four Panzer IV tanks so I can swap these with the Tigers as I feel the need. D-Day: German sees the release of some great new models that are pretty hard to resist, so I plan to add at least one Panther Tank Platoon, as well as an Sd Kfz 250 Scout Troop.

Of course I also have some Support options to round out the Force.

Other tempting developments include expanding my Armoured Panzergrenadier Platoon into a whole Armoured Panzergrenadier Company by painting an HQ and one or two more platoons, and heavy weapons units.

It is the great thing about building Germans, units can be moved about several different forces.

I’ll keep you posted,

~Wayne

Big Four Battle Time – Wayne vs Victor

With the completion of Wayne’s first 100 points, Wayne and Victor thought they would have a game to celebrate another Big Four of Late-war army passing the 100 point mark and the release of D-Day: German.

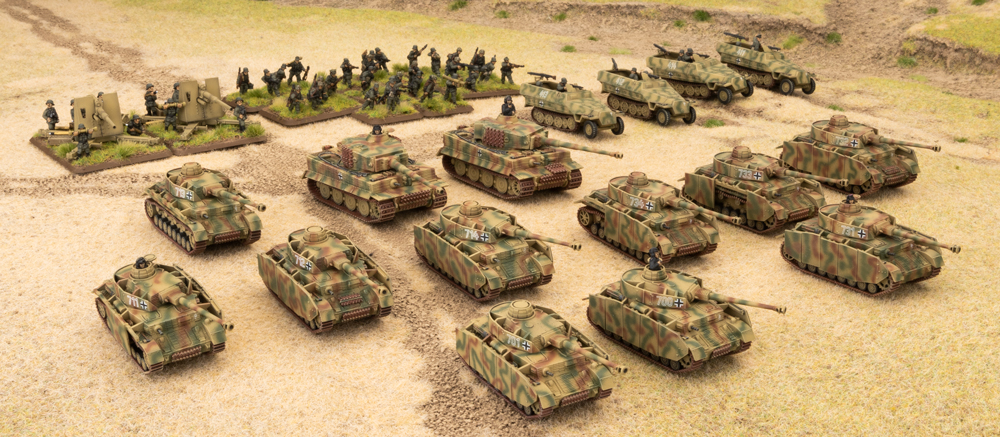
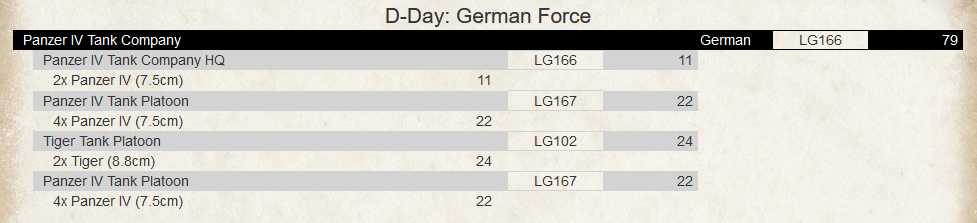
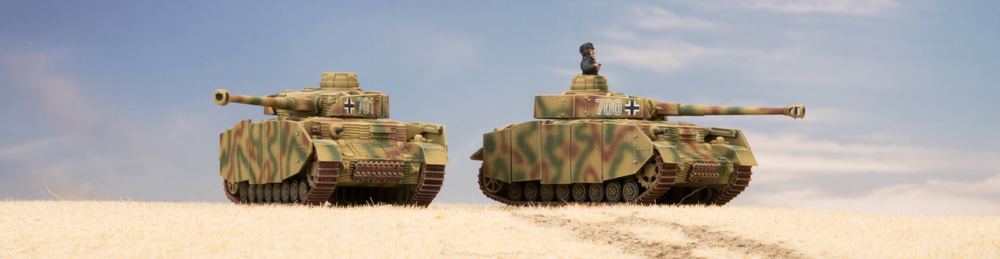
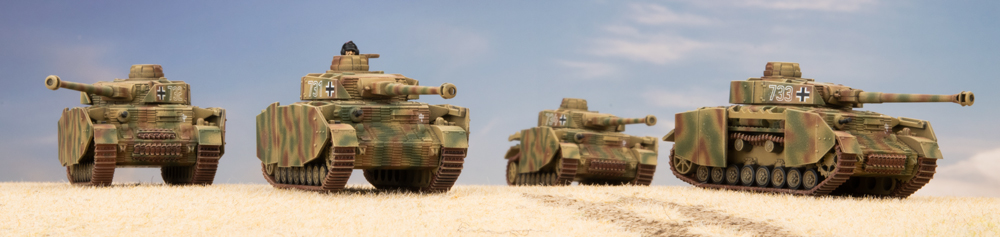
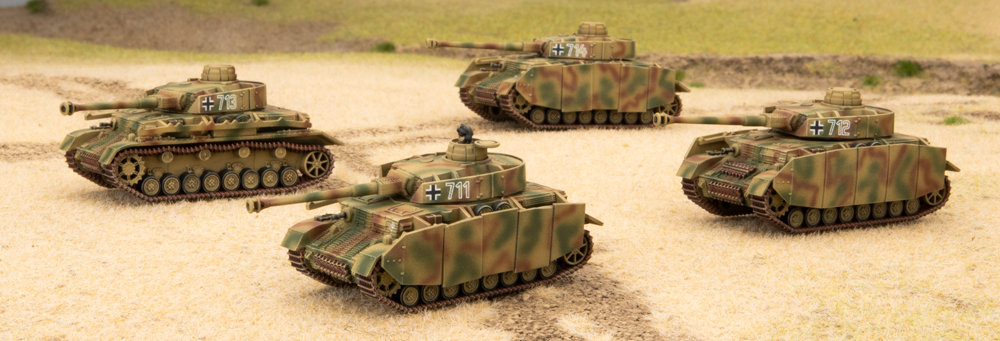
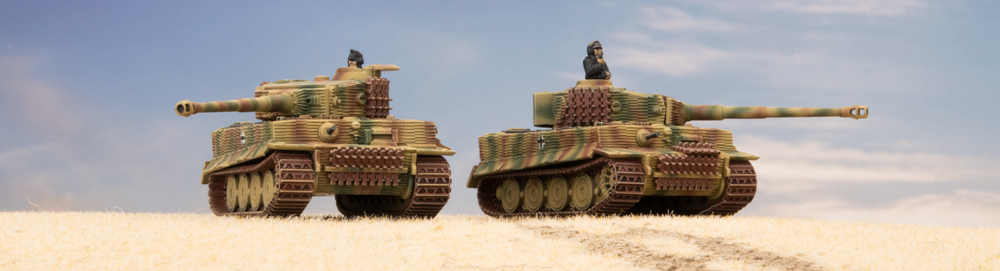
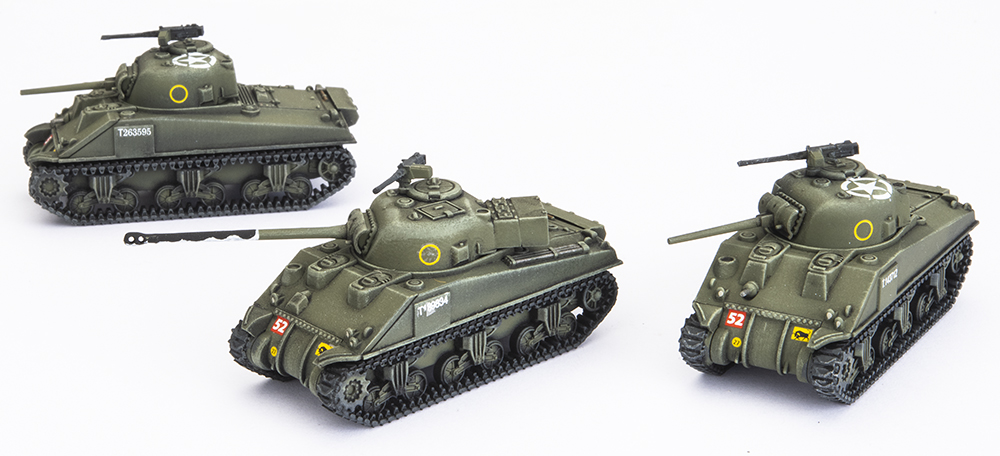
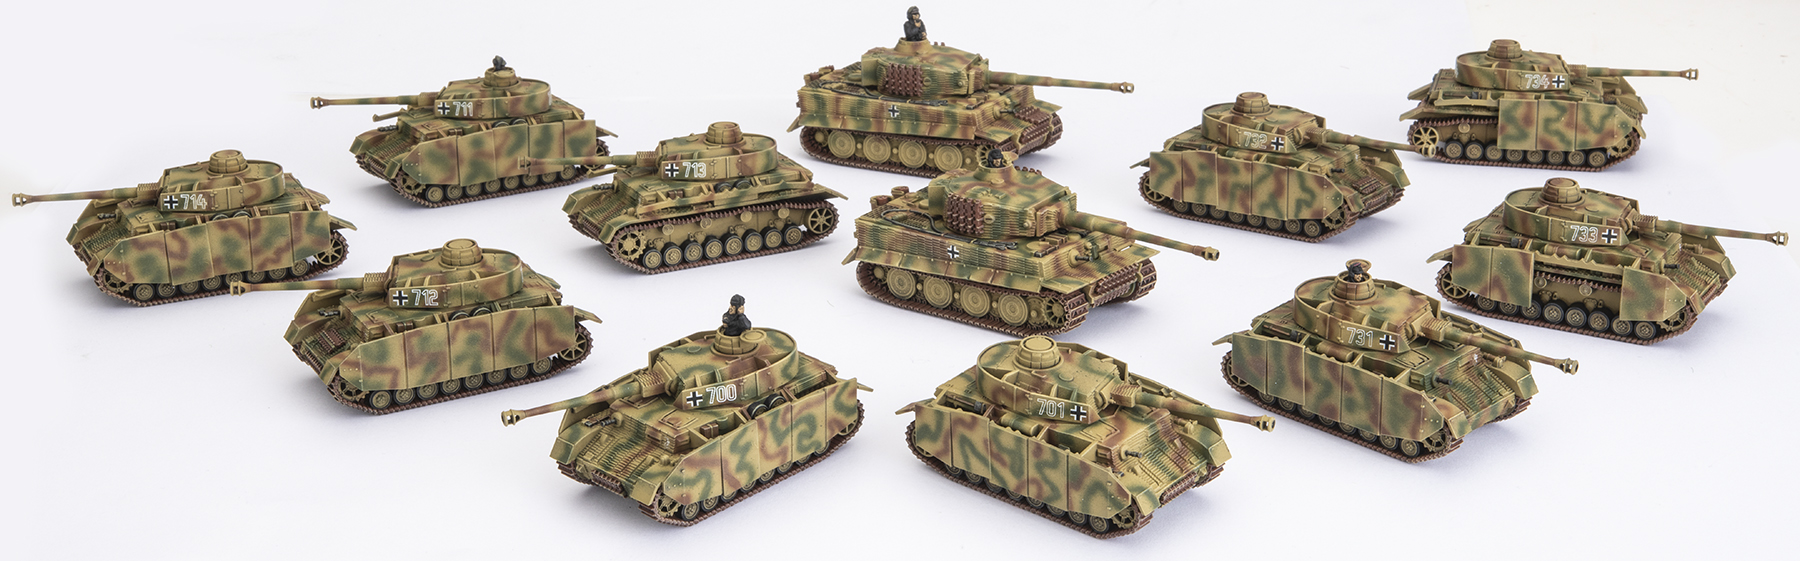
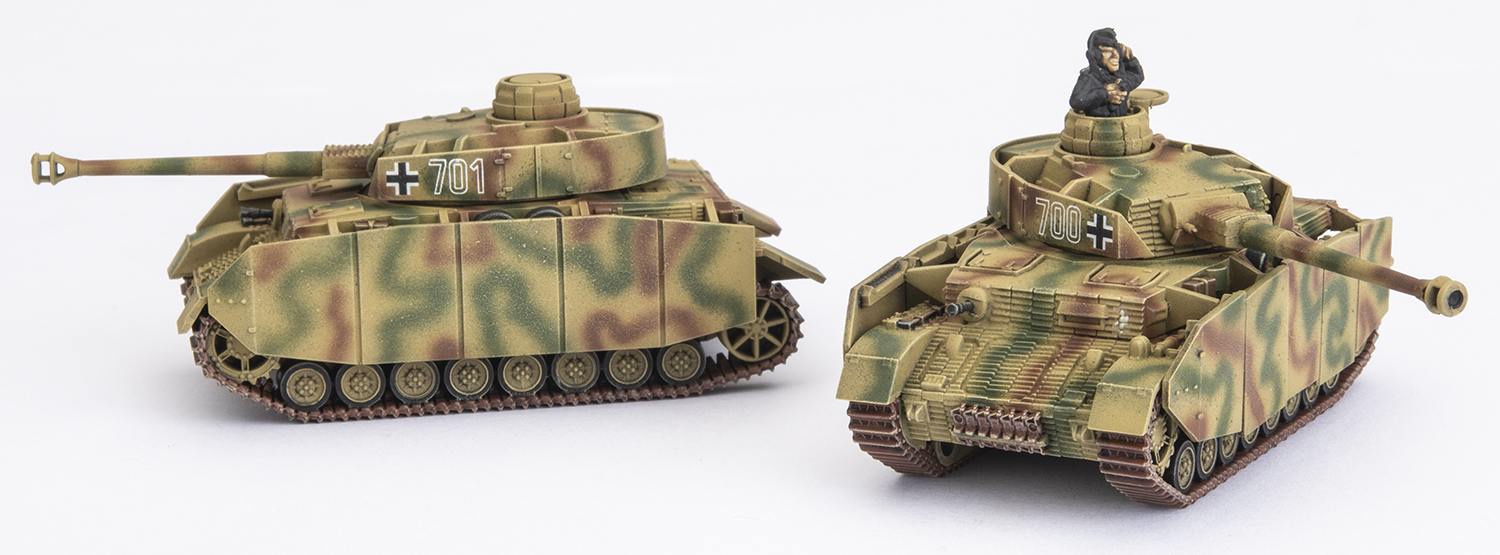
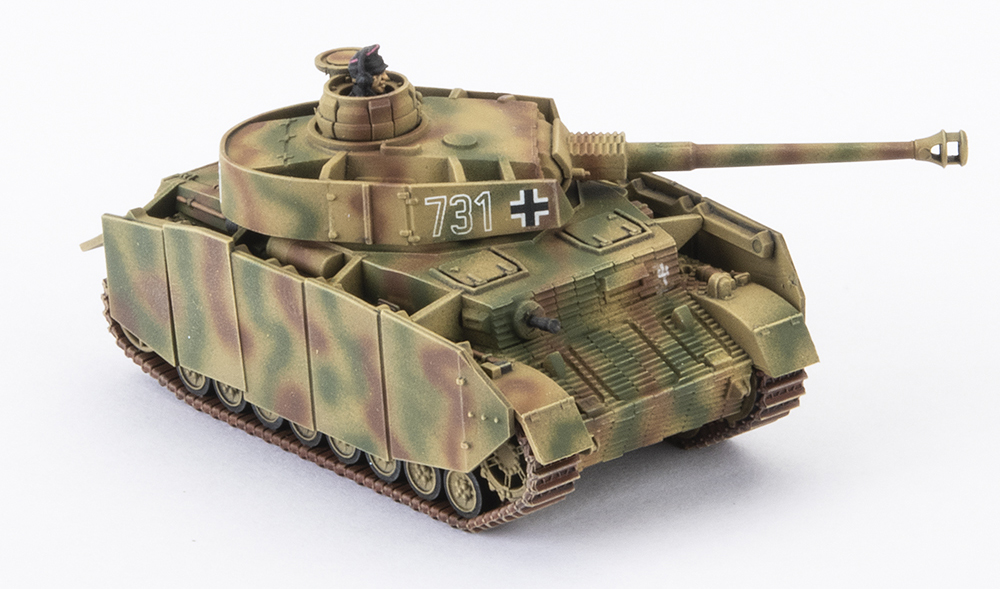
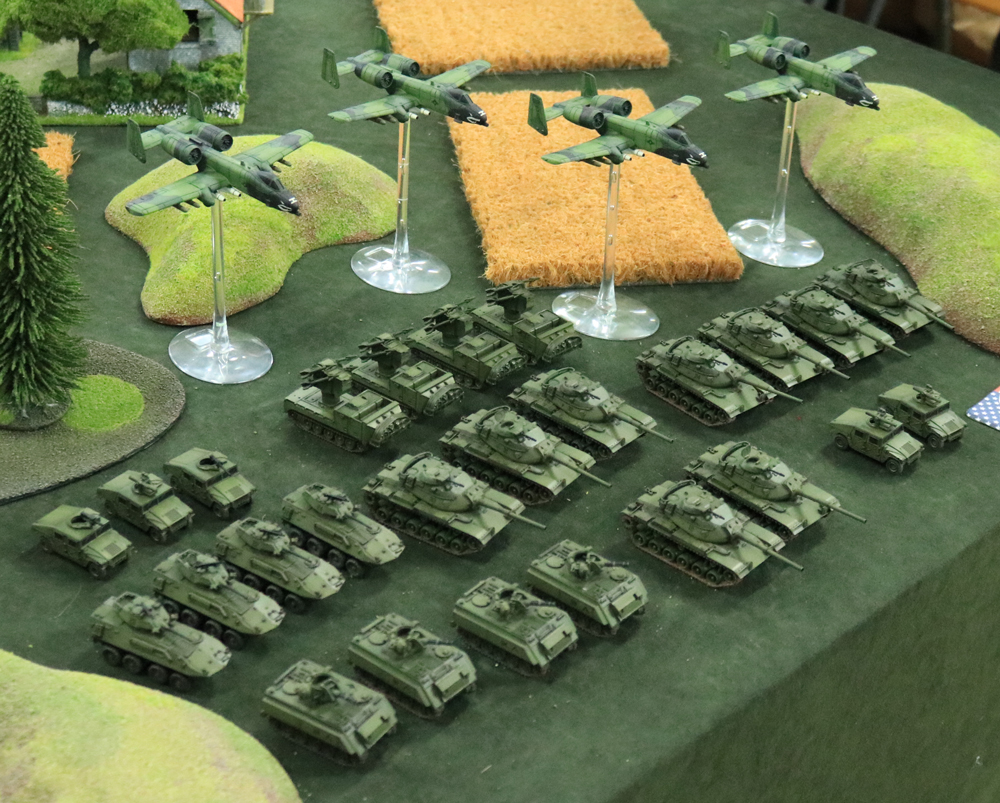
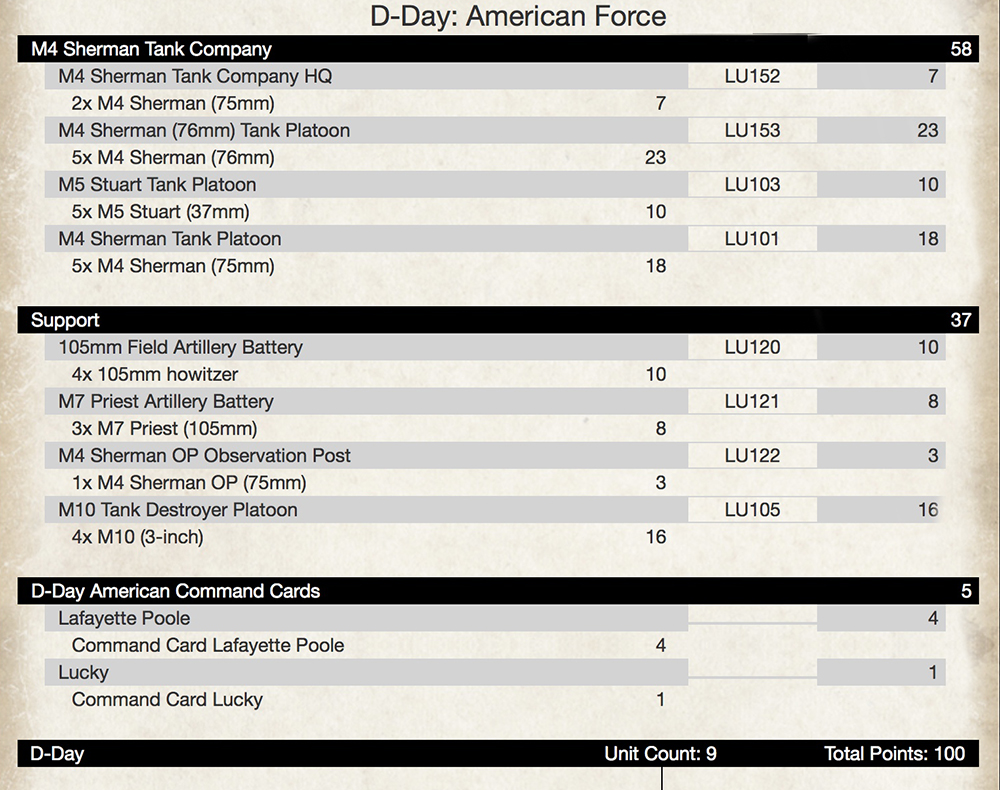
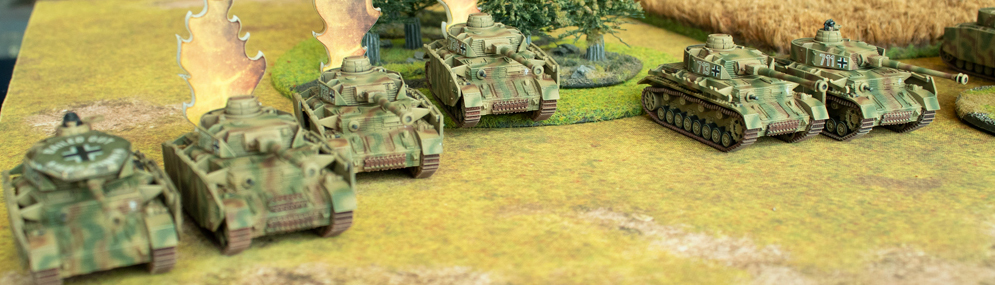
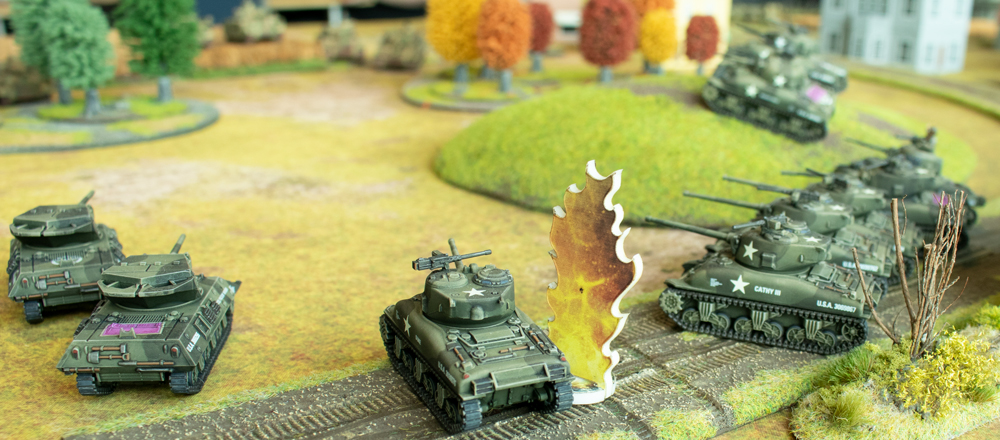
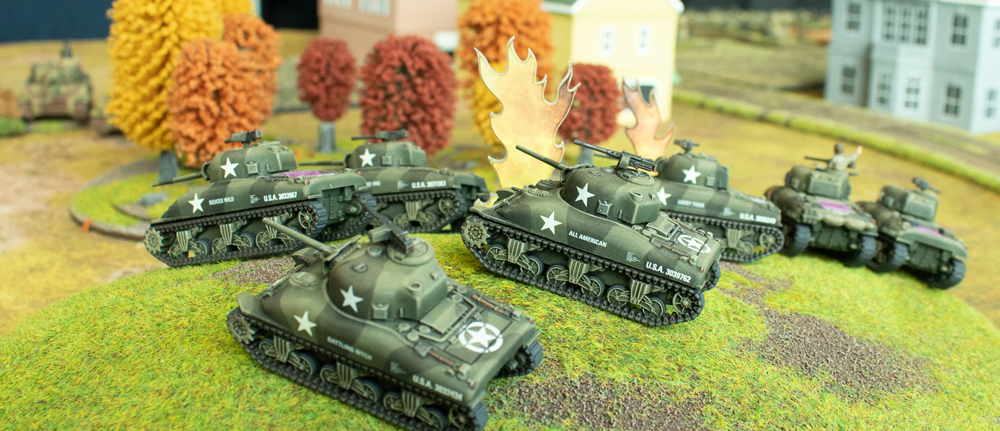
Victor took a modified version of his US force he took against Casey on the release of D-Day: American. Wayne took his Panzer IV Tank Company.

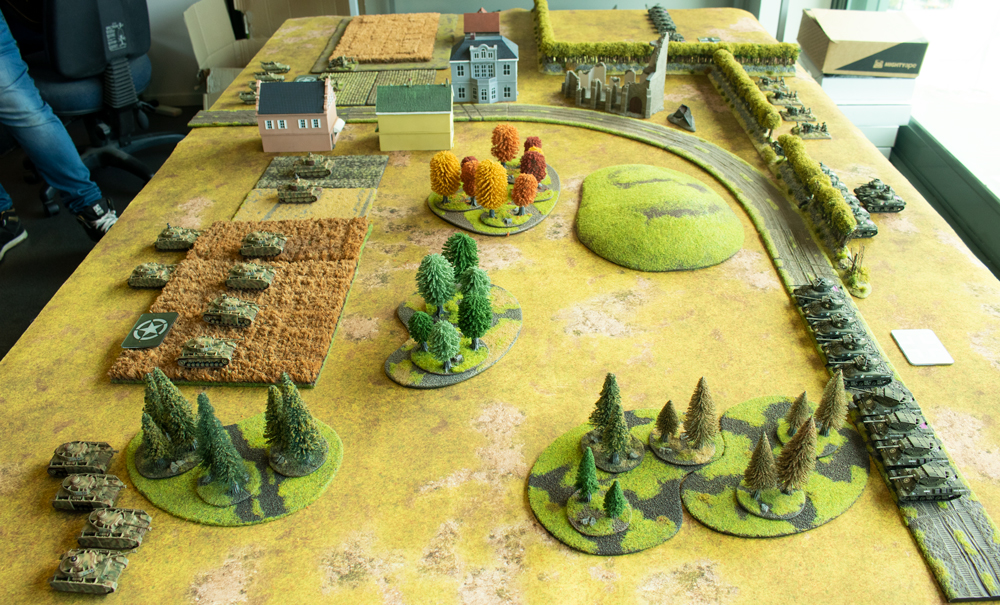
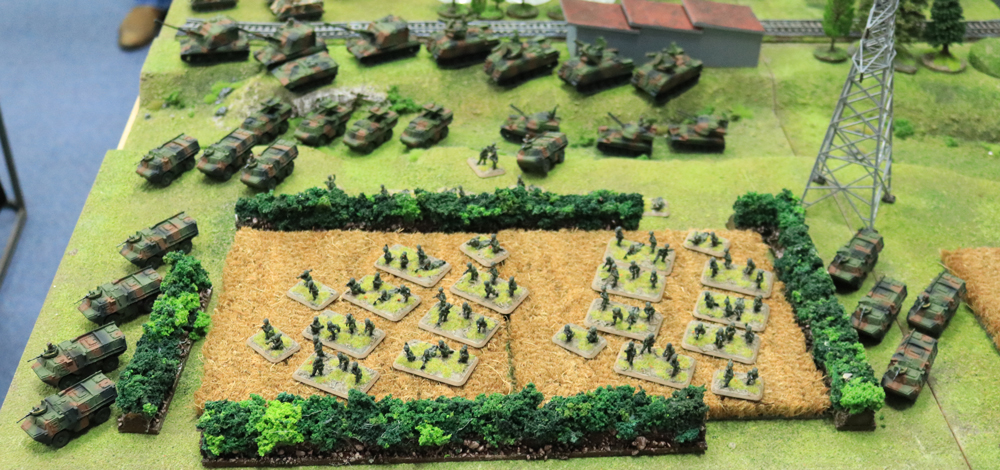
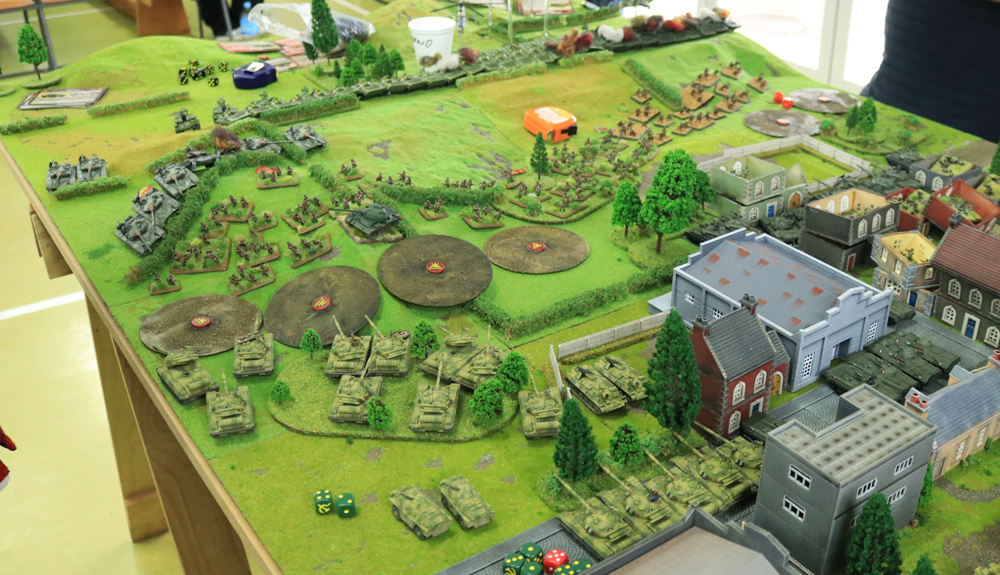
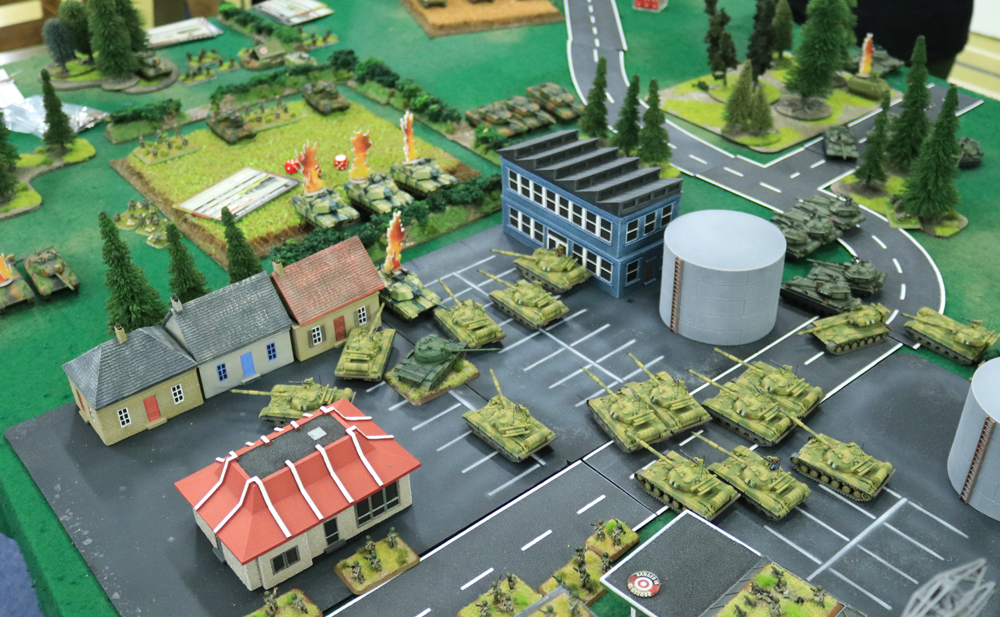
They decided to play Free-for-All. Victor started deployment and Wayne won the dice off to see who goes first. Deployment was evenly spread, with both players concentrating their tank units on the forested side of the battlefield.

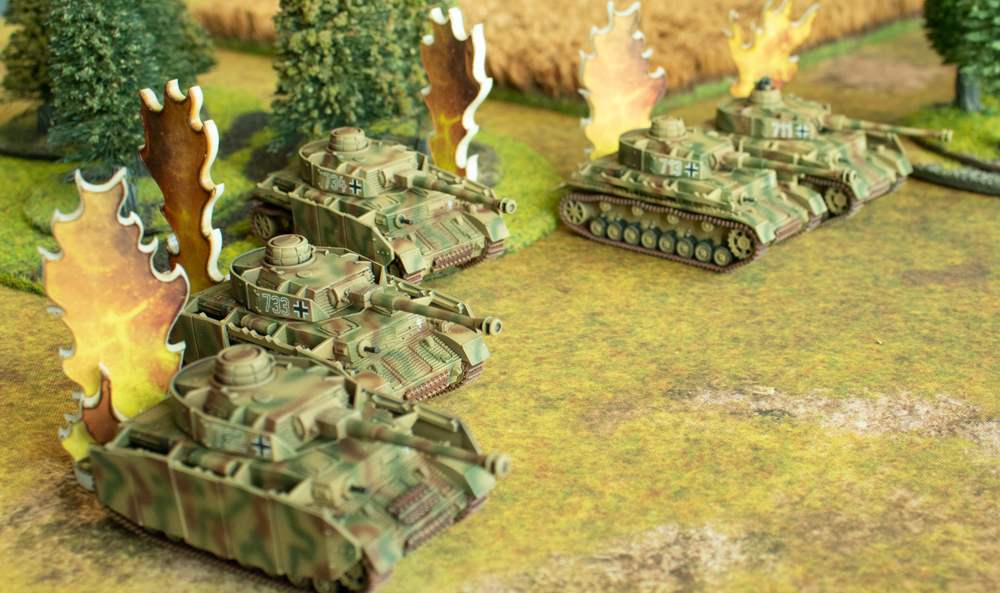
Turn 1:  The first turn saw Wayne push his Panzer IV platoons forward to engage the M10s and Shermans, but with only moving ROF just one Sherman was destroyed. Victor’s retaliation was swift and deadly three Panzer IVs were destroyed and one bailed out, all from flank platoon.

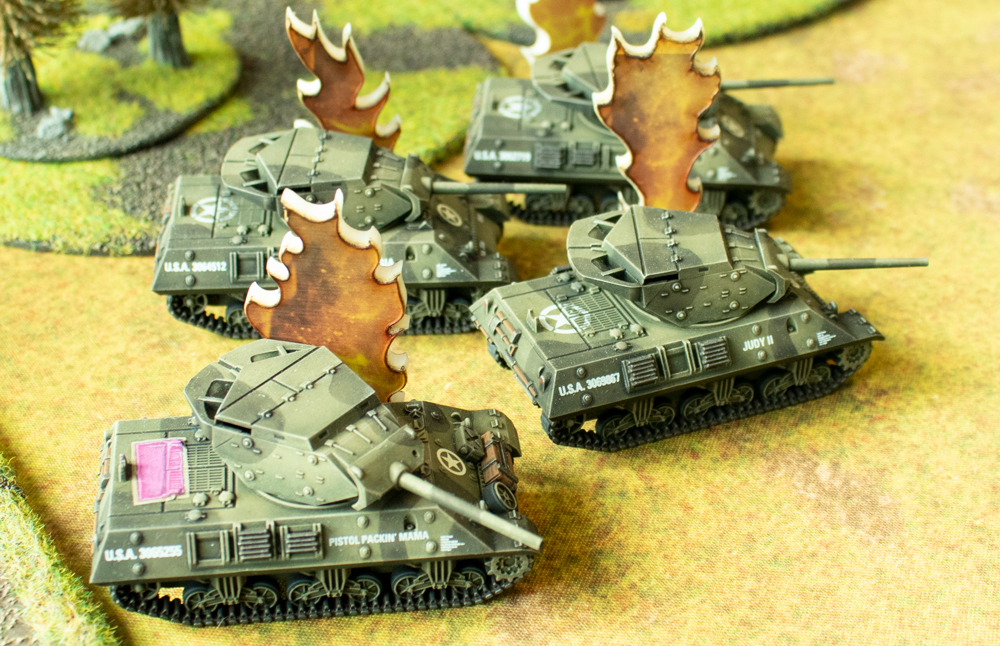
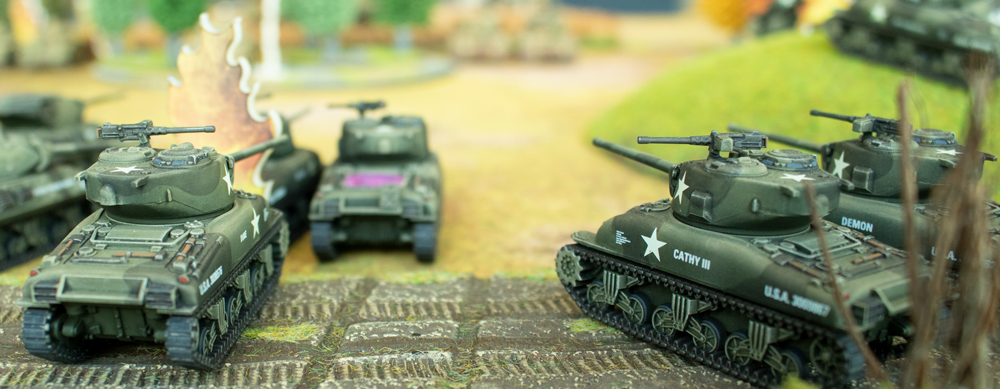
Turn 2:  The morale of the devastated Panzer IV platoon didn’t hold, and despite the last tank remounting, their Last Stand roll wasn’t so successful and he beat as hasty retreat. However, Wayne “88” began engaging the M4 Shermans on the hill knocking out two tanks. The last Panzer IV Platoon and the Tiger concentrated their fire on the M10 platoon which had advanced from behind the forest, destroying one and bailing out another. The HQ Panzer IVs knocked another two Shermans on the hill.

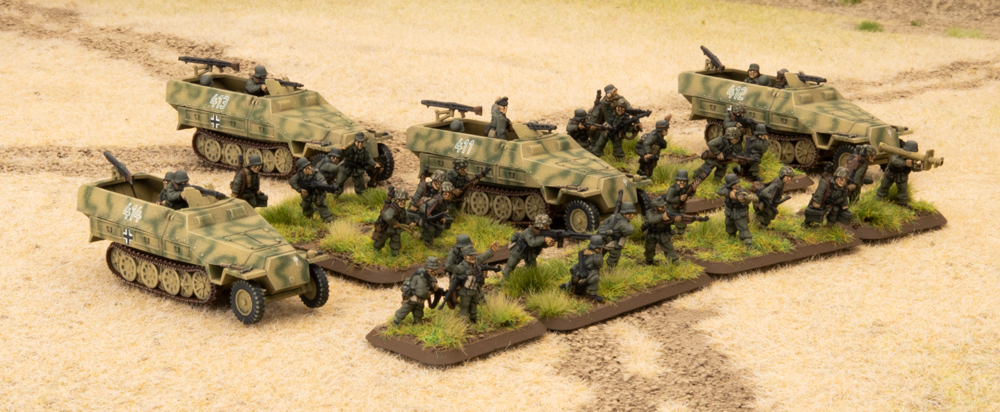
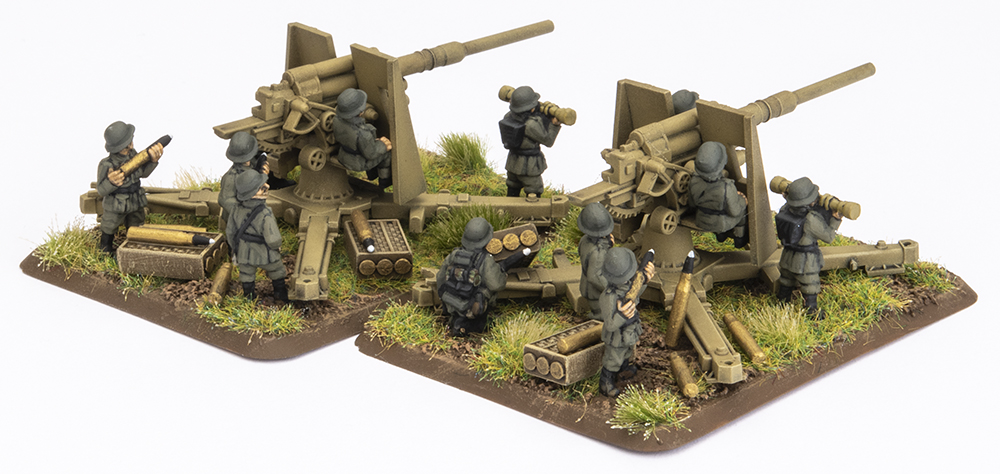
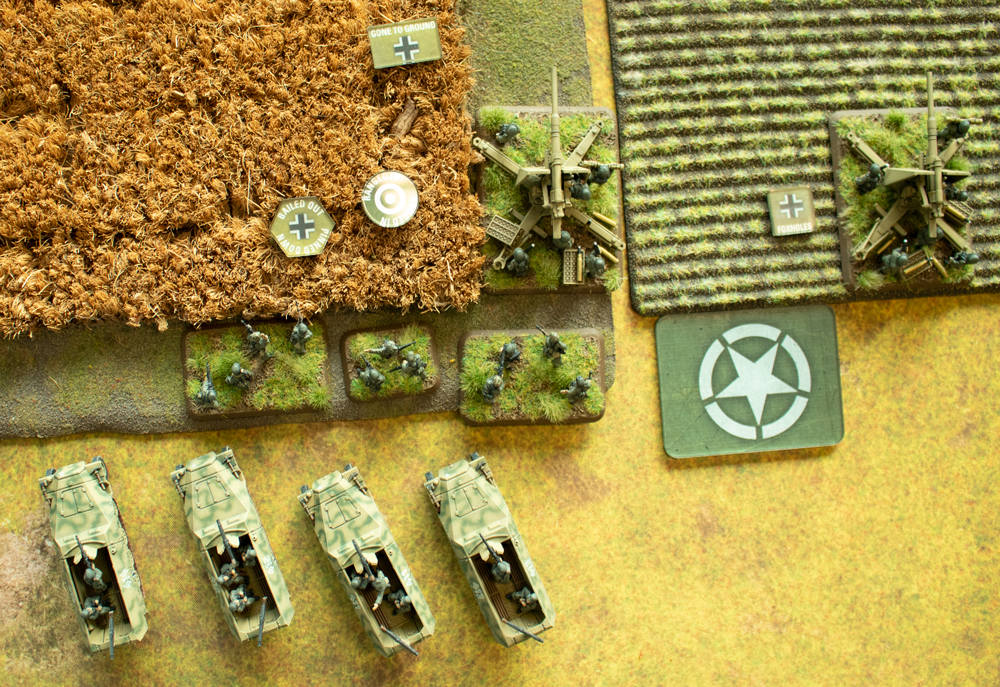
Victor returned fire on the flank, but only managed to destroy a single Panzer IV in the forest to the front of the M10s. On the other flank the M5 Stuart Tank Platoon pushed up and began machine-gunning the Panzergrenadier who had dismounted near the 88s and the objective. Despite massive firepower (25 MG dice), they only managed to kill the one team after on scoring four hits! Meanwhile, Victor’s artillery has been ineffectually peppering the Panzergrenadiers and 88s.

Turn 3: The Stuart had done enough to attract the attention of one of the 88s, it swung around and destroyed two Stuarts. The other 88 took aim at the American HQ Shermans who had also moved to the hill and knocked out one tank. The Tigers and Panzer IV Platoon concentrated on the M10 tank destroyers, knocking out all but one. The HQ fired on the last M4 Sherman Tank Platoon tank on the hill, but failed to hit it.

Victor managed to pass the Last Stand for his M4 Sherman Tank Platoon, but failed for his M10s. Re-ranging in both his batteries he managed to knock out three more Panzergrenadier teams, then destroyed one more with his Stuarts. His 76mm Shermans destroyed two more Panzer IVs.

Turn 4: With only one Panzer IV left the second platoon also failed last stand and quit the field. The Panzergrenadiers also gave up. The 88s killed two more Stuart and bailed out American commander. The Tigers continued to fire at the 76mm Shermans, destroyed one and bailed two. The HQ took a long range snipe at the Sherman OP and the last stubborn Sherman on the hill.

Victor remounted his 76mm Shermans, but the Stuart ran off. The repeat bombardment on one 88 had no effect. However, on the other flank the game was one. Wayne failed to save two 76mm hits on the Tigers and Victor made the Firepower rolls. With only the HQ left in Wayne’s formation they are not in Good Spirit and are destroyed.

A Victory to Victor.
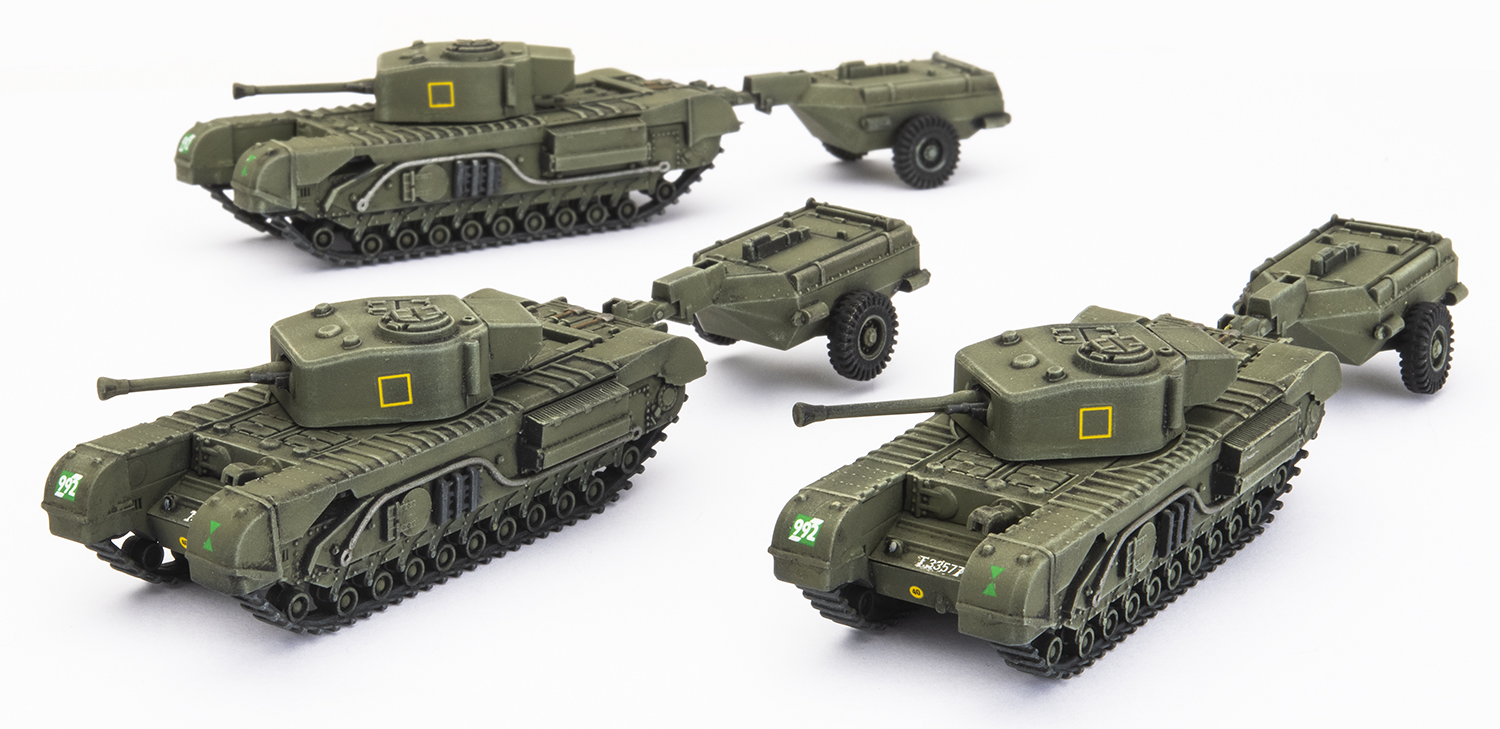
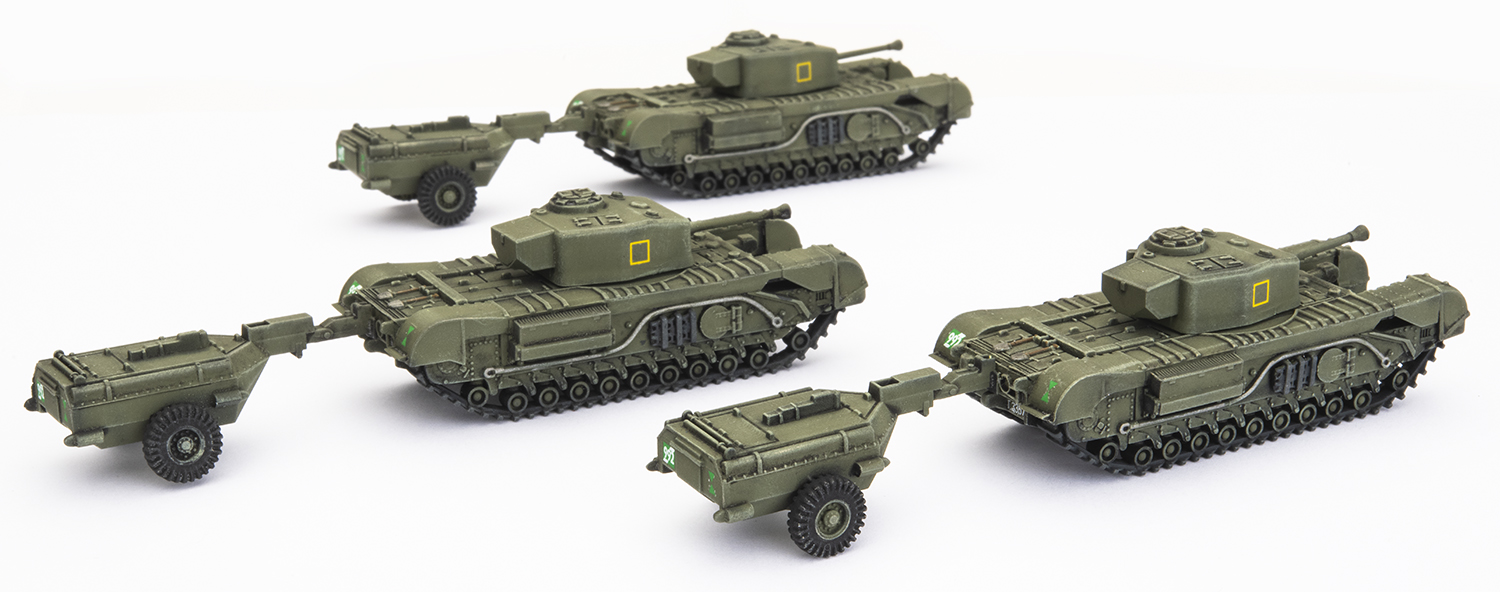
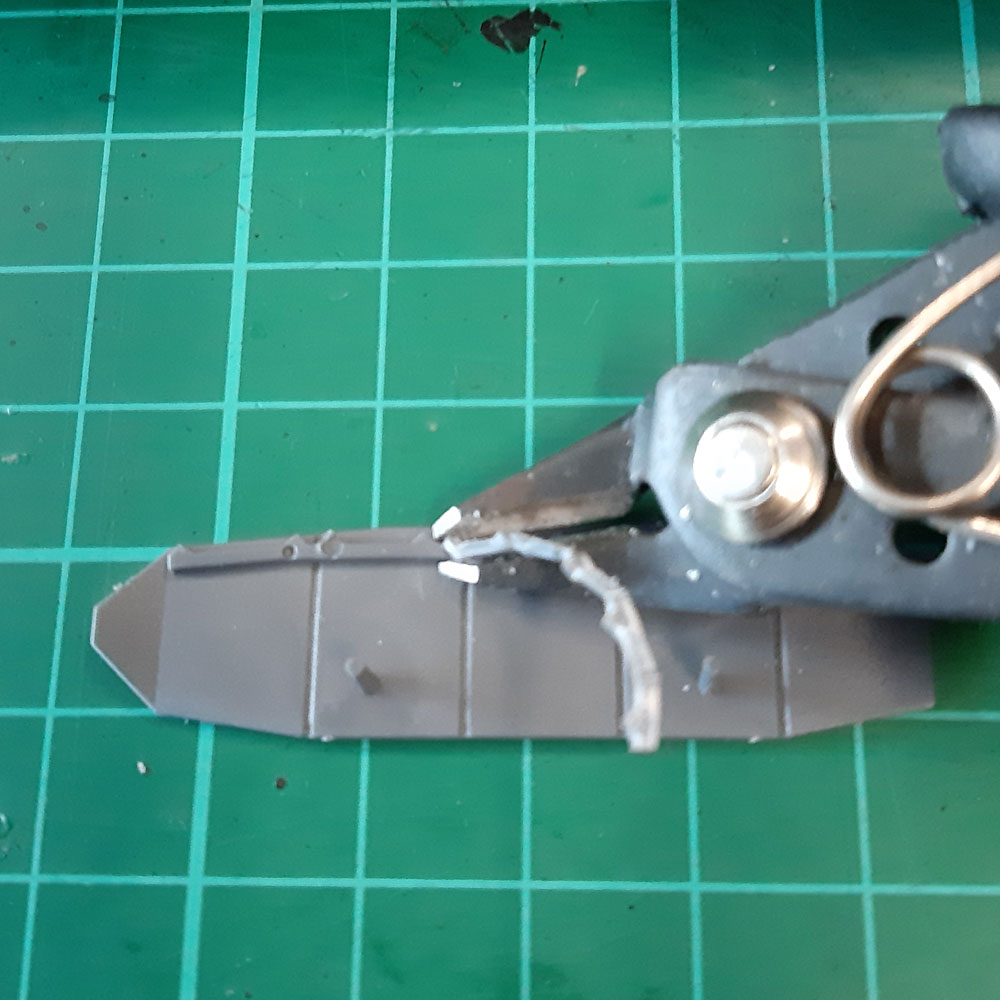
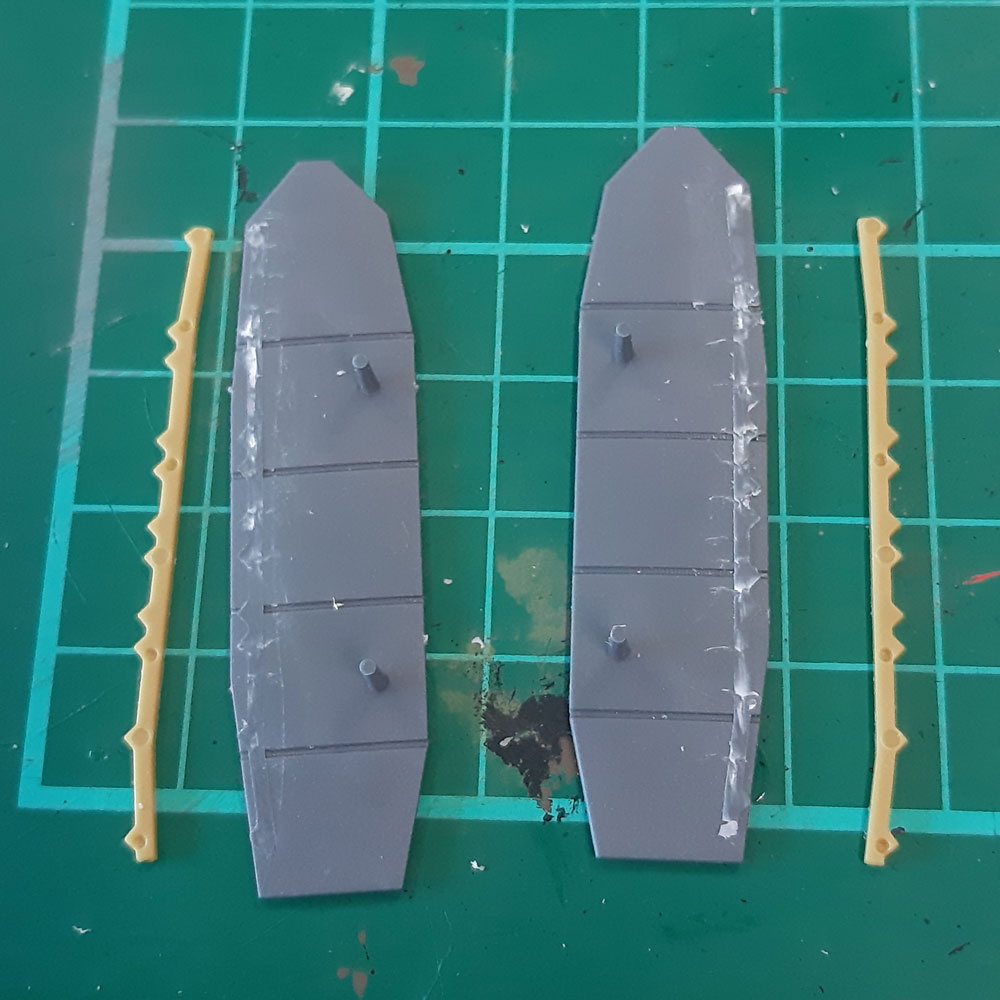
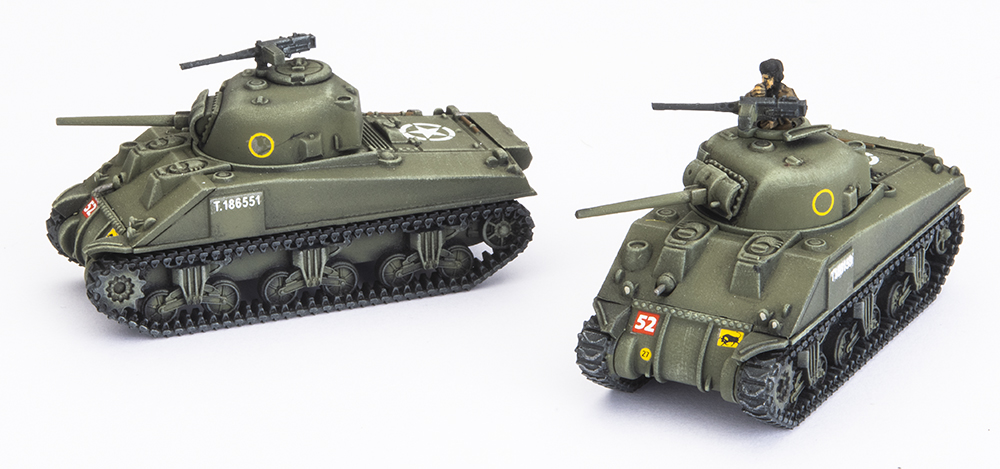
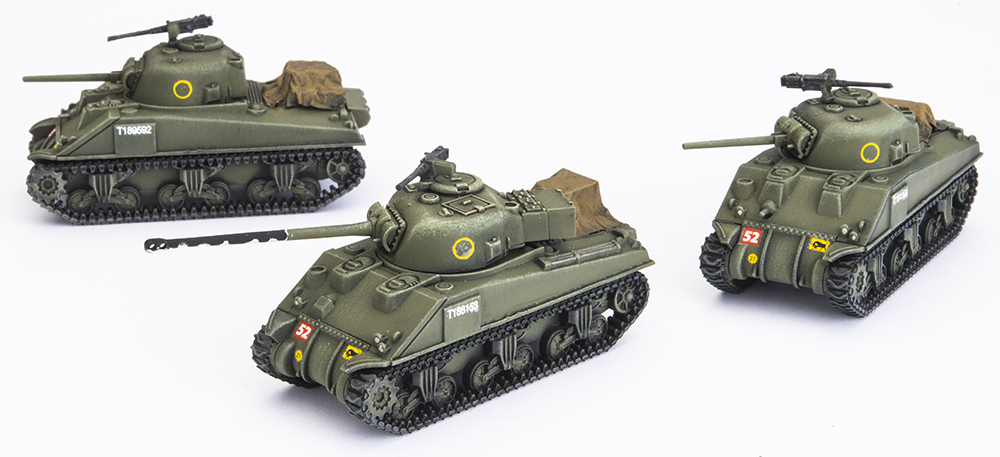
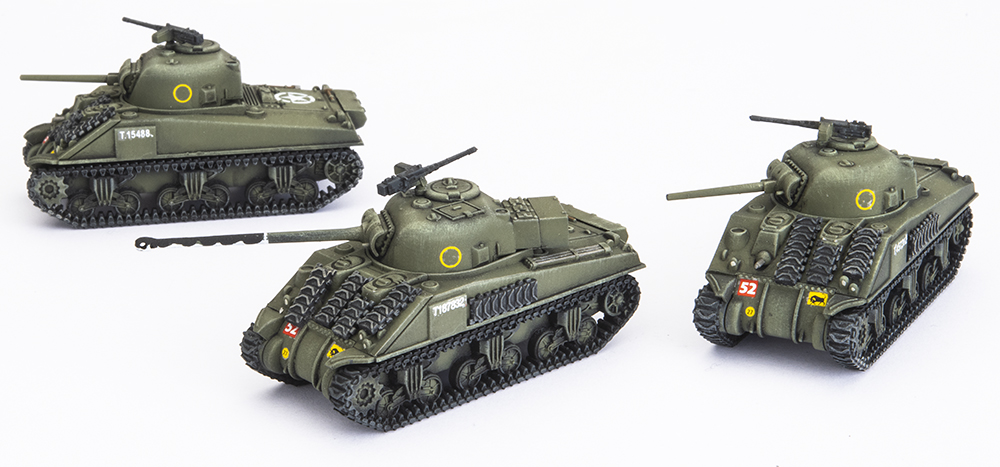
Wayne Rolls Out With Infantry and 88’s

Progress is on my Panzer IV Tank Company has reached a climax. I’ve completed the last two units I need to bring my force up to 100 points (well, actually 99 or 101 points).

The first new unit is the Armoured Panzergrenadier Platoon (see page 50, D-Day: German). This unit consists of seven MG42 teams, a Panzerschreck team, and four Sd Kfz 251 half-tracks. I also plan to run them equipped with Panzerfaust anti-tank weapons. Most teams have one miniature armed with the Panzerfaust.

These are made from the plastic Panzergrenadiers that come with the Starter Army Deal. However, as I actually also split a Hit the Beach with Victor, I have a lot of these guys, so I may have mixed them up a bit during clean-up.

For the half-tracks I went with a green only camouflage to keep them a little different to the tanks. I painted the vehicle crew separately and glued them into the half-tracks before varnishing.

The second new unit is an 8.8cm Heavy AA Platoon (see page 65, D-Day: German) and consists of a pair of 8.8cm AA guns. I keep these pretty simple and didn’t bother with any camouflage. I painted the crew separately, then glued them to the base, before texturing and painting the bases. I placed the guns on the base, but not glued to work out where I could place tuffs. I didn’t want to place any tuffs where the gun might go, which would make it hard to glue down later after the flocking was done.

Afterwards I realised I had painted one too many crew, as I only need to place five crew on each gun. I had painted six, forgetting the seated gunner in my count. One less crew would have made it a little easier to position the gun on the base, but in the end it fitted anyway.

~Wayne

The Raging Bull of the 11th Armoured!

Phew! That is a lot of Sherman tanks to have finally finished and I can tell you I feel a real sense of accomplishment about how they look, especially when I put them on the table alongside my M10s and Stuarts. It is starting to look like a really legitimate army.

First up is my HQ Platoon – two Sherman tanks, easily identifiable thanks to their fairly clean look, no stowage, and (obviously) the Company Commander sitting up high, talking on the radio.

Next is First Platoon, once again looking clean and tidy, with Allied Stars on the engine decks of the two 75mm armed Shermans. I am really pleased with how the counter-shading of the Firefly 17 pdr guns turned out.

Second Platoon has stowage on the engine decks to help identify the unit. These were made by gluing stowage items to the deck, then pressing a piece of aluminum foil over and super gluing it in to place.

The Third Platoon knows that there are some nasty tanks lurking among the other Big Four armies so have added extra track links to the front of their tanks in the hope that it will help slow down a high-velocity round.

Last, but certainly not least, the Fourth Platoon is clean as well, but instead of having the Allied Stars on the engine decks, they are on the turrets of the 75mm tanks.

Like the rest of my models, I’ve had a few decal issues that are really exacerbated by the flash photography here at the office, but damn (if I do say so myself) the colour palette of the yellow 11th Armoured Division Markings, Bridge Weights and Squadron Markings, with the splash of red from the Regimental Marking along with the white from the Stars and Serial Numbers really add to the whole look and feel.

Looking at the whole army sitting in my tray here at work there are a couple of things I would have done slightly differently with the benefit of hindsight, but as a whole it looks really good and I cannot wait to tackle the Carriers, Churchills and Guns (and Infantry) to get the first wave finished.

~Chris

Wayne’s Panzer IV Tank Company Progress Report

With only a month or so until my deadline of getting 100 points finished in time for the release of D-Day: German, I think things are going well.
I have now finished my four tank units.

Panzer IV Tank Company HQ
2x Panzer IV
Panzer IV Tank Platoon
4x Panzer IV
Panzer IV Tank Platoon
4x Panzer IV
Tiger Tank Platoon
2x Tiger
That’s 79 points already!

As you have seen, if you are following our bigfouroflatewar Instagram account, I’ve started on my Armoured Panzergrenadier Platoon. I’ve got the Sd Kfz 251 half-tracks ready for crews and have the infantry teams underway.

After that there is a pair of 8.8cm AA guns and crew to complete the force.

I’m quite pleased with the tanks, and I’m looking forward to painting some more. I thought I might paint another four Panzer IVs that I can swap out for the Tigers when I feel the need.

You can check out Wayne’s first platoon of Panzer IVs here…

Mistakes were made
I discovered a couple of things I would do differently. First off, when assembling your Sd Kfz 251 half-tracks glue the drivers in before completing assembly. Secondly, don’t try and trim decals after you have removed them from the backing paper while wet, they are slippery and hard to cut.
~Wayne

I call them Achilles!

It has been a while since I actually finished anything, primarily because I decided to try and plow ahead and finish all of my Shermans and M10s in one great big push… I both succeeded and failed; I managed to get a lot of work done on my Shermans, but at the same time got a little bogged down as I wasn’t getting that emotional boost by actually completing anything. To get that quick hit of positivity I decided just to crack on and finish my tank destroyers.

I am really pleased with how the whole platoon turned out and whilst there are a couple of elements I could have improved on; mainly some silvering on the decals – poor execution on my part. I do love how the other aspects of the models came out, especially the little stowage touches and shells sitting in the ready ammo stowage.

Time to make the final push on my Shermans and get those bad boys ready for the table because after that I just have a single battery of artillery to complete and I will have 100 points finished and ready for battle.

~Chris

Wayne’s First Panzers

It took me a while, but I have my first unit done for my Big Four Of Late War German force. I really enjoyed painting these Panzer IV tanks, and had a bit of fun modifying a few of the Schürzen plates. The haphazard spray-gun squiggly line camouflage applied by the 2. Panzerdivision tankers was an interesting challenge, but I think it has come out OK.

I painted these first with a Dark Yellow airbrushed basecoat, then a black magic wash (a mix of water, floor polish, and Indian ink), then airbrushed the flat panels with the base colour again, leaving the darker areas around the details. The green and brown camouflage colours were then applied with my airbrush as thinly as I could. The details like tools, tracks, and tyres were painted, decals added, before each tank was given a drybrush of Vallejo Model Color Buff.

Next, I’ll paint my the second Panzer IV Platoon. It will get the same treatment.

~Wayne

The Big Four Detour: Panzerschreck 2019 Report

Every year members of the New Zealand Studio travel down to sunny(ish) Palmerston North for the worlds longest running Flames Of War / Team Yankee tournament. This year the Big Four embarked on a road trip whilst other members of the team took the expedient option and flew.

The road trip down featured the customary stops at various model and gaming shops along the way, where some mistakes were made! At least there were no road closures resulting in 2-hour detours (unlike the last two years!).

Panzerschreck is normally a doubles event and under Team Yankee it was decided a force should contain a minimum of two Formations, using one Force diagram as the basis for the army. Wayne and Victor paired up, using West Germans and Israelis, whilst Casey and Chris teamed up with their Soviet and Czechoslovakian armies. The combined forces could be up to 140 points with no prescribed way as to how they are split.

Over the weekend we were fortunate enough to play some really great opponents, as well has facing off against some tough armies. Of course, Panzerschreck is known for being a hard but friendly event so this was no surprise.

In addition to the gaming activities during the day, in the evening we would retreat back to Evan’s (our NZ based sculptor) house for some post game debriefs and some boardgames.

Before we knew it the weekend was over and it was time to return to Auckland… of course we made time for a few more stops, including a quick visit to the New Zealand Army Museum at Waiouru.

To check out some of the armies and games, click on the thumbnails below