And we are back…. we gathered the team for another session live on Twitch. Watch whilst you hobby, and don’t miss the chance to join us on our next one by heading over to the Battlefront Twitch Channel…
Hobby and Paint Live – 23 April
The Big Four Of Late War, otherwise known as Battlefront Miniatures Studio Members Victor, Casey, Wayne and Chris sat down to hobby together on a Twitch Live Stream, answer your questions, and just talk a little smack. Hobby along with them.
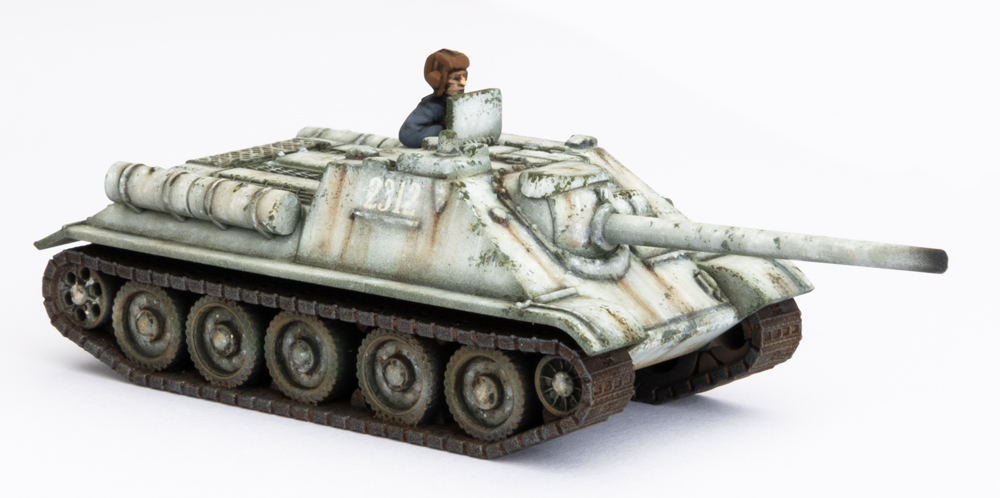
Casey’s Tank Killers
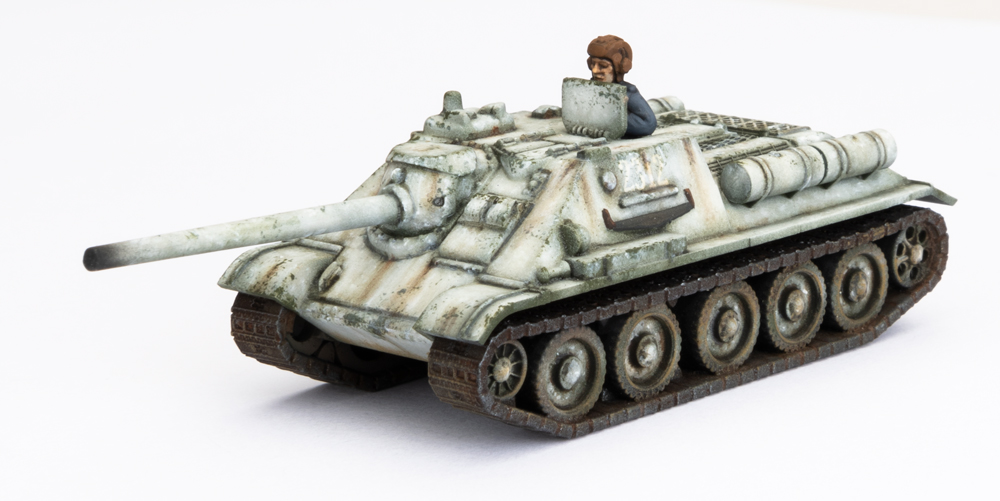
 I’ve had my SU-85’s almost finished for a few weeks now, and managed to spend some time last week doing the finishing touches like the saws and exhausts.
I’m very happy with these have come out. When I was painting them I though I had gone a little bit heavy with the final white oil paint step and thought that I had lost a lot of the colour depth that the earlier stages added, but the matt varnish brought it all together and darkened out greener areas and added some of the contrast back in.
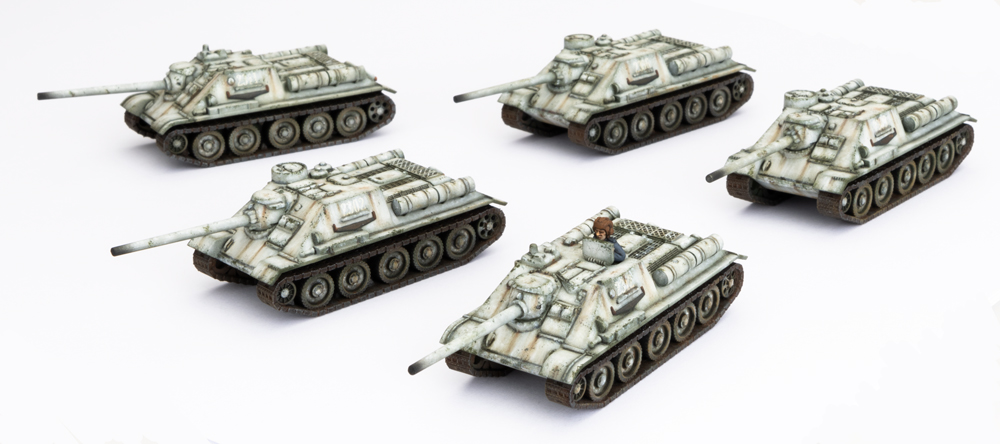
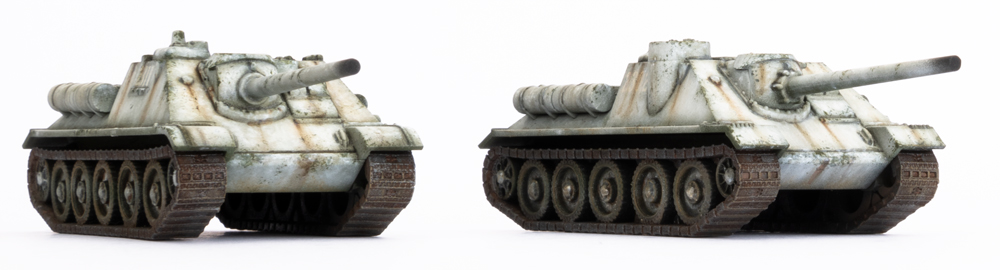
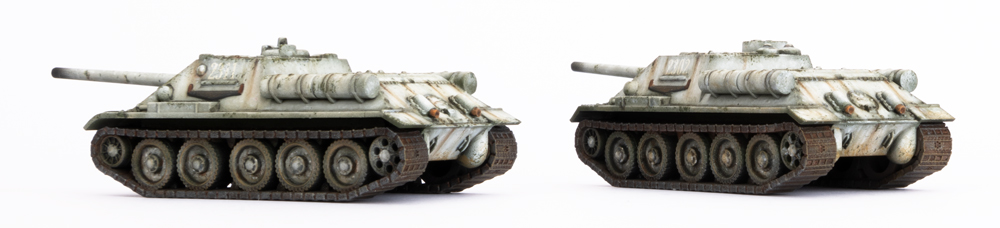
For those of you with eyes for details, you’ll notice that there is a mix of SU-85s and SU-85M tank killers here. I deliberately painted a mix of models for 2 reasons.
1. I thought it would be more interesting to paint slightly different models.
2. It fit my overall theme of a cobbled together regiment of whatever was found at the depot.
Besides, they look so similar that I feel comfortable fielding them as either/or and will just tell my opponent what they are on the day. With these completed I’ve now started working on the core of my force, my T-34s, and should have the first platoon finished in a couple of weeks.
~ Casey
The Heavy Hitters Battle Report
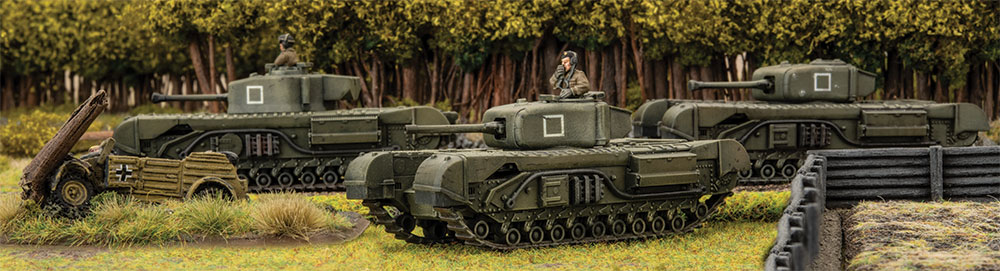
 With the D-Day: British Live Launch coming up tomorrow, it seemed like a perfect excuse to hang around one afternoon and play a game. Needless to say Chris was anxious to get his Churchill Armoured Squadron of the tabletop for its first game. Casey quickly volunteered to play against him as they have a long running gaming rivalry / partnership that stretches back about 15 years. Casey also saw it as a great change to dust off an old German army that had been sitting on the shelf and take it out for a spin!
The Forces:
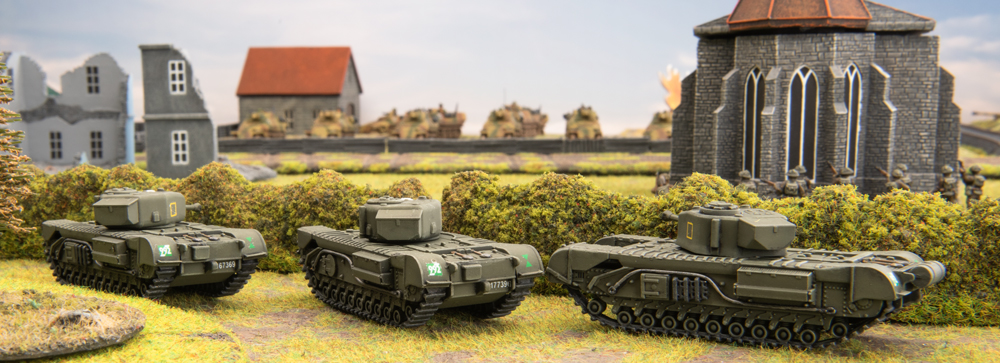
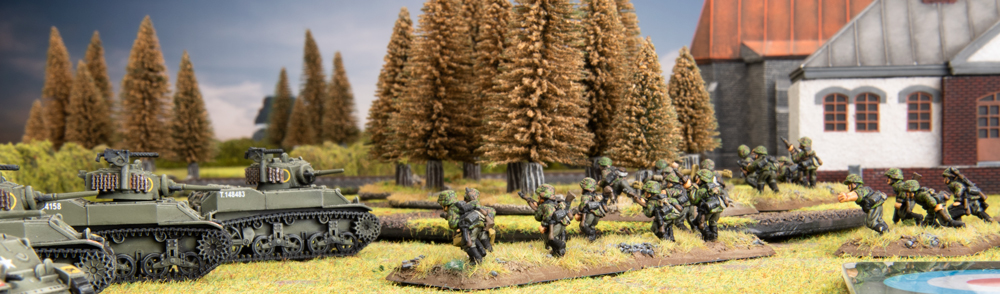
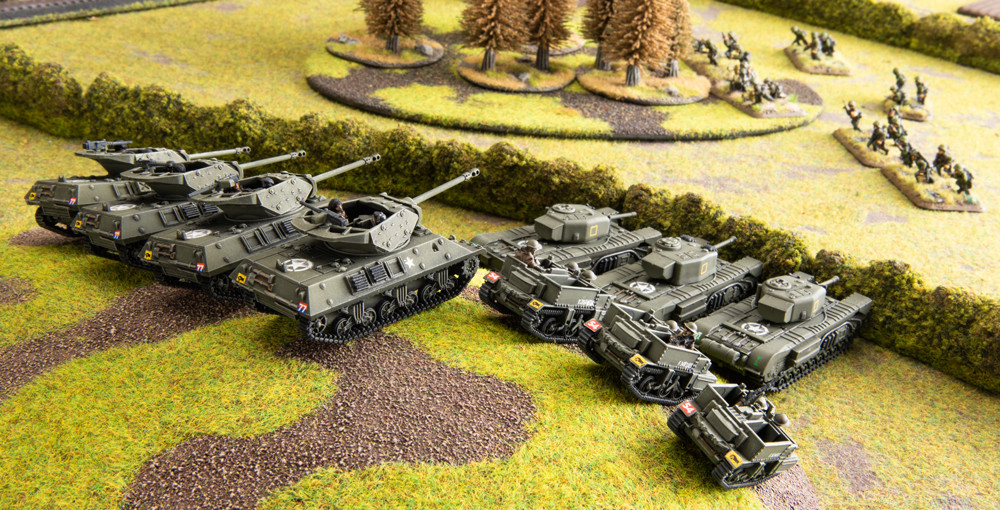
Chris had just finished his Churchill army the week before so it was no surprise that the core of the force was based around an HQ and two platoons of Churchills. Since he never leaves home without some M10s they were an obvious choice, especially since he knew Casey would have Tigers. Rounding out the force were Stuarts, Infantry, Carriers and Crusader AA (a cheap option to pad out the Formation and a useful way to cut down infantry).

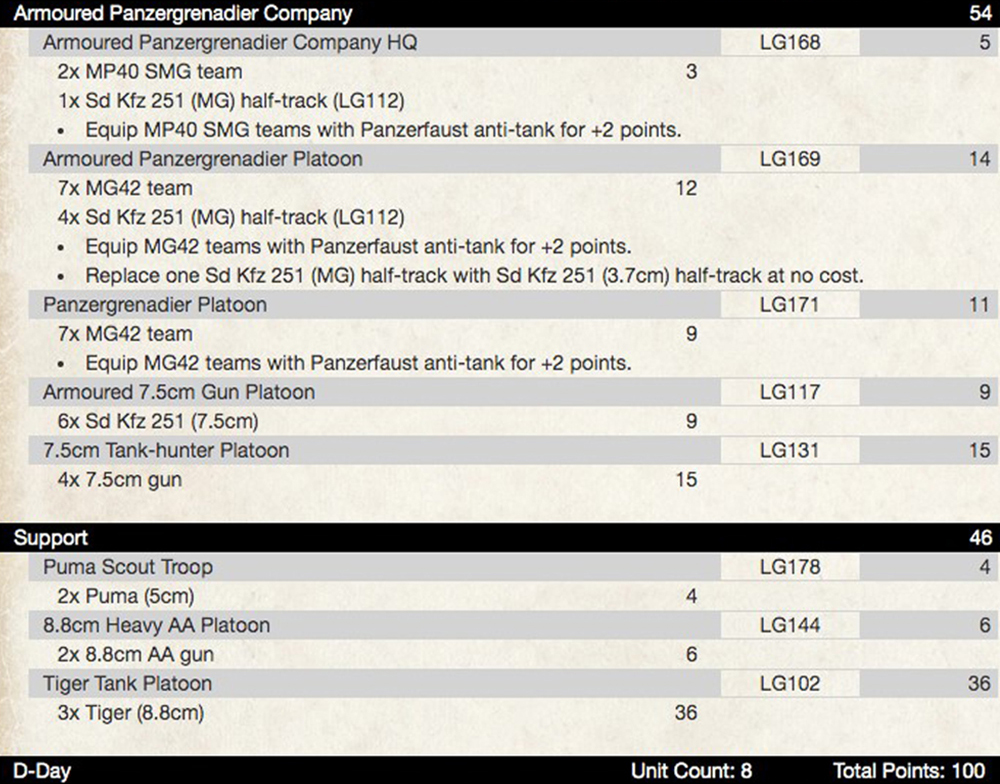
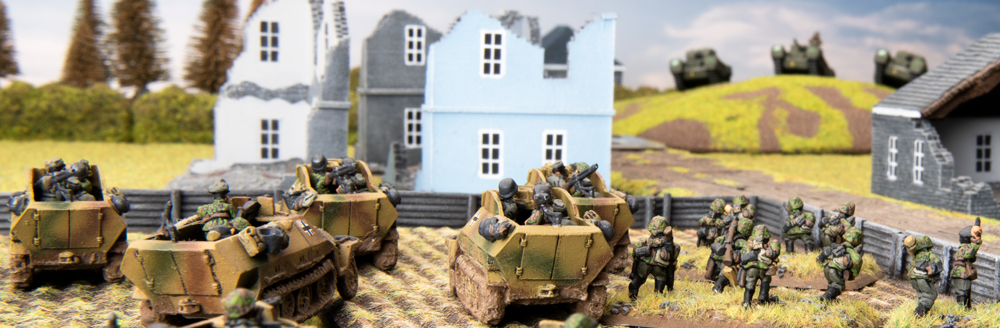
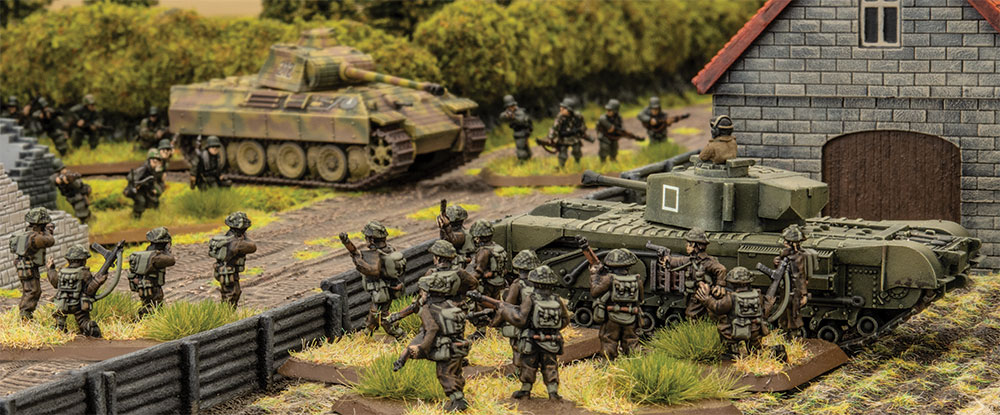
Casey went for a Panzergrenadier force, painted in an SS scheme, but using the normal D-Day: German book. The list was packed with heavy hitting guns including 75mm Anti-tank guns (PaK40s), 88s and Tigers, as well as a local favourite, the Sd Kfz 251 with 75mm cannon.
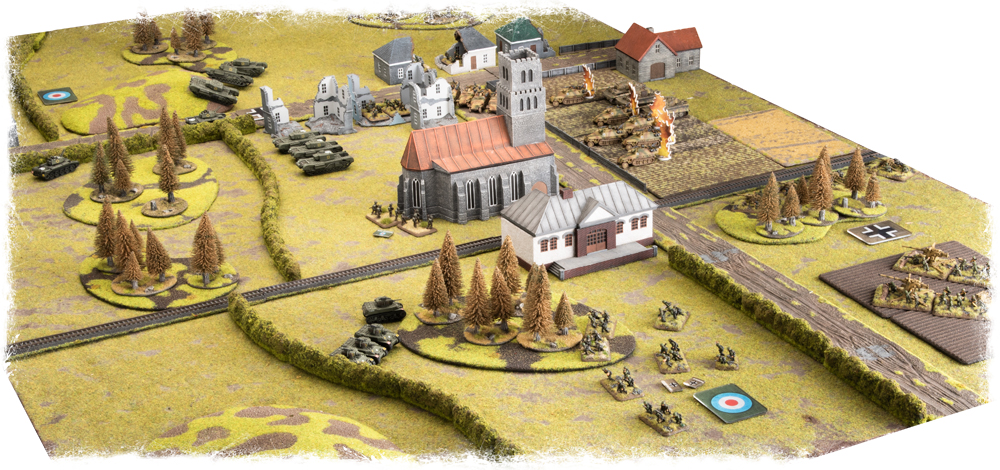
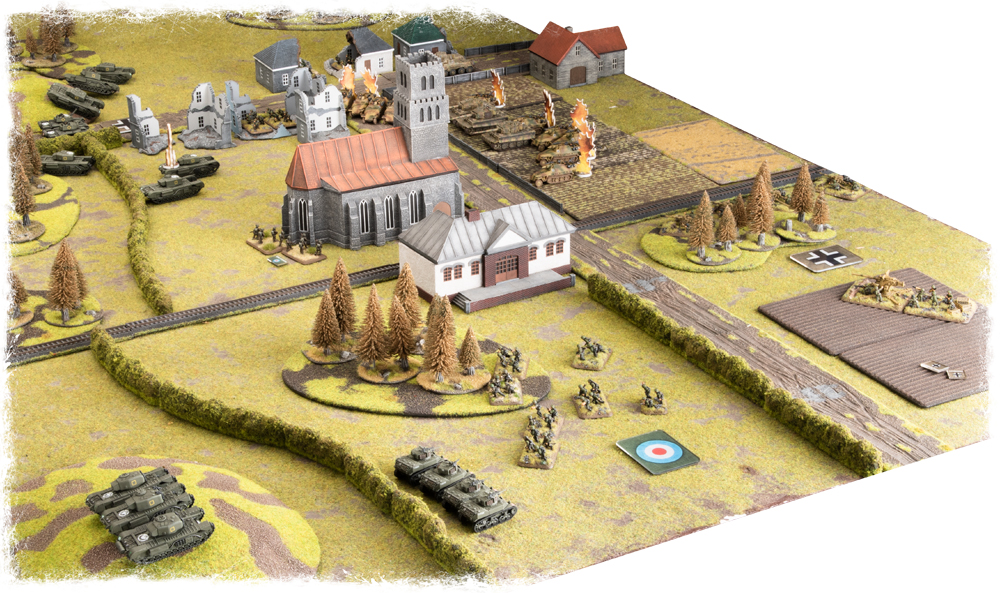
Setup and Deployment:
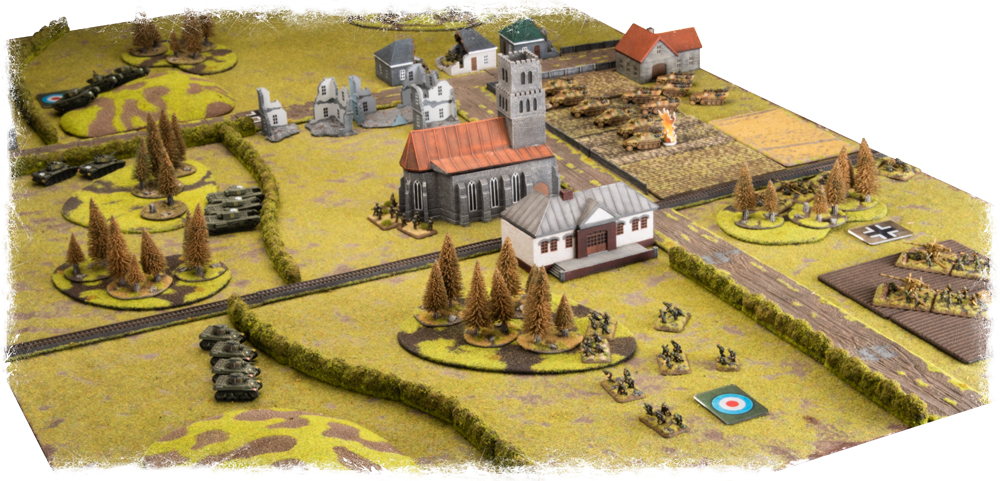
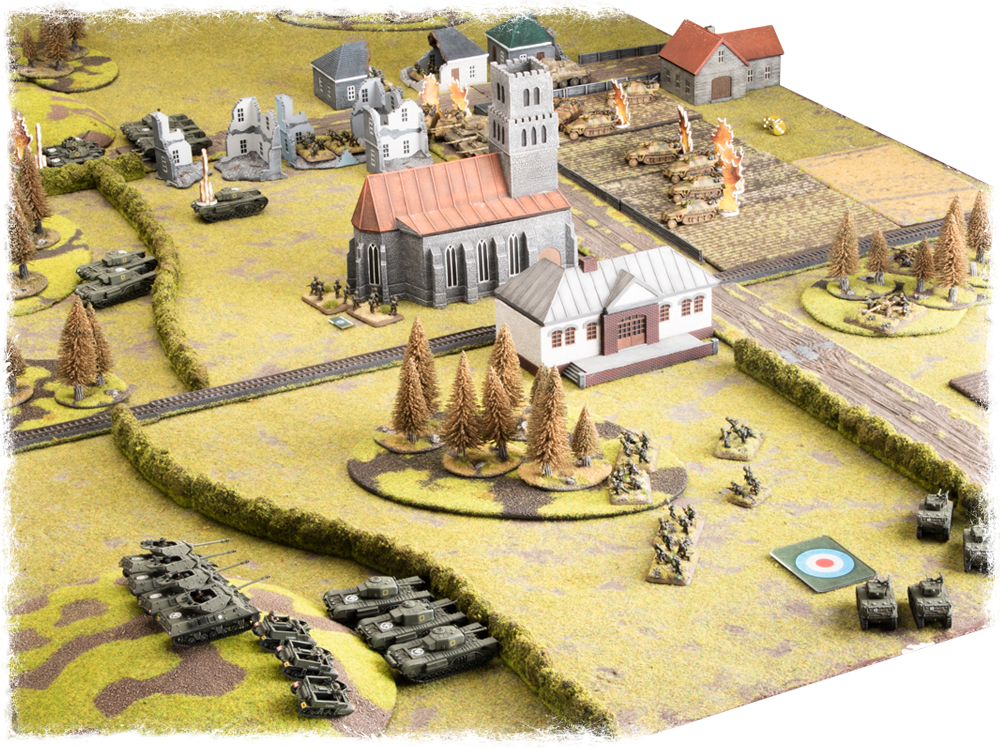
The table was set up with a small, rather ruined village off set from the middle of the table, surrounded by roads, woods and hedges. This meant that there were plenty of fields of fire, but they were often limited, and advancing troops could generally rely on some cover.
The mission selected was Dust Up, so Chris deployed in the left corner, whilst Casey had the right corner.
 Casey’s Plan:
Normally I’m quite a defensive player, but against Chris’ Churchill list I think I’ll need to be more aggressive and push towards the far objective before Chris gets too many reserves. Hopefully this will disrupt his plans so he has to not attack one of my objectives with the majority of his force.
My plan is to hold my back objective with the Panzergrenadier Platoon. On the other flank I plan to push up through the ruined houses with the Armoured Panzergrenadier platoon, use the Sd Kfz 251 (7.5cm) half-tracks to cover them, and ready to hit the objective once my Tigers turn up.
Chris’ Plan:
My plan was simple. Hold the rear objective with my HQ platoon as the CS tanks and their 90mm guns can engage targets anywhere on the board (with indirect fire). In the centre, my infantry will push up to try and take the church to split the board in to two halves and make it difficult for Casey to send troops back to defend the objectives.
Whilst this is happening my tanks will hook around to hit the back objective. Any reserves that turn up will be well placed to support, or with a quick dash, could head over to reinforce my objectives.
Turn 1:
 Casey’s force dashed laterally along the table, seeking the cover of the fields and ruined village, whilst his guns went to ground and waited for targets. His Panzergrenadier Platoon advanced on foot to secure the back objective.
Chris pushed up his Stuarts to start heading for the same objective, hoping to catch the infantry in the open and not dug-in, whilst the infantry dashed up the hedge planning to head for the Church next turn. The Churchills supporting them engaged the 7.5cm halftracks, managing to bail one, whilst the HQ bombarded the dismounted Armoured Panzergrenadiers, killing two teams.
First blood to the Churchills!

Turn 2:
Casey’s Armoured Panzergrenadiers un-pinned and continued their advance up the road, using the ruins for cover. In the middle, the halftracks opened up on the advancing Rifle Platoon with everything they had, but only managed a single kill. The 88s and PaKs tried to knock out some tanks, but found the Churchill armour too tough to penetrate at long range. Meanwhile on the other flank the Panzergrenadiers found themselves too concerned with the advancing Stuarts and failed to dig in…
With infantry in the open the Stuarts blazed away… and only got one hit (which was saved). The Churchills failed their Blitz move so moved up to the hedge line but failed to achieve anything with their fire, whilst the infantry pushed up to the Church, planning to push forward and hit the anti-tank gun line in a couple of turns.
All round it was a fairly unspectacular turn, but did the ground work for both sides to keep the pressure on.
Turn 3:
With no sign of Reserves, Casey decided to be a little cautious this turn, finally digging in his Panzergrenadiers, advancing his other platoon further up the table and absolutely hosing down the infantry in the Churchill, killing two and pinning the Platoon.
Failing to unpin his infantry, Chris found himself with limited offensive options, especially since he too failed to get Reserves. The Churchills pushed up and engaged the 7.5cm halftracks, knocking out three of them, reducing Casey’s options to defend his PaKs if the Rifle Platoon decided to move forward and hit the PaKs, or flank the infantry via the Train Station. The Stuarts kept threatening the back objective but failed to actually do anything substantial.
Turn 4:
Tigers! Casey looked visibly relieved as he moved the Tigers on to the table. They failed to penetrate the tough armour of the Churchills – or more accurately Chris shifted the single hit on to the late Churchill and chuckled as he rolled yet another save. The PaKs and 7.5cm halftracks continued turning the church into rubble, killing another infantry team.
Chris brazenly left his Churchills in the centre of table, confident that the armour that had kept them safe would continue to do so. Their fire knocked out yet another cannon halftrack but failed to hit any of the PaKs. The HQ Platoon decided to advance and harass the infantry and Sd Kfz 251 halftracks, as well as securing the all important forward objective, but otherwise failed to achieve anything. The Stuarts shuffled around and continued to fire their MGs as fast as possible, but other than raining some brass on the ground they failed to even pin the Panzergrenadiers in front of them.
Turn 5:
BOOM goes the Churchill! Good dice can only keep your tanks alive for so long and eventually a high speed 88mm round (or two) punch through, killing one and bailing another. Casey also found his Pumas coming in from reserve and they quickly pushed up the road to distract the HQ Churchill Platoon, and prepare to threaten both objectives simultaneously. It wasn’t all bad news for Chris though as the late Churchill continued to find fire being moved onto it where its armour could easily stop PaK 40 rounds.
They say it is always darkest before the dawn and it was certainly feeling that way for Chris, but luckily a platoon of Churchills arrived to support the Stuarts, considerably changing the odds at that end of the table. Their combined fire knocked out an 88 (Casey would comment later that perhaps that platoon had been under utilised but hindsight is 20/20). In the centre the Rifle Platoon continued to hide behind the solid brick walls of the church and remained pinned down, the Churchills decided that Tigers would win any gun-fight and attempted to withdraw back over the hedge, although one did fail it’s cross check.
Turn 6:

The arrival of Chris’ Reserves pushed Casey into action, knowing that he was running out of time to overrun the defending forces. The Pumas stalked the Crusader AA tanks, knocking them out, whilst the Tigers tried (and failed) to finish off the Churchills in the centre. On the other side of the table things went from bad to worse as the 88 ran off, forcing the PaKs to try to push their way through the small woods to put fire down on the Stuarts and Churchills.
Chris was certainly feeling the pressure on the far flank (especially since he failed to kill anything with the combined fire of the two platoons) but he knew he had Casey on ropes on the other side as M10s and Carriers turned up to really double down on the poor Panzergrenadier Platoon sitting lonely and isolated around the objective. Despite all the fire they only managed to kill a single team, but with the stage now set for an epic Turn 7 assault, time was running out for Casey unless he could kill the Stuarts that were now within 4″ of the objective!
Turn 7:

Knowing that it was now or never, Casey launched a desperate attack on the HQ Platoon guarding the objective. The Tigers failed to kill anything, but the Armoured Panzergrenadiers still went in for the assault (after both of their flank shot Panzerfausts bounced off the Churchills armour!). Chris looked excited at the opportunity to gun down the infantry in the open, but was less enthusiastic when he only got three (yes 3!) hits. The infantry knocked out the two CS tanks with their ‘fausts and forced the remaining tank to back off. The objective was now in Casey’s hands, assuming he could keep it for a turn.
Of course it wasn’t all roses and chocolates for Casey down the other end of the table… Yes, he had managed to knock out a Stuart with the fire from the PaK 40s, but with so much incoming fire, and then a pair of assaults from the Churchills and Stuarts there was only so much the Panzergrenadier Platoon could do. They found themselves pushed back, leaving the Stuarts contesting the Objective at the start of the turn, and holding it at the end…
Chris (and the Churchills) Win!

Casey’s Thoughts:
Churchills are really tough, especially if your opponent only rolls 5s and 6s for armour saves (Chris literally chuckled as he read this comment by Casey). If the Tigers had done a bit more damage on turn 4 or 5 I would have been able to launch my assault on the objective a turn earlier.
One thing I was pleasantly surprised about was how good Panzerfausts are!
All in all it was a close, fun game to play. I think I’ll have to paint some Churchills up for myself at some stage.
Chris’ Thoughts:
I was probably (definitely) quite lucky with a few of my dice rolls here. I think Casey’s comments about being a defensive player probably cost him the win here. A bit more aggression, or just pushing up a team a bit further to contest the objective prior to the assault could have made all the difference.
Not sure I used my infantry particularly well, I had a plan for them, but in hindsight I could have just parked them on the objective and really lowered my mid-game stress levels!
I will say though… Churchills for the win! They really were awesome, and the ability to upgrade one model per platoon to the late version was excellent. Front Armour 11 leading the way definitely saved me a couple of casualties during the course of the game.
Everyone Needs A Stretch Goal…
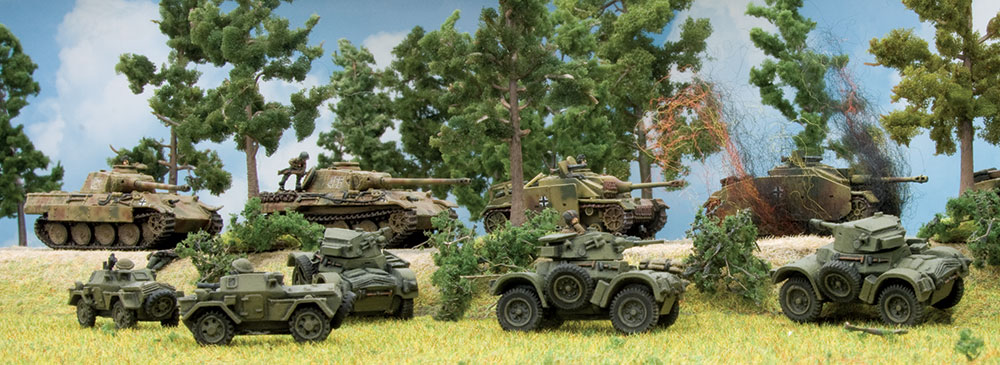
 With two companies of tanks already planned, as well as a pile of support options, I thought it might be fun to add an extra company to the mix, if for no other reason than I like the new plastic Daimler and Dingo models, but also because all the cool kids are running Armoured Car Formations I thought I might give one a go too!
There is no dedicated Armoured Car Formation in the book, but thanks to Command Cards we have the option for one and to my eye it looks pretty interesting. Haven’t played it myself but why let that get in the way of a little enthusiasm.
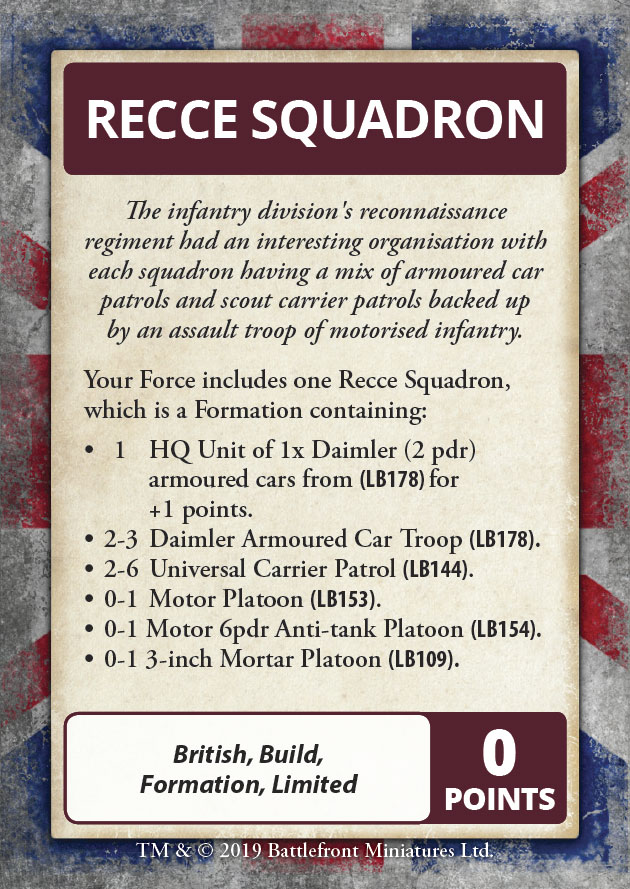 The Formation has an HQ Daimler, 2-3 platoons of Armoured Cars, more Universal Carriers than you can shake a stick at, and a small portion of ground pounders – a Motor Platoon, 6pdr anti-tank guns and a Mortar Platoon. The way I see it, there are Armoured Cars for some flash and dash, Carriers for sneaky-sneaky, whilst the units with legs can do a pretty decent job of holding an objective. It also gives a me a good reason to actually get my infantry painted (bonus points!). For around 30-35 points, depending on options and upgrades, I can get a Formation that has all the minimums, along with the guns, infantry and mortars. This still leaves me with plenty of points to run a second Formation, or a few “Black Box” support platoons (Shermans, Cromwells, Churchills etc) and some Divisional level assets too.
A quick bit of Google-foo led me to another reason why I need to build and paint this Formation… the 11th Armoured Division was supported by the Inns of Court Regiment, also known as the Devils Own. Where did they get the nickname, I hear you saying? Well, and this is where I turn to Wikipedia and just pull a “copy-and-paste”.
The Bloomsbury and Inns of Court Volunteers was reformed in 1797 during the Napoleonic Wars. It was shortly afterwards that the regiment gained its enduring nickname. During a review by King George III in Hyde Park in 1803, the King used his dislike for lawyers – particularly ones carrying arms – to name the massed ranks of the Law Association as “The Devil’s Own”. “It is understood that the King was in high health and excellent spirits at the time. When the ‘Temple companies’ had defiled before him, his Majesty enquired of Lord David Erskine, who commanded them, as lieutenant colonel, what was the composition of that corps? ‘They are all lawyers, Sire,’ said Erskine. ‘What! What! ‘exclaimed the King, ‘all lawyers? all lawyers? Call them the Devil’s Own, call them the Devil’s Own!” “And the Devil’s Own they were called accordingly.”
https://en.wikipedia.org/wiki/Inns_of_Court_Regiment
There is something appealing about unleashing an army of lawyers on an unsuspecting opponent!
So that makes three Formations from the new book that I am very keen to paint – each one gets to look different from the others, and each one will give me a very different gaming experience, even if I keep the supporting elements largely the same.
At this point I should probably stop digging through the book and Command Cards in case I find anything else interesting, and just starting painting some models…. Hmmm, some M5 half-tracks are awfully tempting to add as a Command Card to my Motor Platoon or 6pdrs!
~Chris
We Shall Be Worthy*
When I think about the British in Late War, I group their tanks in to (generally speaking) three different types; Shermans, Churchills, and Cruisers (Cromwells/Comets). With a Sherman force completed, and the Churchills underway and on the painting table, I am already starting to think about how I would build a force based around Cromwells.
I initially thought about painting up a Desert Rats force. Phil has had some success in the past running Cromwells with little red Jerboas on them, so they must be good. However, with the strong 11th Armoured Division feel to my army, and their distinctive yellow and black divisional markings looking so good on the tanks I didn’t want to break the colour/markings scheme. Luckily for me, the 11th were supported by the 2nd Northhampton-Shire Yeomanry and then the 15th/19th The King’s Royal Hussars, working as their Divisional Reconnaissance Regiments, so I could keep the theme running through all the models I paint!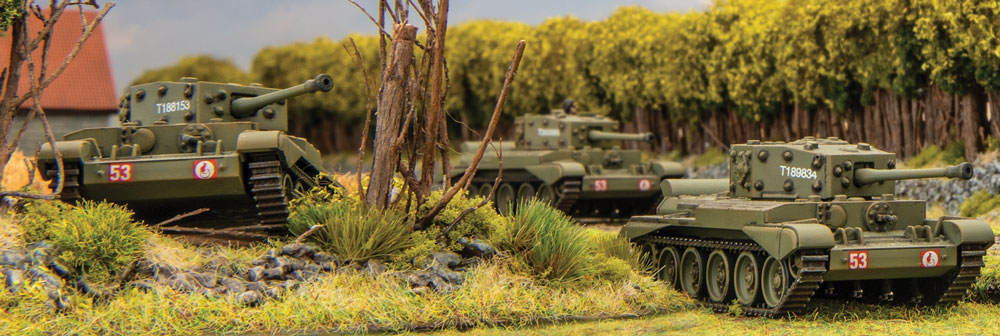
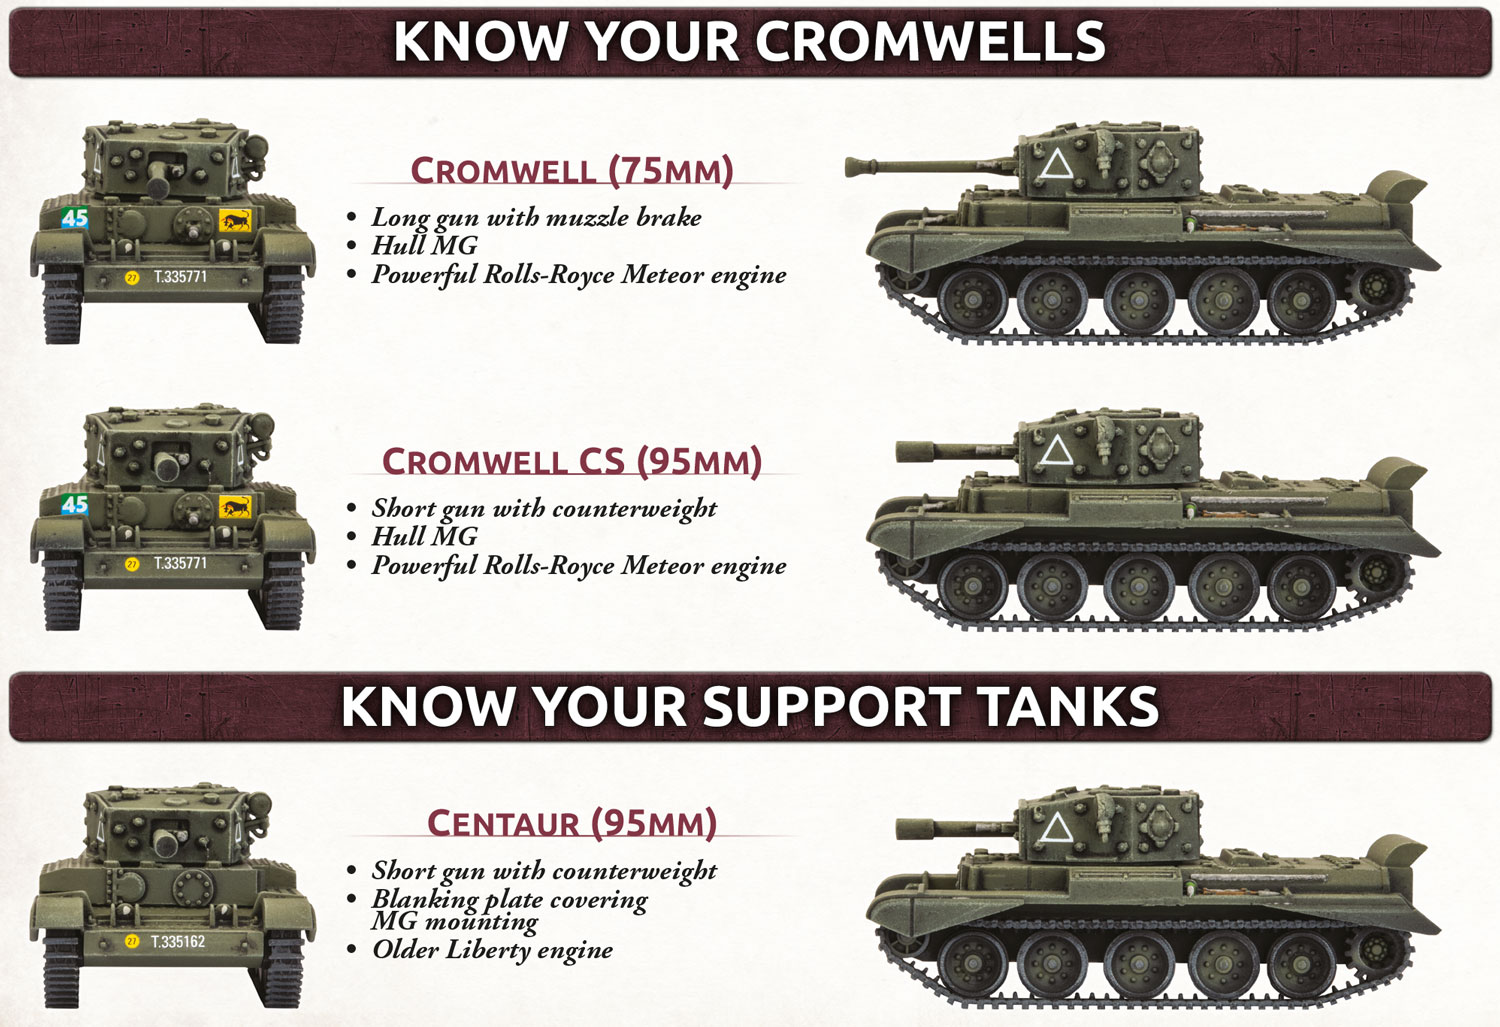
Looking at the Cromwell Armoured Recce Squadron list, it will be easy to start painting up the basics and building upon the models I already have! Starting with the HQ, much like the Churchill force, I can have a pair of Cromwell CS (95mm) tanks, along with a single Cromwell (75mm). This will give me some nice light artillery, and a small amount of painting variety.
I can then fill out the Squadron with four (or five) more platoons of three Cromwells, alongside a platoon of Stuarts and the always useful, Crusader AA platoon. All of this comes to 96 points, so doesn’t leave much left for Divisional Support, assuming I want to run LOTS of Cromwells!

Keeping my options open and looking back to the Desert Rats Cromwell Armoured Squadron you can build and HQ with two 75mm tanks and two CS tanks, and then up to four platoons of Cromwells, each with a Firefly included! A full-strength HQ, and four platoons, plus the Stuarts and Crusader AA do come in at an unfortunate 101 points, but by dropping a platoon you pick up enough points for a variety of support options. Sounds interesting!
So, where does that leave me now? Well, I am definitely going to paint up enough models for a full HQ and four platoons of three Cromwells, each with a Firefly. Here however (please don’t judge me) is where I am going to diverge from history, for the sake of having a nice looking and thematic force. I’ll paint the whole force in my usual way, but when it comes to the markings I am going to go a little rogue – the Cromwells will have 11th Armoured Division and 15th/19th The King’s Royal Hussars markings, with white triangles for the Armoured Recce Squadron. My Firefly tanks will get the usual 11th Armoured Bull markings (along with bridge weights and serial numbers), but that may be where I leave it, with no Regimental Flash or Squadron markings…
It is all a little hinky and the purists may not like it, but with this plan I get the best of all worlds. I can field them as the his historically accurate 15th/19th The King’s Royal Hussars, but I will also have the extra models so I can field them as a different Formation from the book – and when I have a painting plan for the D-Day: British book that is around 60+ models, what’s the problem with adding another four!
~ Chris
*Merebimur (We shall be Worthy) – the moto of the 15th/19th The King’s Royal Hussars
Touch Me, And You Burn*
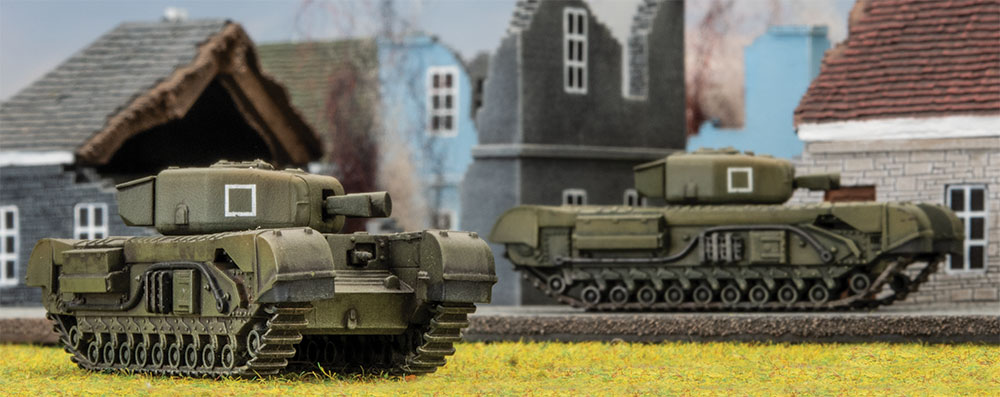
The upcoming release of the D-Day: British book has me looking over some lists I’ve never really thought about running before and the Churchill force, in Late War, is definitely at the top of that list. Looking at it, I’ve no idea why it’s never appealed to me in the past – the tanks have great armour, a reasonable gun and have that tendency to strike fear into their opponents.
A Churchill Armoured Squadron can field plenty of Churchills, and at 18 points per platoon, or 20 if you upgrade one to a (late 75mm) version, you can easily fit 4 platoons in a Force whilst still having a few points left over for some supporting elements. I’m thinking that in this particular case that is a bit of overkill and I’ll just paint two platoons, I can always paint up a 3rd one later after I’ve played a few games. This also means I have plenty of points available for a full-strength HQ platoon along with a couple of Churchill CS (95mm) tanks, and one Churchill (late 75mm).
With so many models of Churchills available in the list, it’s easy to get confused what each one is for…. The CS tanks give me some light artillery and can also still knock out Panzer IVs and guns with direct fire. The Churchill (late 75mm) tanks in the HQ and platoons have the advantage of 2 extra points of front armour taking the tanks up to FA11 – my whole plan for these is to try and move hits over to these tanks where possible, thereby minimising casualties, hopefully. There are also Churchill (75mm) tanks and Churchill (6 pdr) tanks – these are the same tank, they just change their guns – the 75mm gives AT 10, FP 3+ and Smoke, whilst the 6 pdr has an extra point of AT, but drops the Firepower by a point and looses smoke. I’m going to paint up one of each in my platoons mainly for looks, but how I choose to field them will be something I need to figure out after playing a few games.
Inside the Formation I’ll also take Stuarts and Crusader AA tanks. They are both useful, cheap and help fill out the Formation making it a little more durable. Rounding out the army will of course be M10s (don’t leave home without them!), Carriers (gives me another Scout and Spearhead unit, and I only just finished painting them!) and a Rifle Platoon (hold your laughter, I am going to get around to them!).
On paper I feel like this list has a bit of everything, it can defend (if forced too), should be strong on attack, can deal with infantry and tanks and has enough models to let it hang around even once it starts taking a few casualties.
If I feel like adding more Churchill based goodness to the force, I can always drop out the infantry, M10s and Carriers, and replace them with some Crocodiles and maybe even AVREs!
~Chris
*Fear Naught Qui s’y frotte, s’y brule (Touch me, and you burn) – the moto of the 9th Royal Tank Regiment
Upgrading from Fortress Europe to D-Day: British
With the D-Day: British book due out shortly, I thought I’d take a quick look back at my original painting plan and then have a quick review of what the next few months might hold for me.
My original list was simple, lots of Shermans along with some supporting elements. You can find the list here… With the Universal Carriers finished recently I can happily say that I actually managed to get the whole 100-point force painted. I even managed to paint up the Churchills that came in the army box and whilst they have been pretending to be earlier models, with the release of D-Day: British they will be able to hook up their trailers and turn into Crocodiles. The Typhoons weren’t on my original plan either, but the idea of painting something different (i.e. not green) really appealed.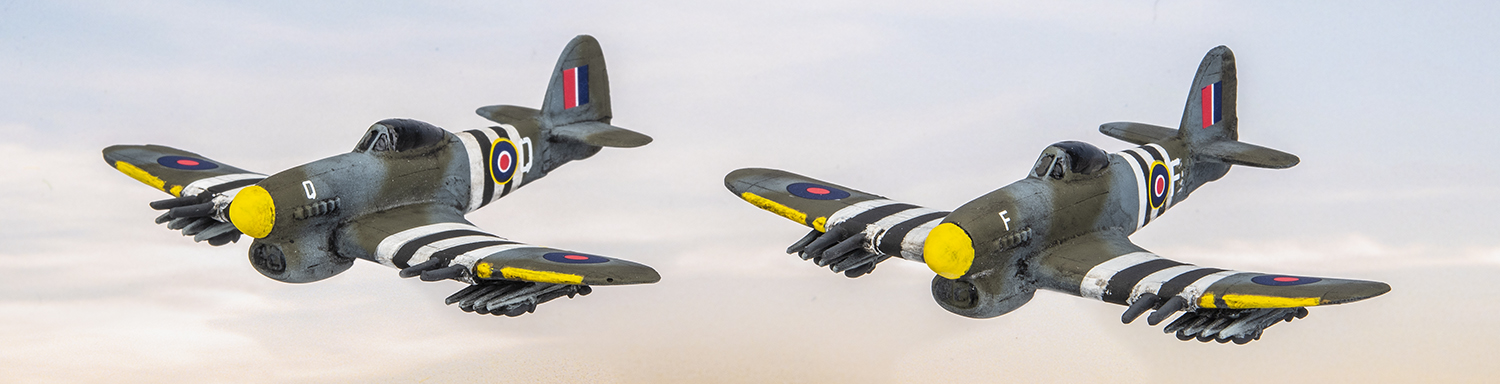
Where I did fail was the infantry – whilst these were not in my initial painting plan, I had good intentions to paint up a couple of Motor Platoons. Painting the artillery crew for the 25 pdrs I wasn’t entirely happy with how they came out, so I kept putting the infantry further down my to-do list. This is something I will have to rectify.
From a gaming perspective also realised that my 3 tank platoons were just too fragile. Part of me thinks I should grab another 4 Shermans so I can max out the platoons, but the other part of thinks that with Cromwells and Churchills coming in the D-Day book, I should just paint those instead.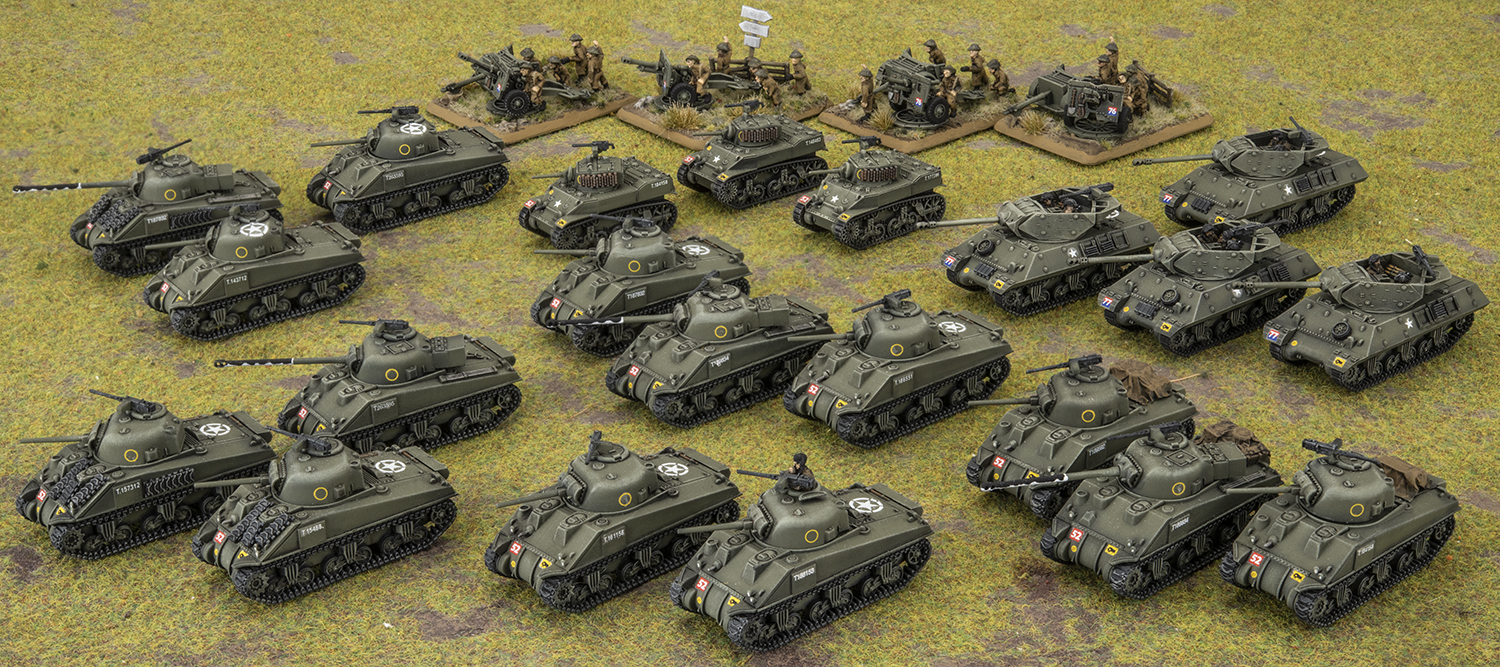
So now that I have opened the door, what am I likely to be painting from the D-Day: British book, other than some infantry!
First up will be Churchills. A small company of these, along with some AVREs, will look really interesting, play quite differently from my Shermans, and be a nice self-contained project that works alongside everything else I already have.
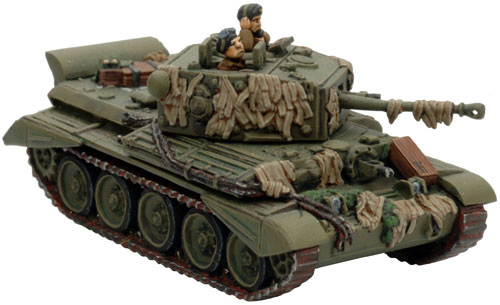 Next will be the Cromwells. In my mind I think of them as fast Shermans, but I am sure that once I get them on the table the differences in stat lines will make me have to play them quite differently. I’ve also wanted to build a Cromwell force ever since James upgraded the old resin and metal models with individually sculpted versions. I’ll need to look into how to replicate his hessian strips!
After this I should probably work on the infantry… but it is highly likely I’ll be doing some more vehicles. A Daimler / Dingo Recce company (Command Card) is really appealing, perhaps a support Churchill Formation from Fortress Europe, or some 6 pdr AT guns, definitely some Crusader AA, maybe some Bofors too, and perhaps another platoon of Carriers… Of course, there are also Paras!
So many choices!
~Chris
Carry On Sergeant
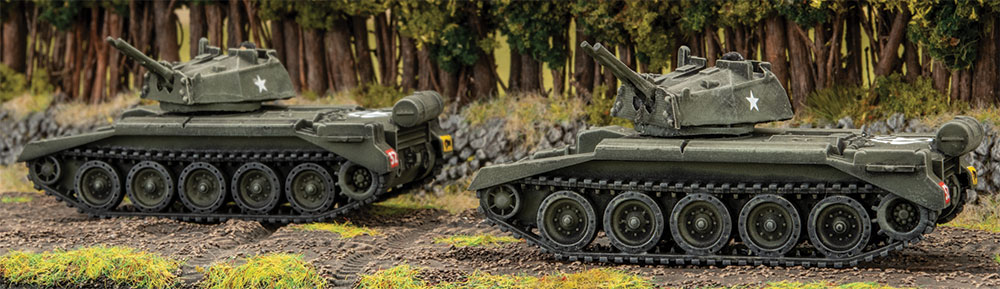
It feels like it has been a very long time since I’ve put up a post talking about what I’ve been painting and with such a big gap it would make sense that whatever I’m showing today should be impressive, have lots of models, and be very complex!
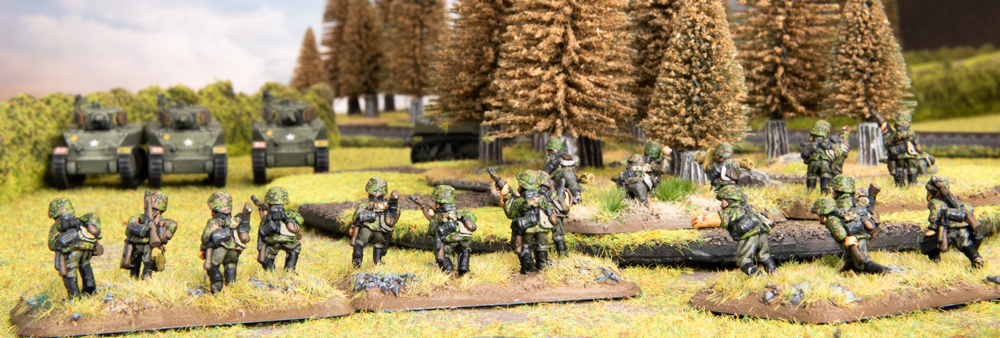
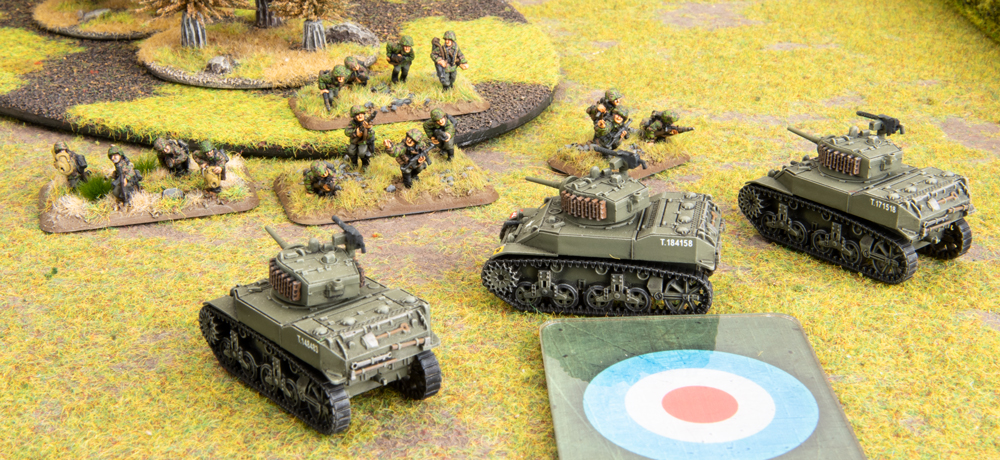
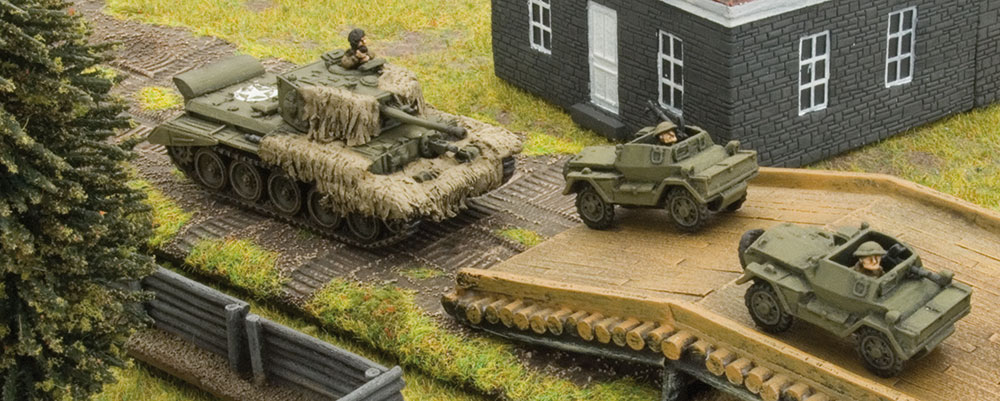
Yeah… well… about that. Today I am happy to share that I have finally finished my Universal Carrier Platoon. Yep, that’s right, a whole Universal Carrier Platoon of three vehicles. Now it isn’t that these were hard models to build or paint (quite the opposite in fact) but rather I’ve kept having other projects pushing in front.
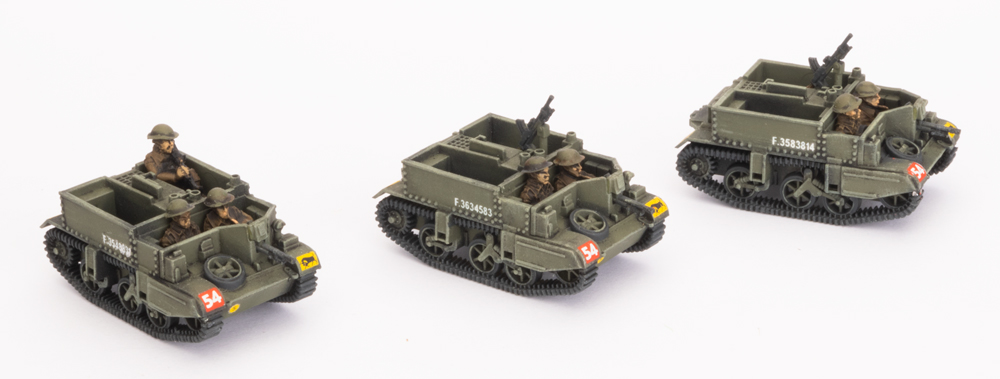 These three models are a definite must have in any British force so I really should have knocked them out a bit sooner but I was getting distracted by all the tanks.
 Now that they are done I can look forward to painting some more Churchills – everyone needs a company of them right. Of course I will need to paint up another Platoon of Carriers at some point because the D-Day: British book and Command Cards have some interesting options that mean I will want another unit.
~ Chris
Two (or Three Days) In The Hutt
Last year at the New Zealand National Wargaming Convention, I spent most of the weekend hanging out with “the boys from the Hutt Club”. A number of us were playing Team Yankee and over a few drinks I found myself asking what they were planning to do for ValleyCon (their flagship event they organise each year) and Team Yankee.
To my pleasure, the idea of 100 point games on 8’x4’ tables was thrown in to the ring. With a cry of “let me ask my wife, but I am definitely coming” I found myself committed to heading down!
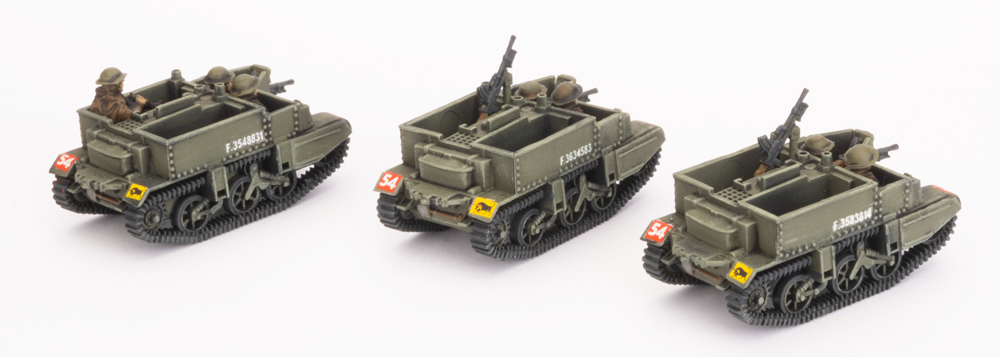
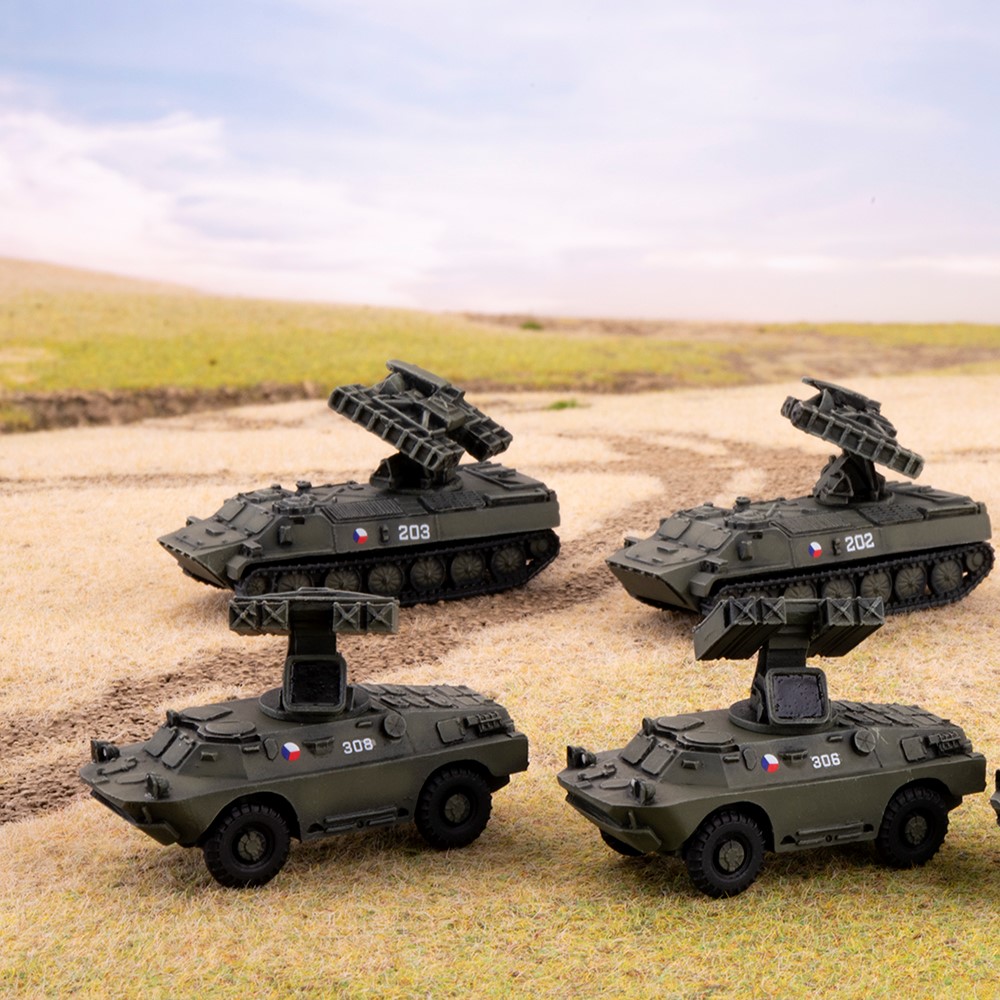
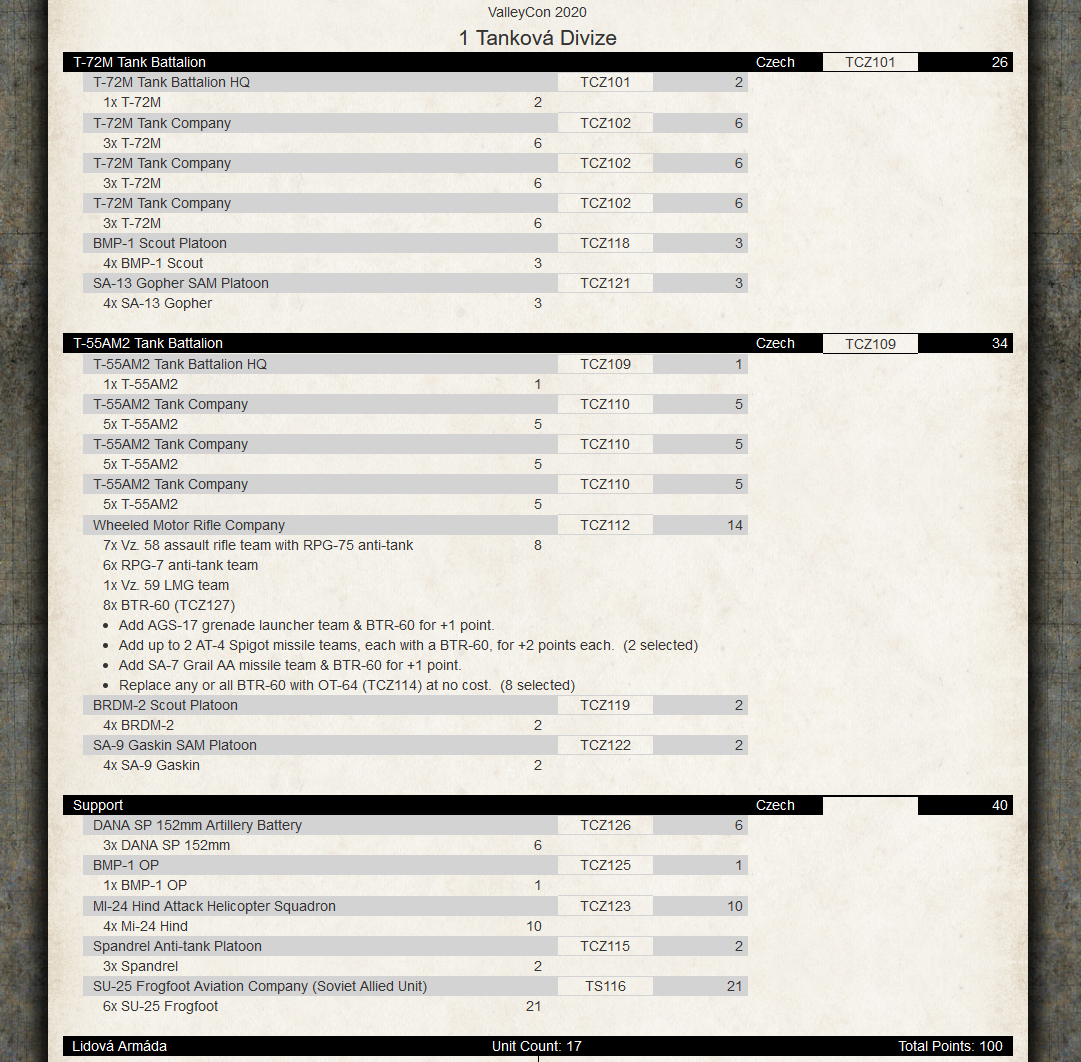
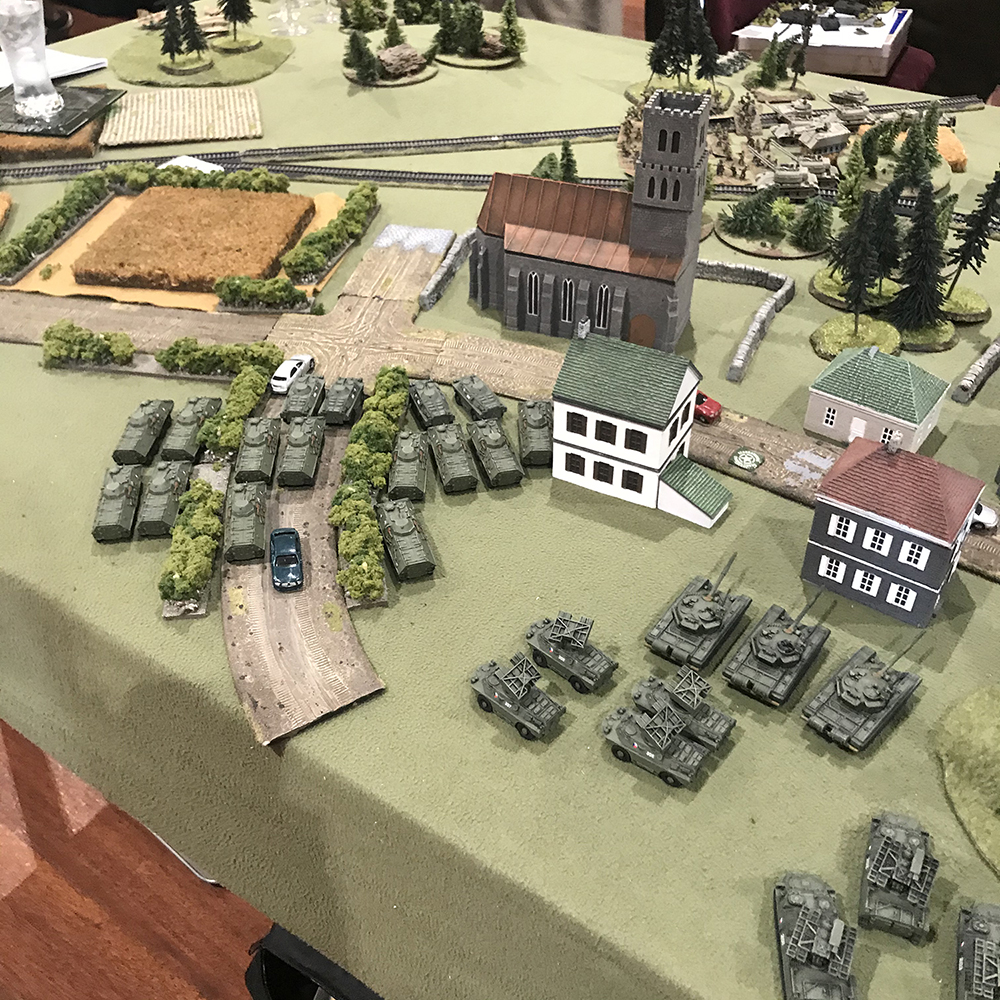
 Fast forward 10 months and I was frantically painting 60 points of Czechoslovakians to take my Panzerschreck army and grow it into a full-size force.
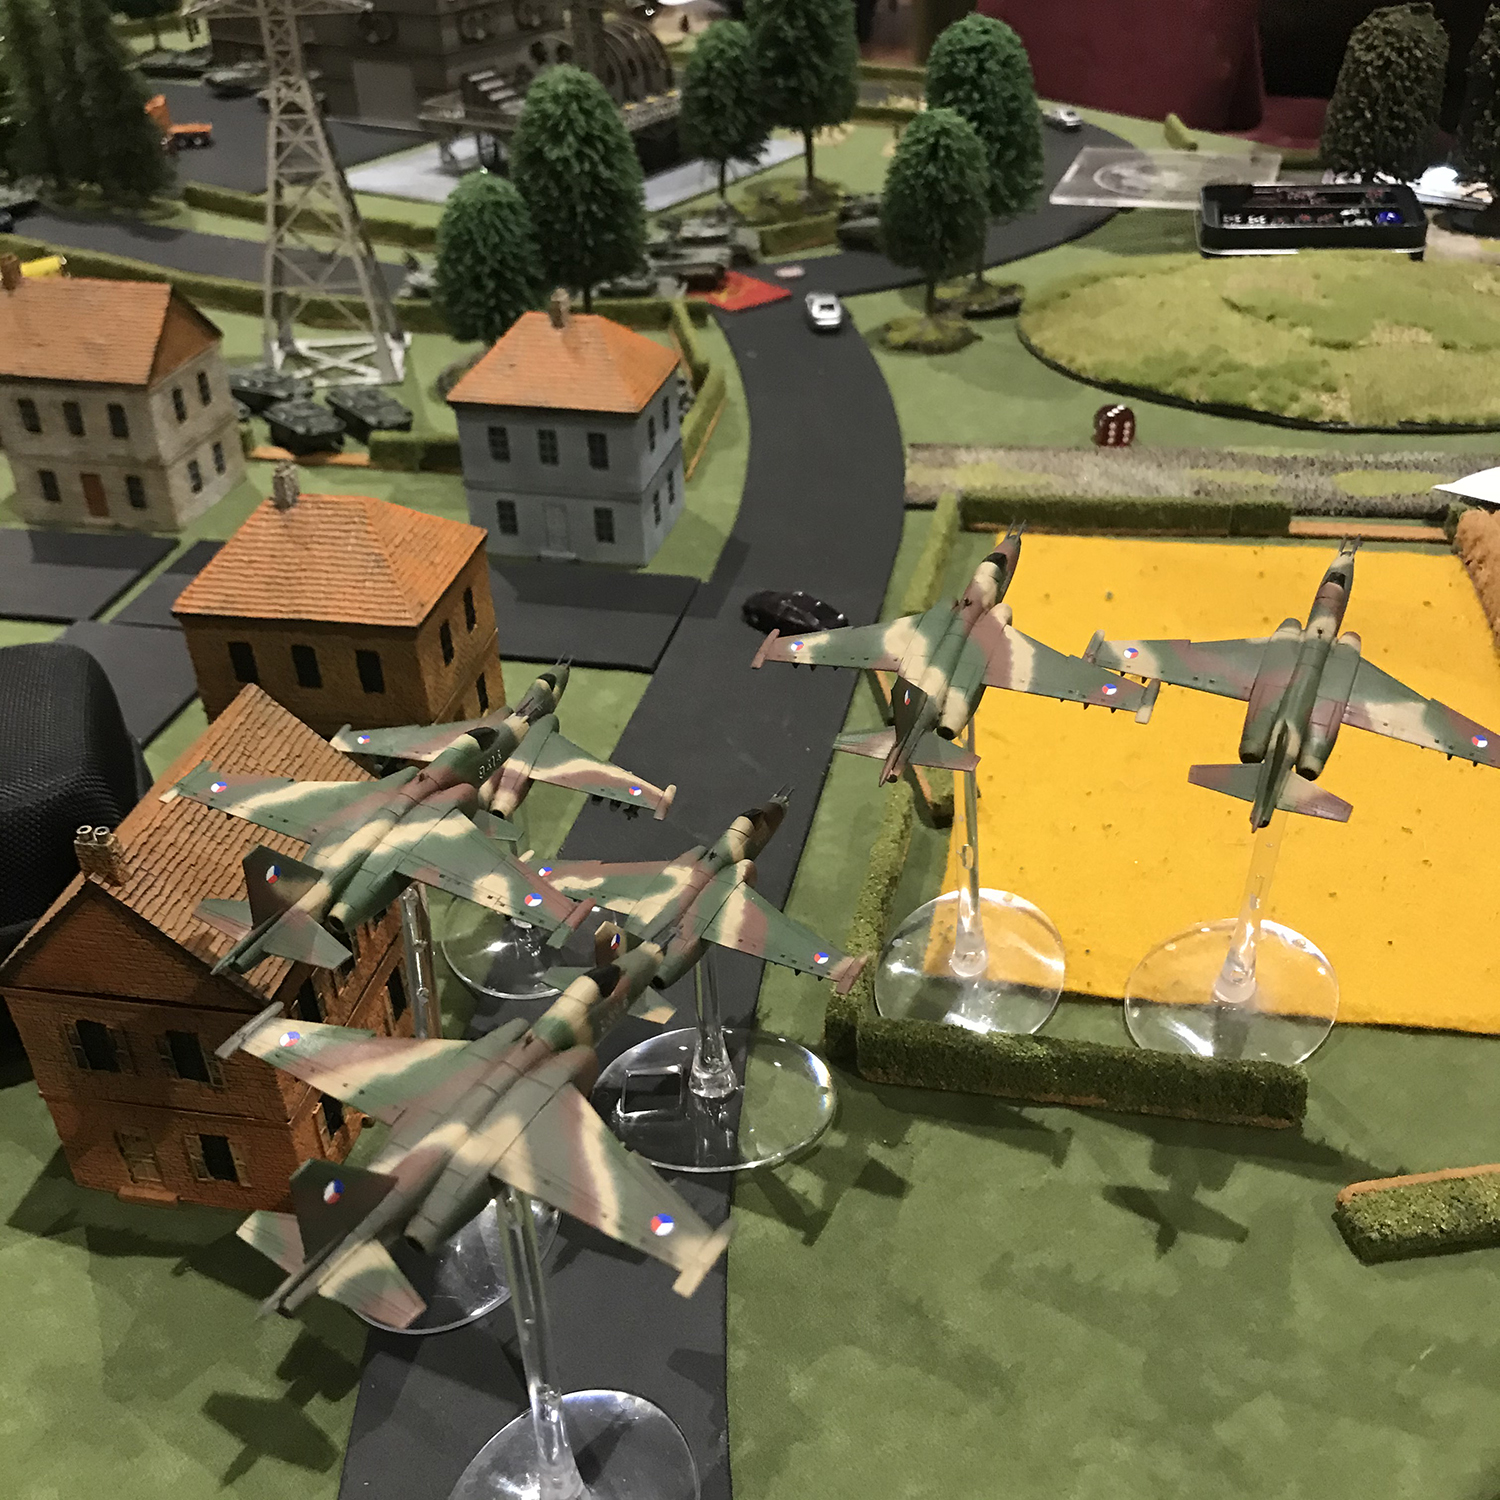
Needless to say, I haven’t completed much in the way of Big Four models recently. Thankfully I had the Battlefront collection to leverage as I failed to get my Hinds painted in time, but I did complete the rest, including a flight of the new plastic SU-25 Frogfoot (who knows what the plural for the Frogfoot would be? Frogfoots, Frogfeet?) aircraft.
My next problem was that the army was too big for the Battlefront figure case! Luckily, I had another case option up my sleeve but the painting and transport hurdles were only going to be the first issues with taking such a large army, especially when you are flying to the event!


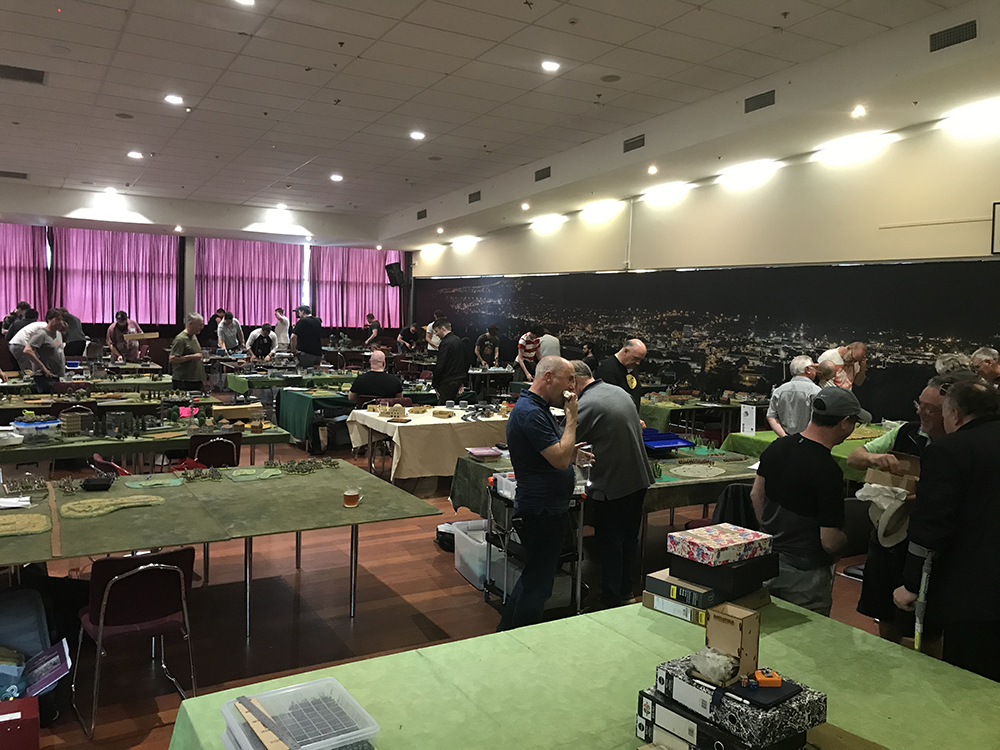
We were lucky to be at the Upper Hutt Cosmopolitan Club for the weekend – a great venue with food and drink onsite and just a generally great atmosphere. I won’t go into the individual games as such but I did learn a heck of a lot about my army and how to play it over the weekend.

- Always make sure you send enough assaulting teams to count as a large company – don’t be lazy about pushing those extra few models in, even if you don’t think their defensive fire will stop you.
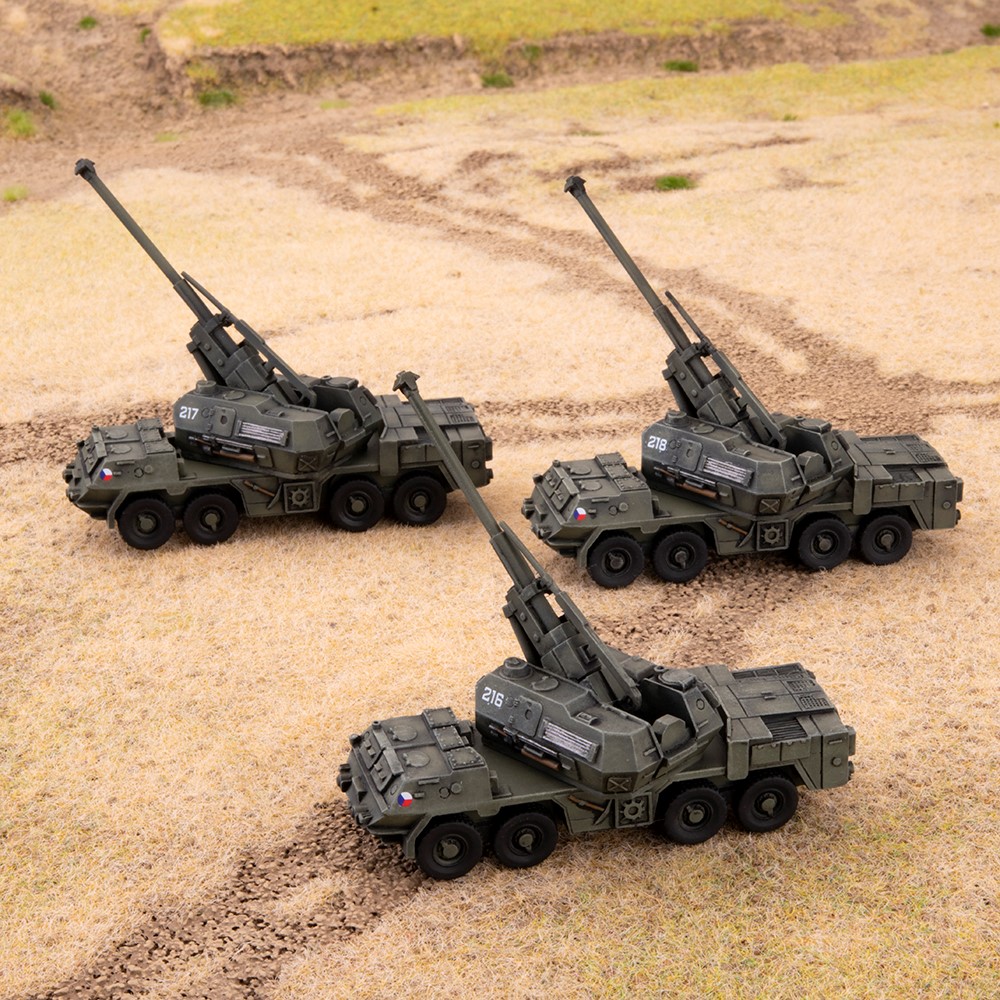
- Autoloaders are the best! I was planning on painting some artillery for my French but my experience with the Dana has reiterated it for me.
- Su-25 Frogfoot + Kh-25 missile = much fun for me. If I could have two flights I would…
- Aggression and fast play is the key to winning (or losing).
 What I found really difficult over the weekend was getting a result (a win or loss, rather than timing out). I am a huge fan of the “if no-one wins we both loose” approach to missions. I want to have a fun game where we both manoeuvre and play to win so a “sitskrieg” style of game is not for me. However, pushing 90 (yes, ninety) models around the table takes a lot of time and effort, combined with my lack of familiarity with the new models I had just built and painted, and a lack of practice games, meant that the army was just too much for me to handle at the start of the weekend. By the end things were starting to come together but let’s be honest, I picked an army that was enormously fun to build, paint and play, but was not a good choice given the “rules” of the event.
Click on the image to the right to see my list…
Knowing my personal limitations, I should have chosen more wisely.

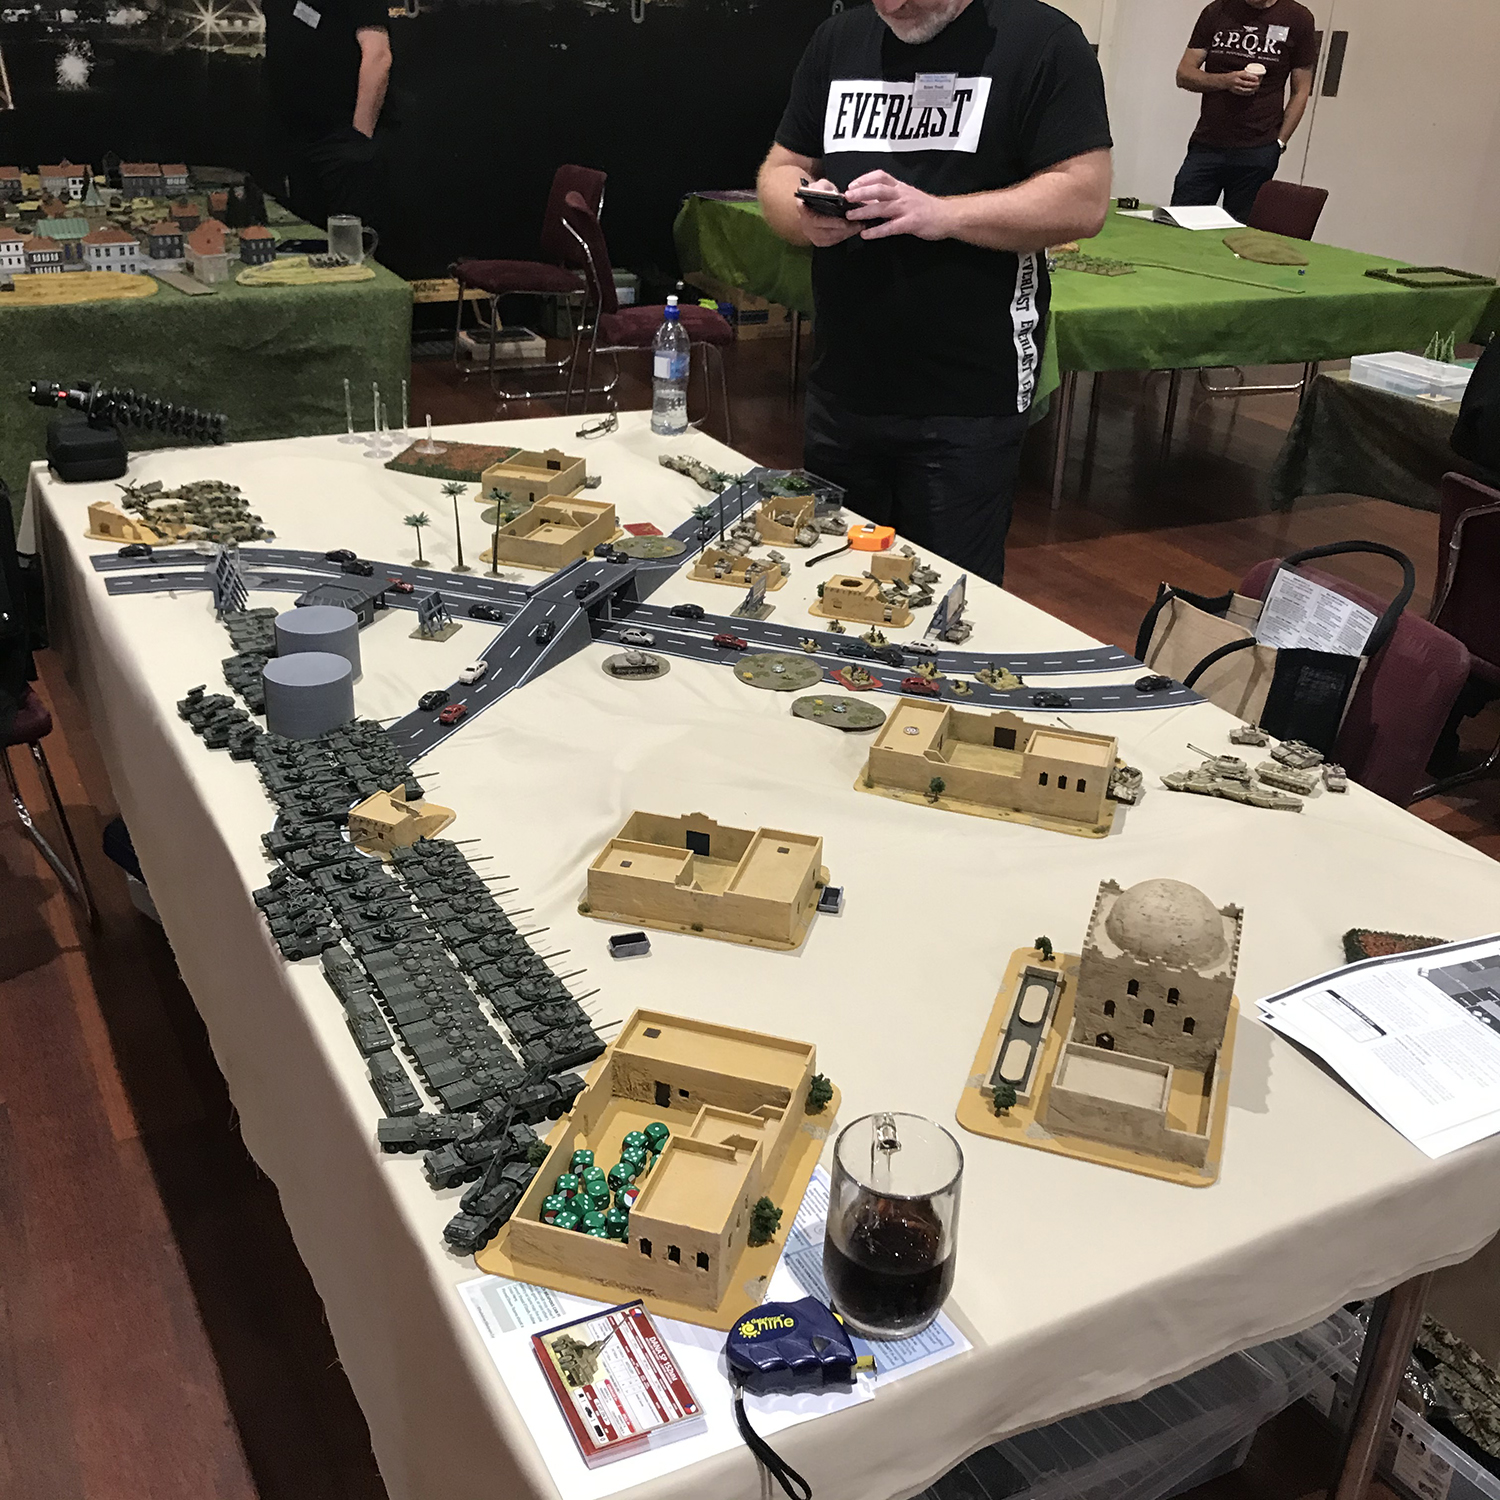
If you would like to see more pictures of the armies at ValleyCon 2020, click here…
So, where does this leave me and my Czechoslovakians now? I love the army, I love the paint job, and I love how it plays, so I’ve figured out a painting list of what I need to do to complete the army which includes more tanks (yes, more T-72 and T-55 tanks), my unfinished Hinds, some BMP-2s as well as a few other bits and pieces. This will give me the option of fielding a more ‘elite’ version of the army (with T-72 tanks, supported by BMP-2 infantry and about 60 models), as well as a even bigger horde for social games.
However, I will be giving the army a rest from Tournaments for a little while and perhaps building a tight list from the WW3: British book. The test shot (pre-production) of the Challenger sitting on my desk keeps calling me. I also have a company of Churchill and Cromwell tanks sitting on the shelf that need some hobby time as part of the Big Four.
 Other than some bad luck with fog at the Wellington Airport (yep, my return flight was cancelled) and an unplanned extra night stay it was an excellent trip, with great games and opponents. Massive thank you to all the Hutt boys, and especially Chris O (and family) for being host, taxi and all-round good bloke during my visit.
ValleyCon 2020 Results
1st – Simon McB
2nd – Richard
3rd – Tom
4th – Chris P
5th – Adam
6th – Bob
6th – Brian
6th – Sofia
6th – Russell
10th – Simon S
11th – Chris T
12th – Regan
13th – Connor
14th – Steve
15th – Lauchie
16th – Chris O
Best Sport – Simon S
Excellent Sports – Chris O & Regan
Best Army – Russell
Excellent Painting – Bob & Adam