
 I’ve mentioned this in the past, but one of the things that I think really makes my British army pop on the tabletop (and in photos) is the use of decals. I always feel that the application of decals to a tank is that final step that really helps to make a difference – much like good basing on infantry.
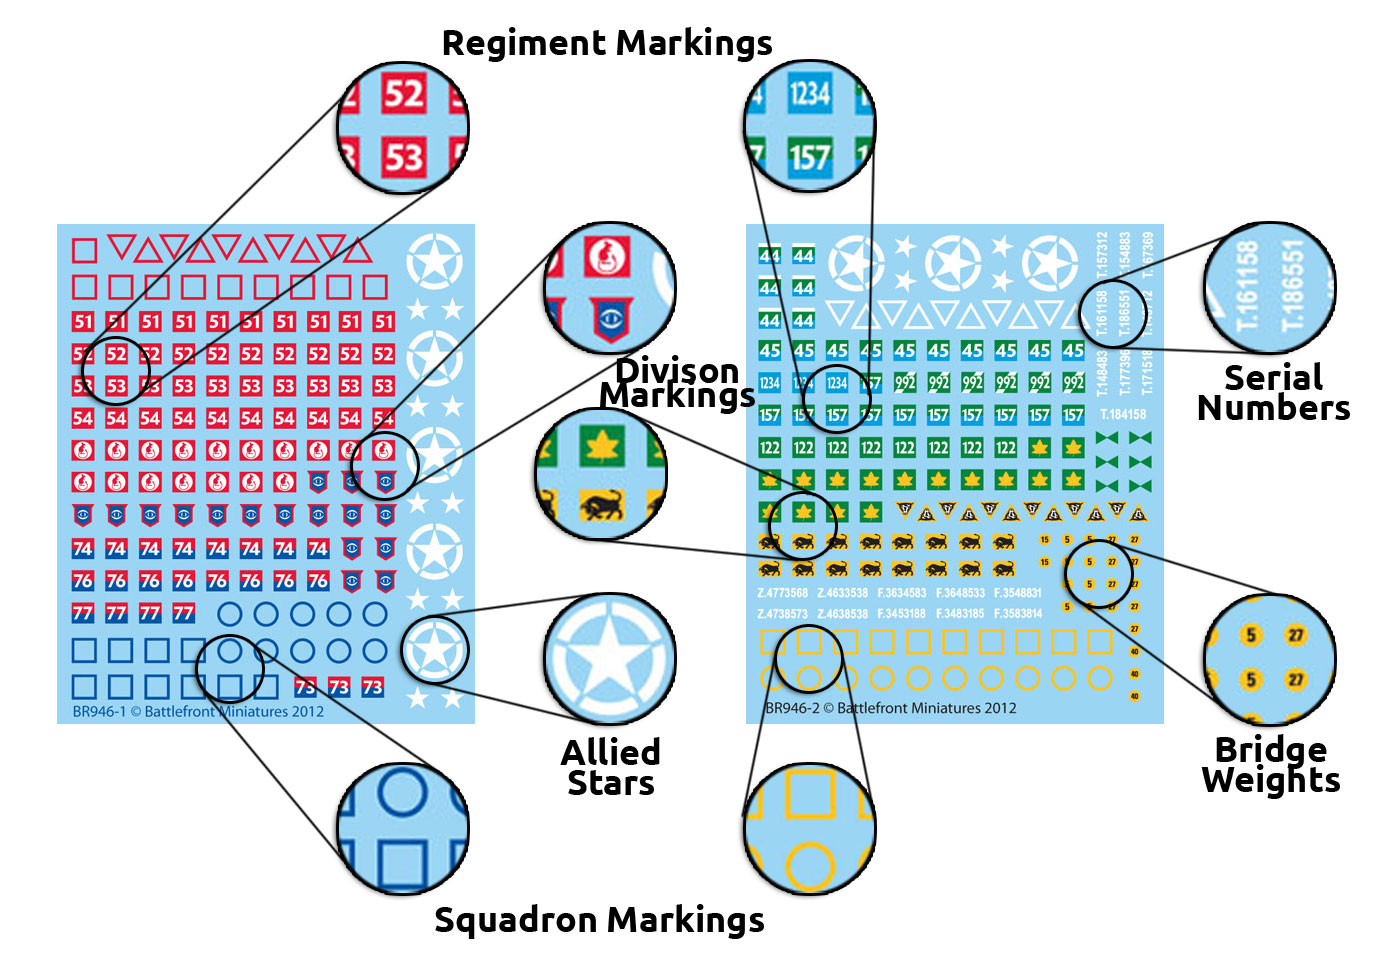
I am quite lucky as the British army went to great lengths to mark their tanks, from Divisional, Regiment and Squadron Markings, to Bridge Weights and Serial Numbers, and of course Allied Stars. With so many options I found most vehicles having around 10-or-so markings for me to apply.
First things first, what are all the decals on the Late War British Decal Sheet? Casey has written a great article (which I have relied on heavily and you absolutely should read) but if you want the basic TLDR (Too Long, Didn’t Read) version here you go…
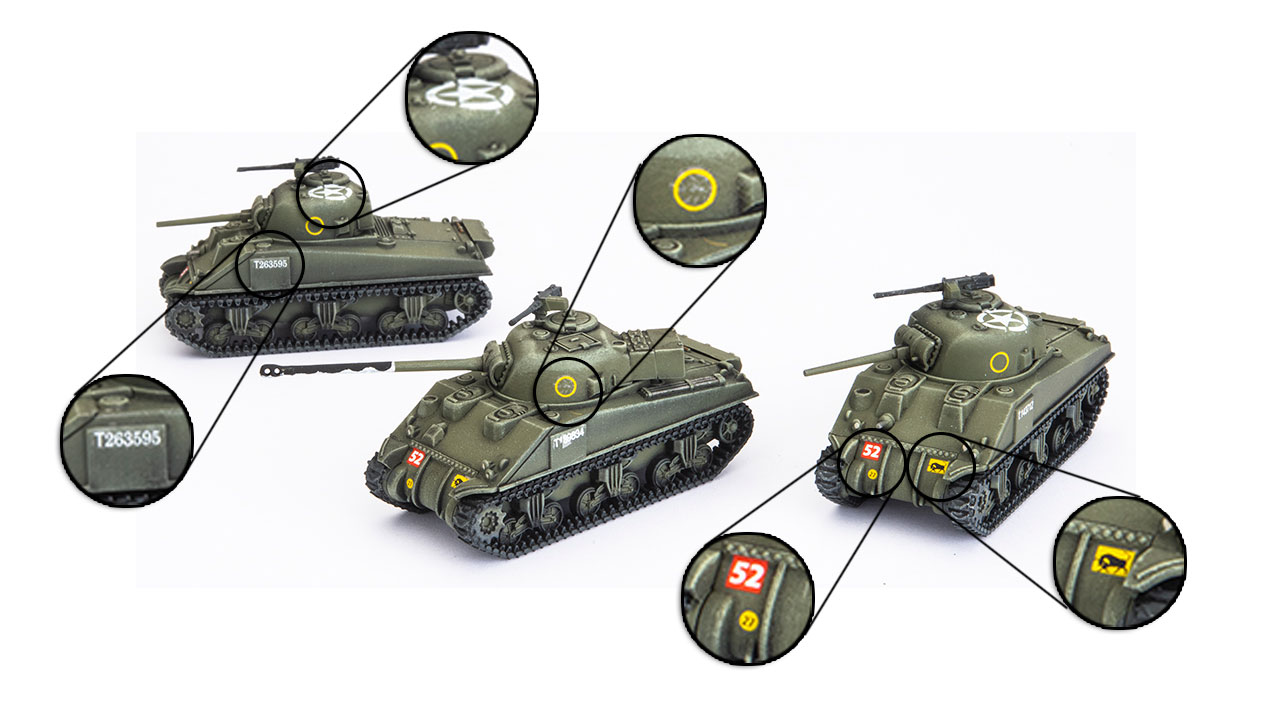
 Looking at the tanks below you can see where I have chosen to apply the decals.
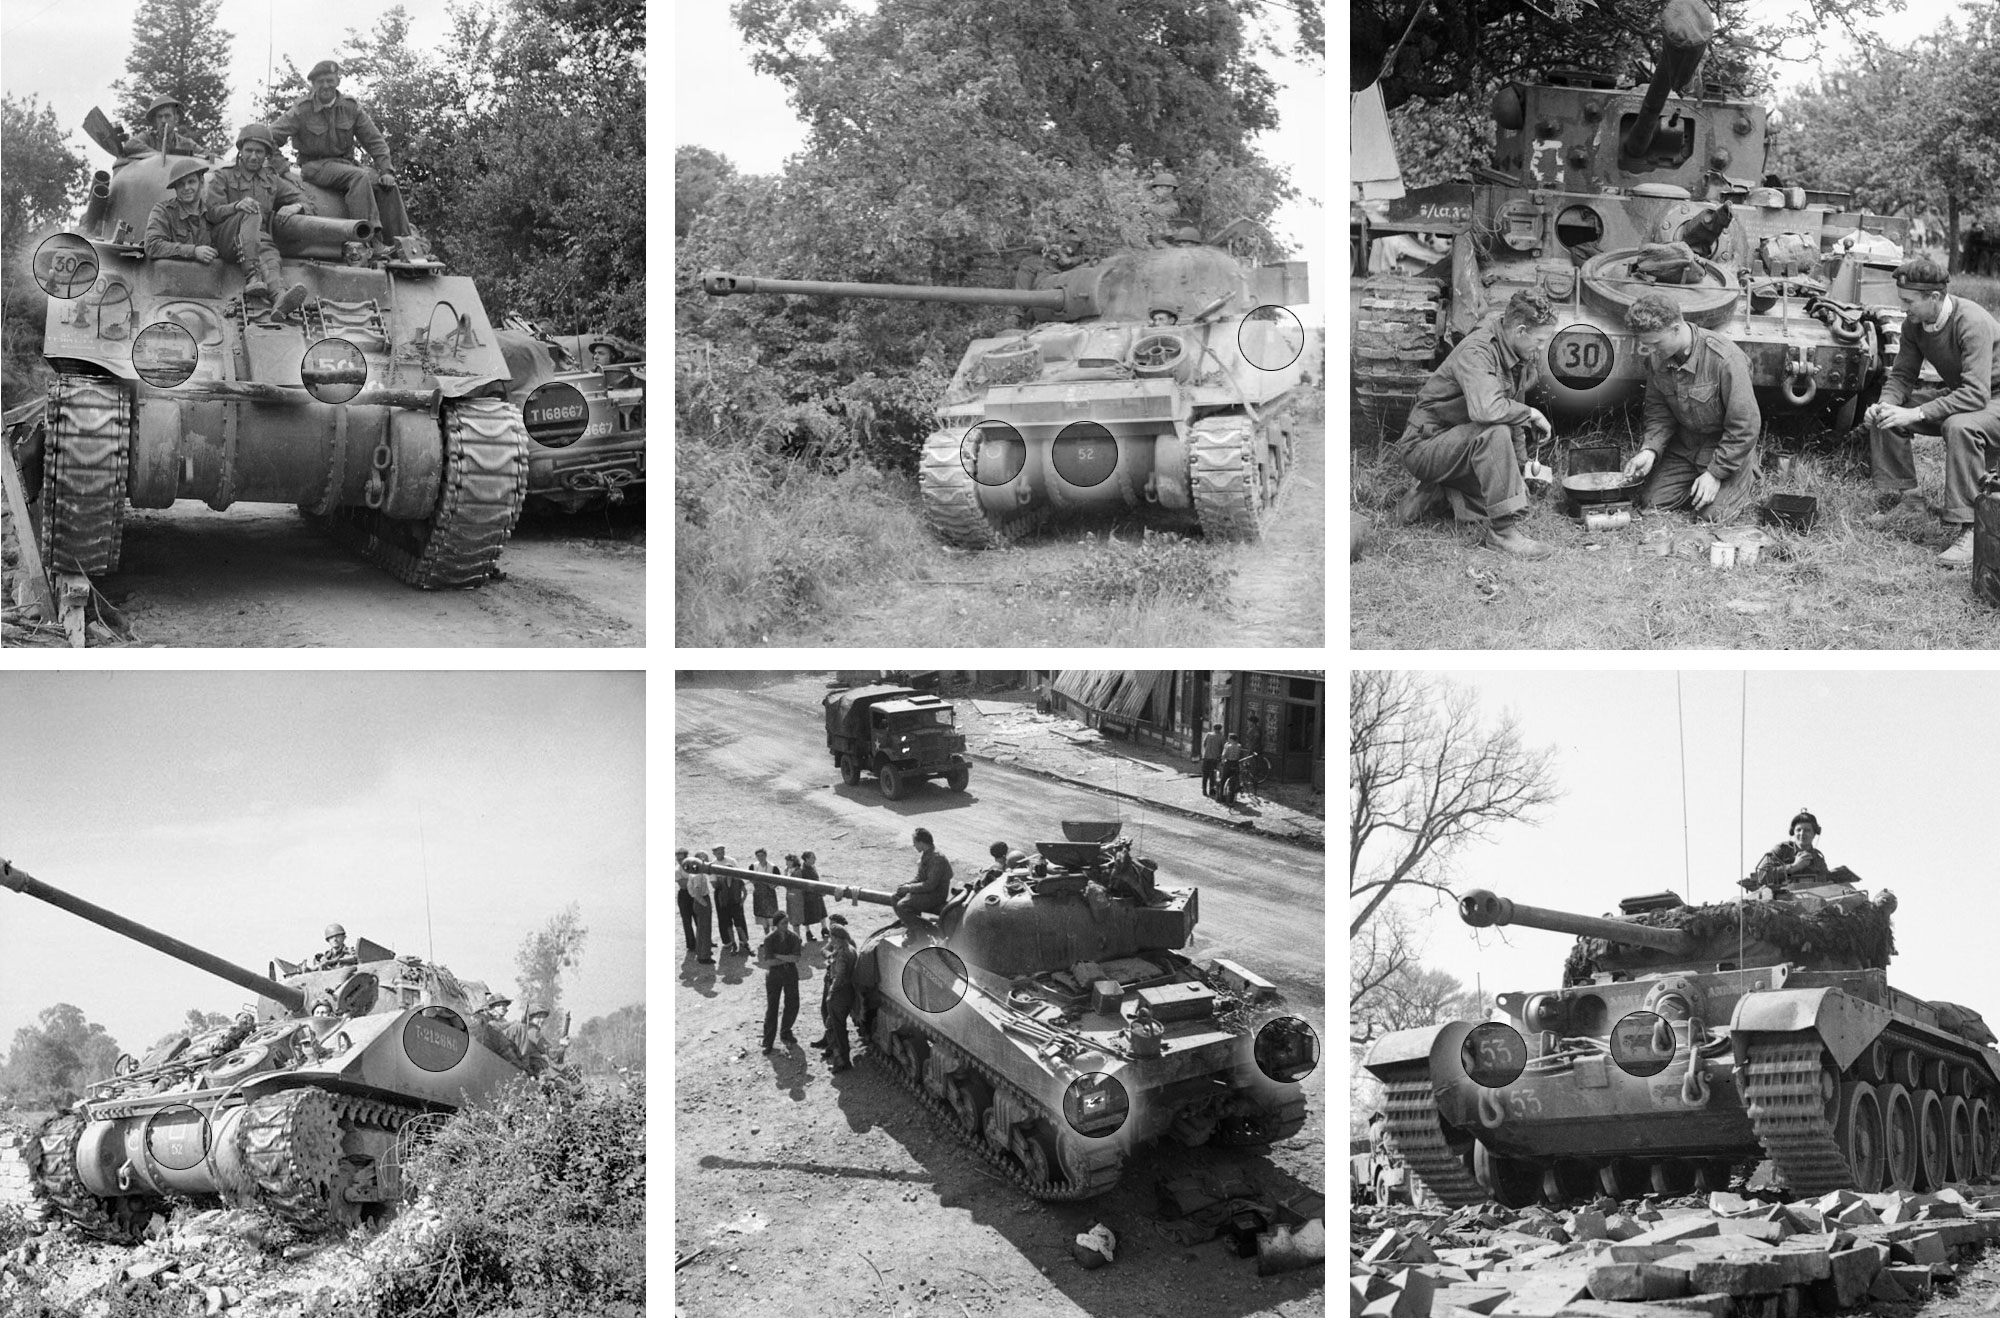
One of the things I learnt whilst doing a little reading through our guides on the website and Colours Of War, is that there was a “mandated” way to apply the markings.
Of course, this doesn’t always match up with what happens in real life as crews will often find ingenious places to put stowage or extra armour, which necessitates the moving of markings. Sometimes they just don’t want a great big white star on the side of the tank as a target for enemy gunners, and sometimes they just don’t get the memo. This means you can either follow the guides on the site like a definitive list, which is perfectly fine, or use a bit of artistic license (which is what I did).
 If you don’t have a lot of experience adding decals to models, give it a go, they really make a huge difference. If you want to know more about how to do it, then check out Blake’s guide on our YouTube channel here…
~Chris