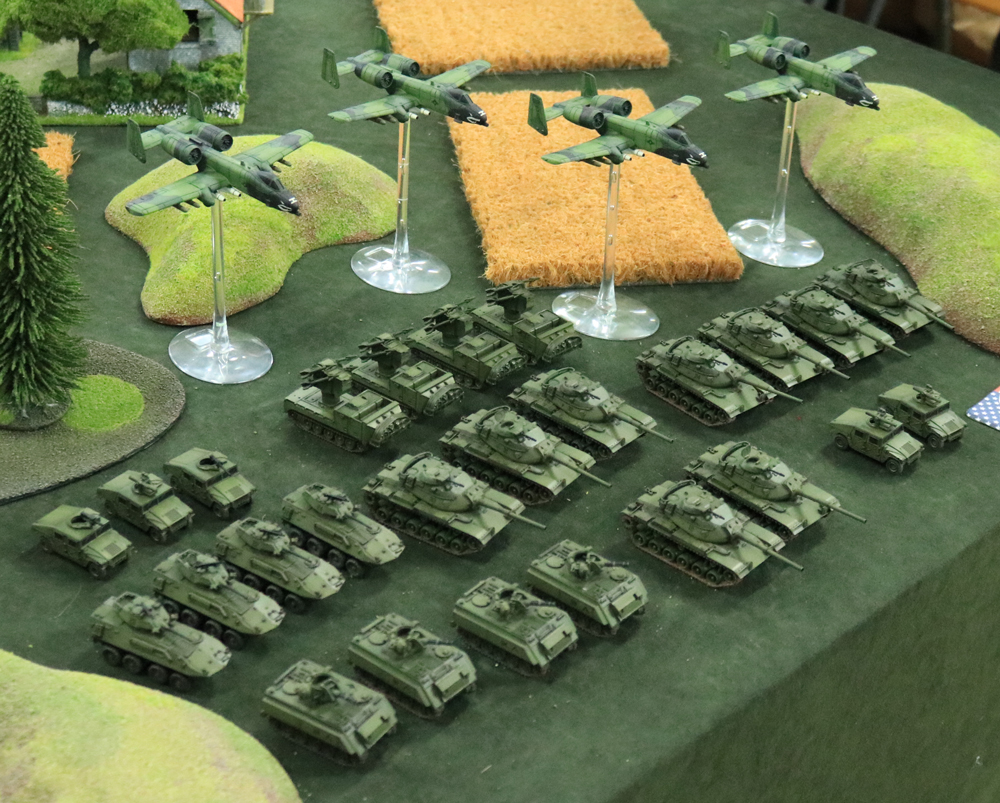
With a plan firmly in place around some painting and modelling inspiration, it is now time to start thinking about the Army and what I will paint first. Like the rest of the Big Four I have grabbed one of the new Late War Starter Armies. With a great mix of models it can either be a complete legal army, or the foundation for one (or more).
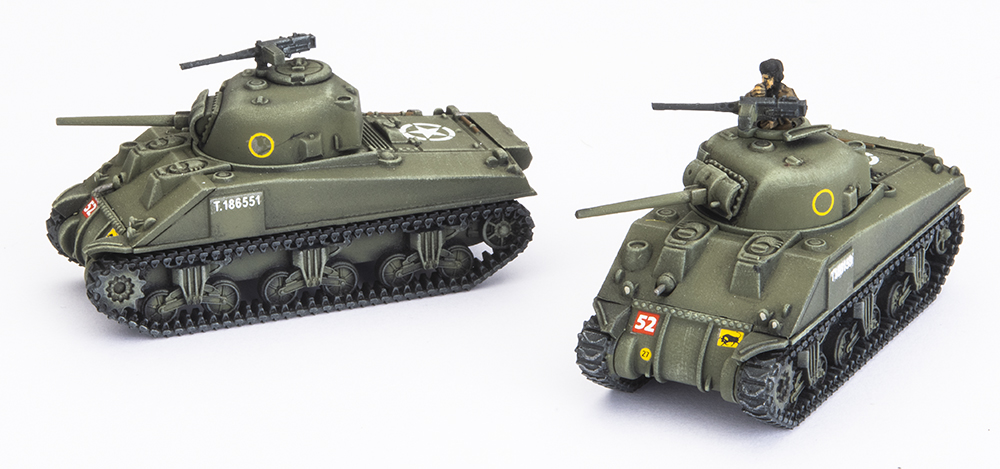
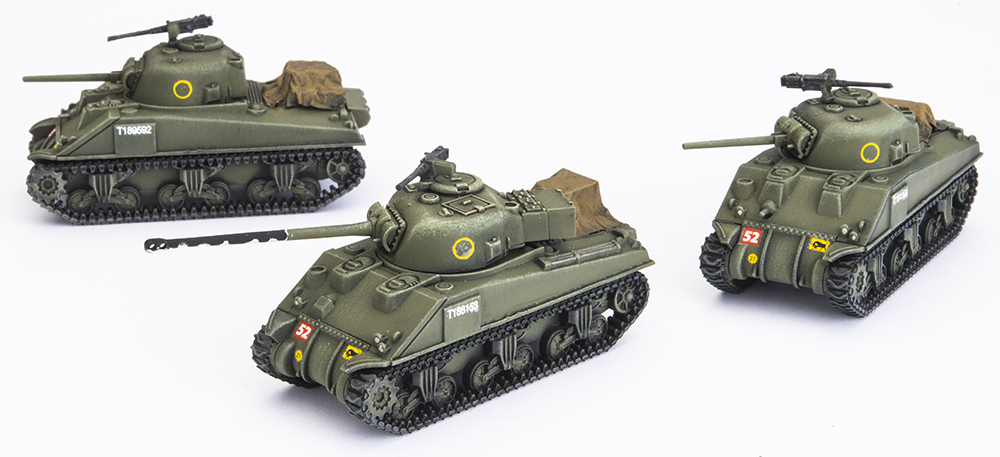
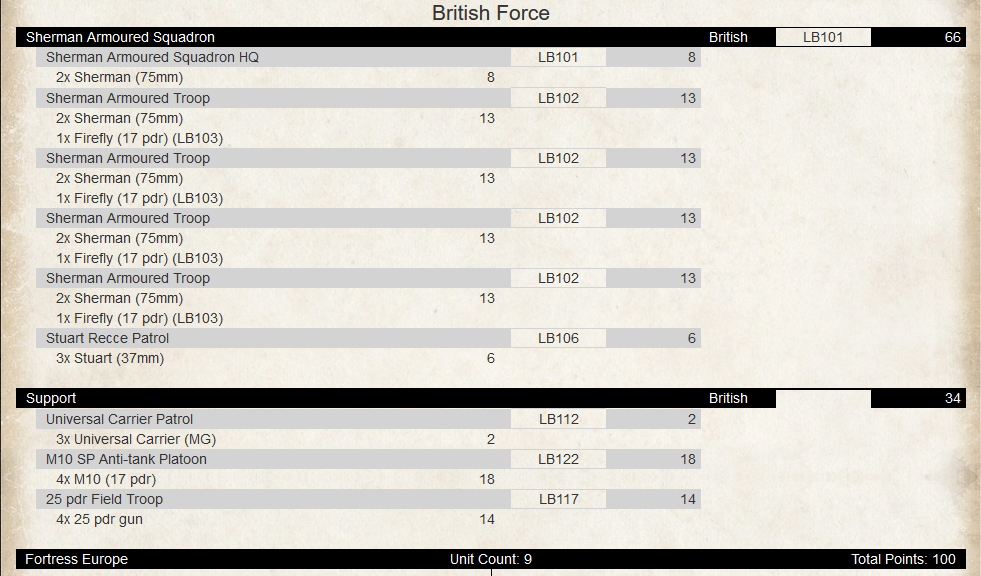
 My plan is to use it as the later – everything in the Army Deal has a place in my painting list, it is just the order that I am going to play around with. For Fortress Europe I have decided to base my Force around a Sherman Armored Squadron with as many Firefly tanks as I can fit in. That means a Squadron HQ of 2 Sherman (75mm) tanks, and 4 Troops, each containing 2 Sherman (75mm) tanks and 1 Firefly (17pdr). With 10 Sherman tanks that gives me plenty of Anti-tank 10 (which can deal with pesky T-34 and Panzer IV tanks) and high explosive rounds to knock out guns or infantry. The four Firefly tanks pack a massive wallop with Anti-tank 14 – that’s enough to punch through a Tiger or Panther. Best of all, it only comes in at 60 points.
Knowing that the other guys have plenty of armour in their forces it would be silly of me to not use the four M10 (17pdr) tank destroyers that is also in the Army Deal. These vehicles have the same gun as the Firefly, but I get four of them for only 18 points!
Painting infantry is certainly my least favourite part of the painting process, but I have been assured that the plastic British figures are both quick to paint and look really good so this is enough for me to add an under-strength Motor Platoon of 3 Bren Gun teams, a PIAT and 2-inch mortar. These will be hard-pressed to achieve much on the table, however it is a manageable figure count for me to punch out. At 6 points they are cheap and being Careful (Hit on 4+) if they hunker down they will stick around. Where there are infantry, there are Carriers… so I’ll be adding a Patrol of 3 – for 2 points they give me a cheap Scout and Spearhead unit.

Alternatively… 3 Stuarts is also 6 points (and coincidentally the number that come in the Army Deal) so I might knock these out initially as a good “test paint” platoon and then do the Motor Platoon later.
Rounding out the force is my battery of four 25 pdr guns. These are fantastic as they can lob HE rounds across the table knocking out dug-in troops (and guns) with ease, plus they have a handy AT rating of 9. Put them on an Objective, dig them in and they will defend it till they die thanks to their Fearless Motivation rating of 3+.
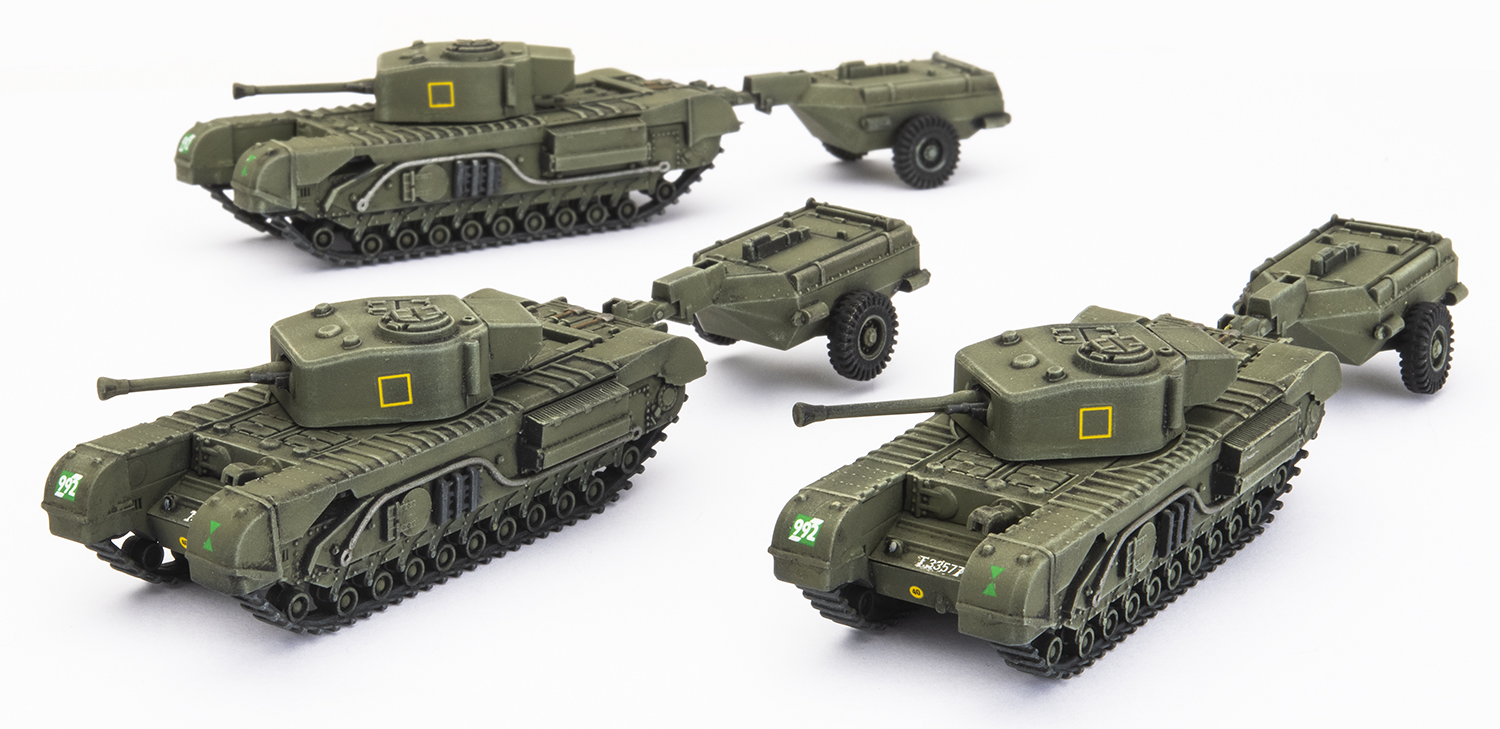
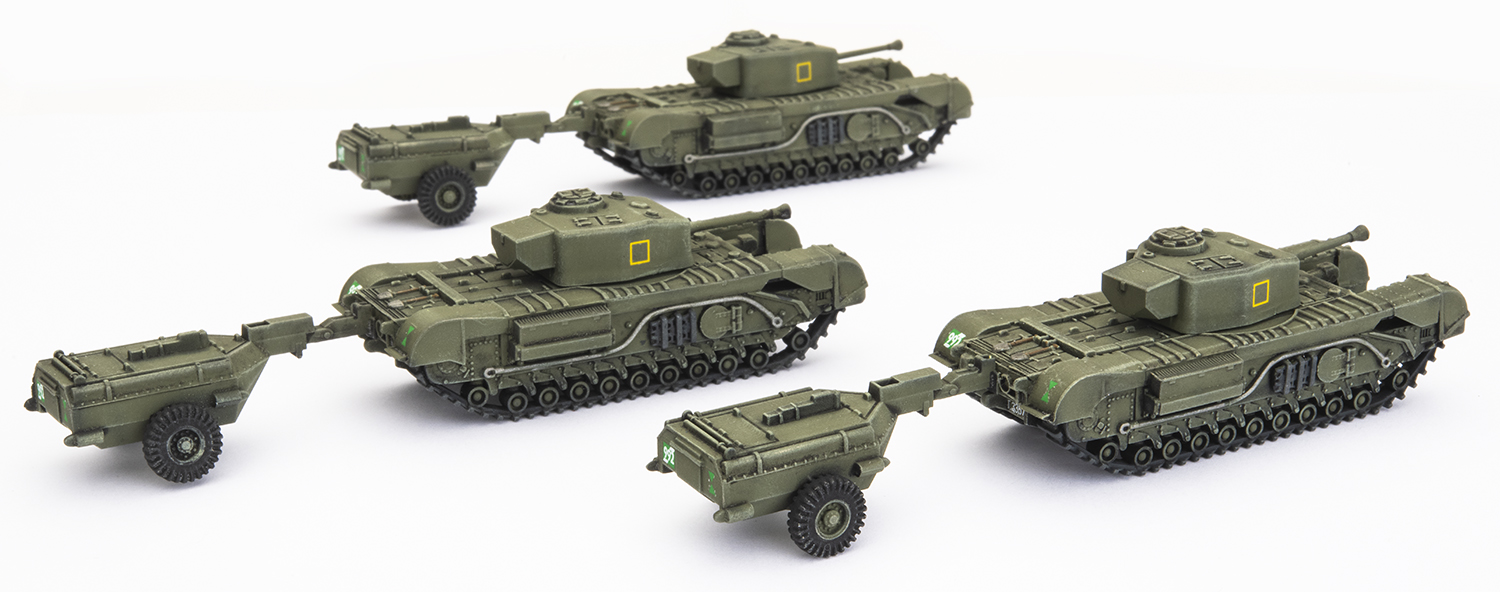
This leaves me with a few things left over from the Army Deal, mainly some extra infantry and Churchills. Assuming I get the understrength platoon painted, the remainder of the figures will be part of my second wave – painting the extra figures so that I have either 2 full-strength Motor Platoons, or 1 maxed out Rifle Platoon. Last, but not least, are the Churchill tanks. I have a plan for these, but it can wait a little while…
The Painting Plan: I don’t want to have to revisit things where possible so I am planning on doing some future proofing. I’ll start with the Stuarts as these are a tidy little platoon where I can knock out a small number of tanks in one go, testing out my paint colours and decal plan to make sure that the finished platoon looks good before tackling the rest. I should do a single test model but I’d rather just dive on in…
The Shermans will be my next port of call and I intend on doing some extras so that I can chop and change the list, as well as doing some extra Firefly tanks on the presumption that in later years we will get to add more. I also have some thoughts about decals and stowage, but more on this later…
Next on the shopping list will be the M10 tank destroyers, partially because they are great! And partially because the crew will give me a chance to experiment on painting infantry and gun crew, whilst still being able to hide any mistakes (since 90% of the figure is inside the turret).
The infantry and 25 pdr crews will probably be last on the painting list, simply because they will use similar colours and techniques and I enjoy painting tanks more than people.
Time to get building…
~Chris

 I’ve mentioned this in the past, but one of the things that I think really makes my British army pop on the tabletop (and in photos) is the use of decals. I always feel that the application of decals to a tank is that final step that really helps to make a difference – much like good basing on infantry.
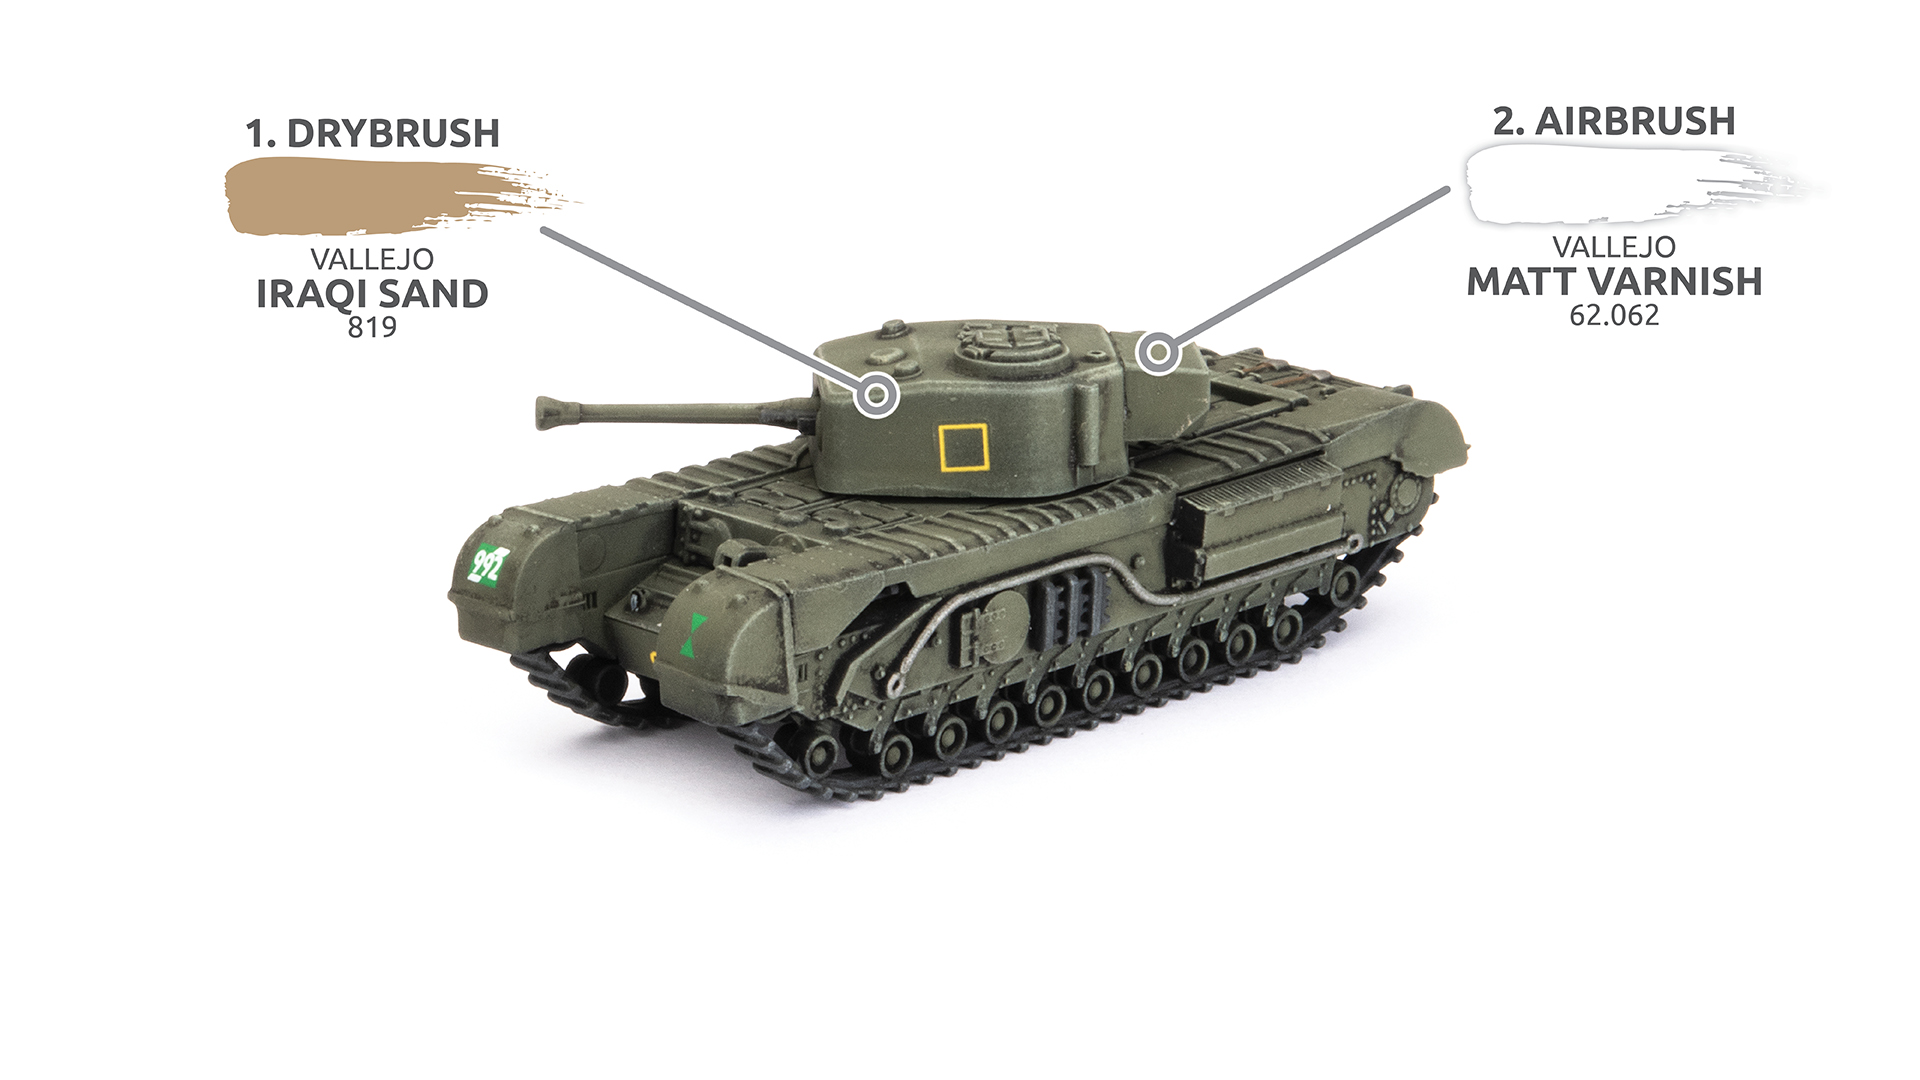
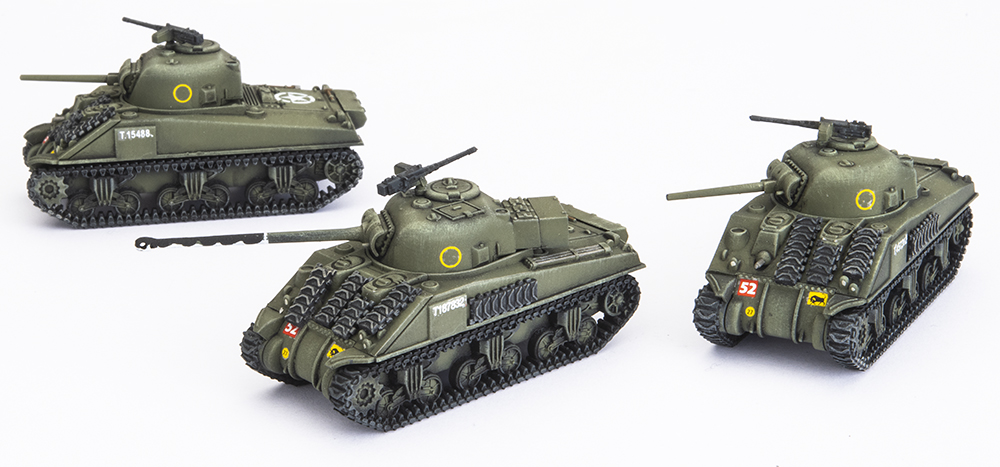
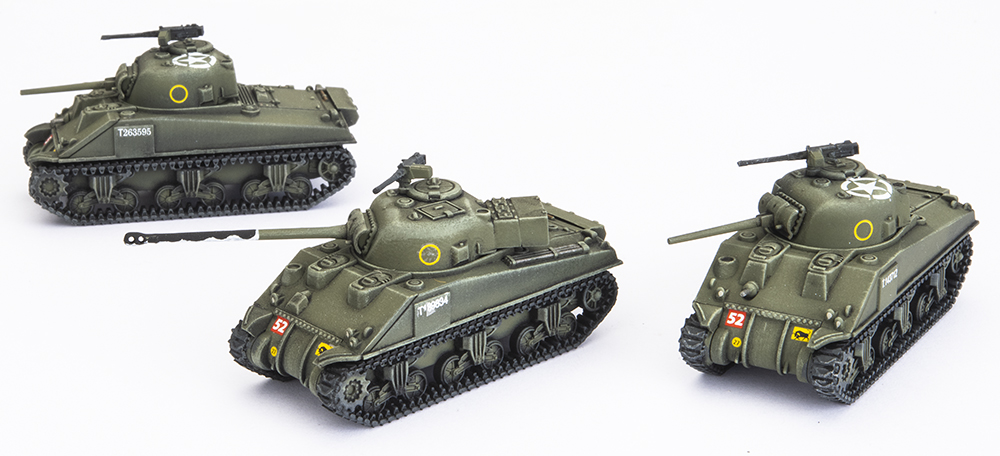
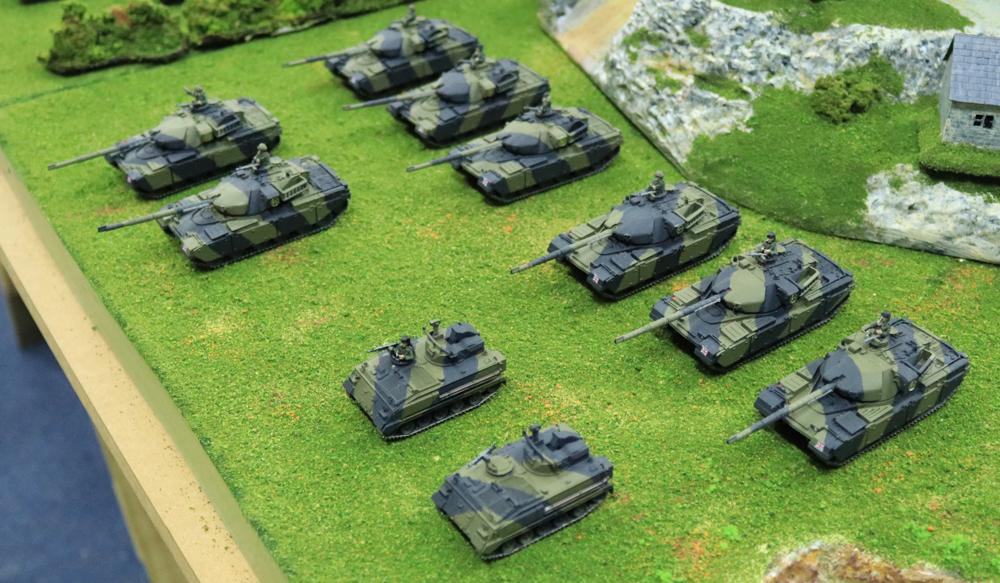
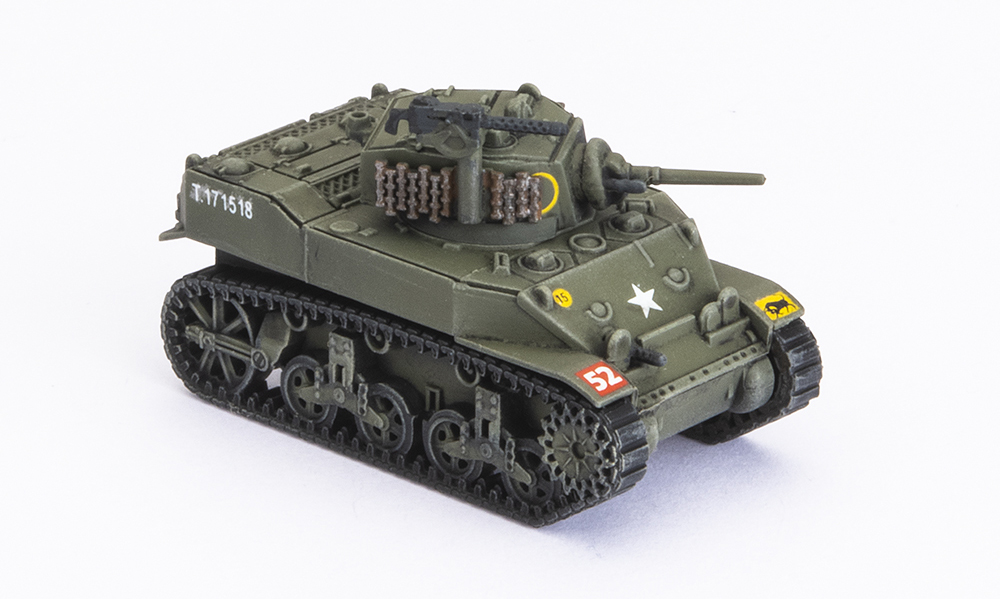
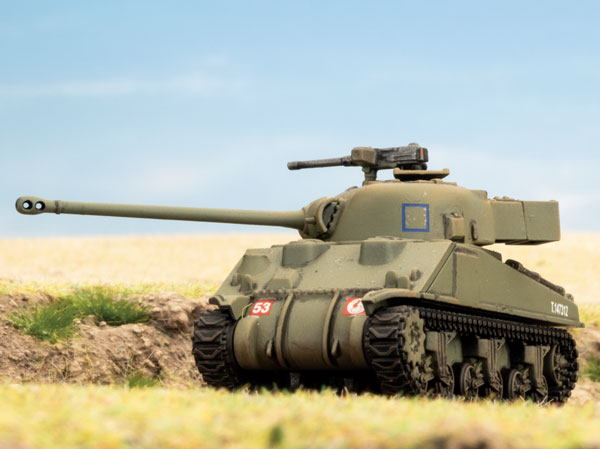
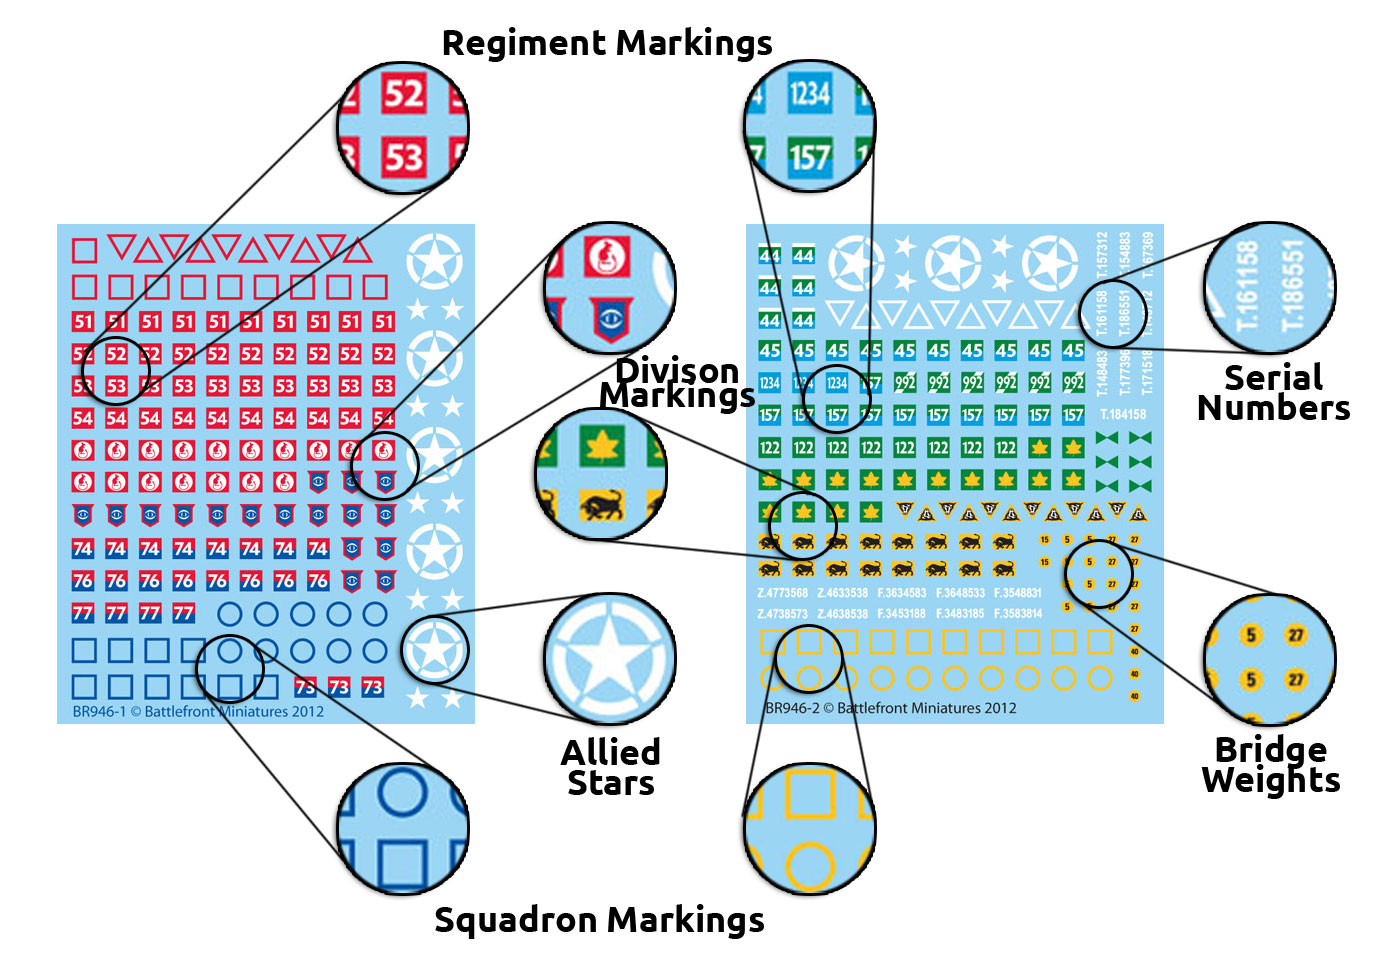 Looking at the tanks below you can see where I have chosen to apply the decals.
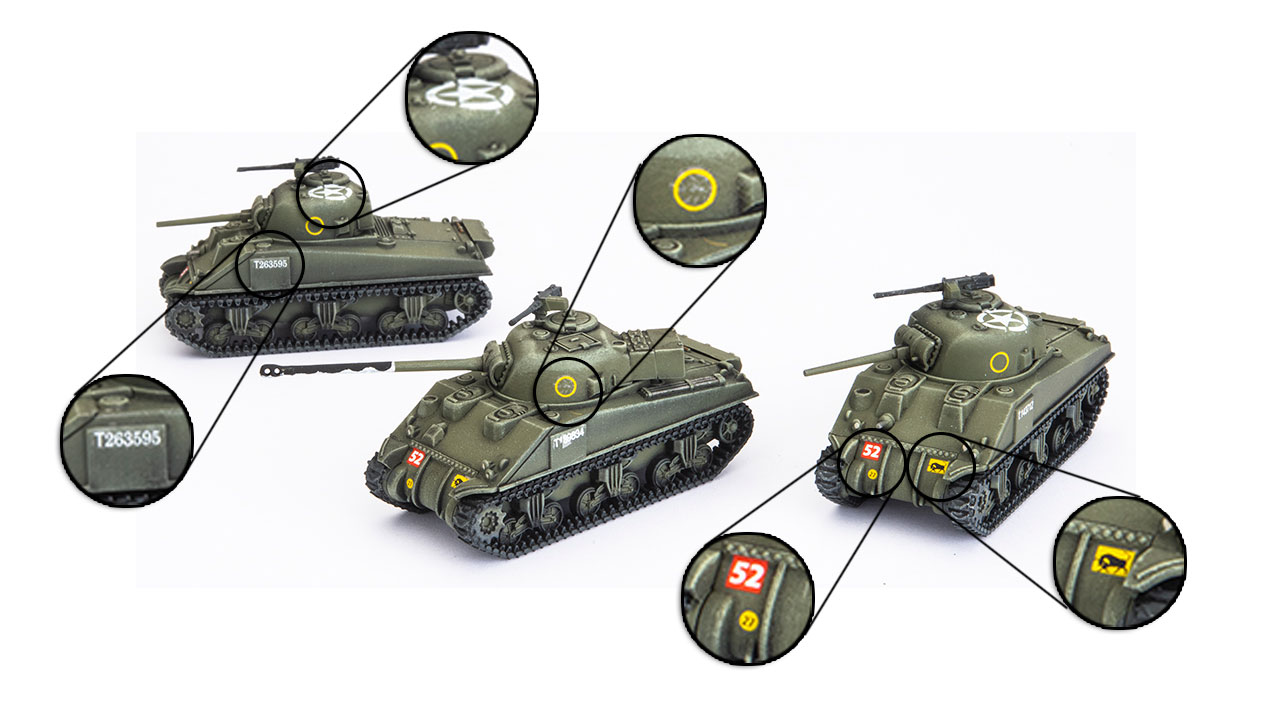
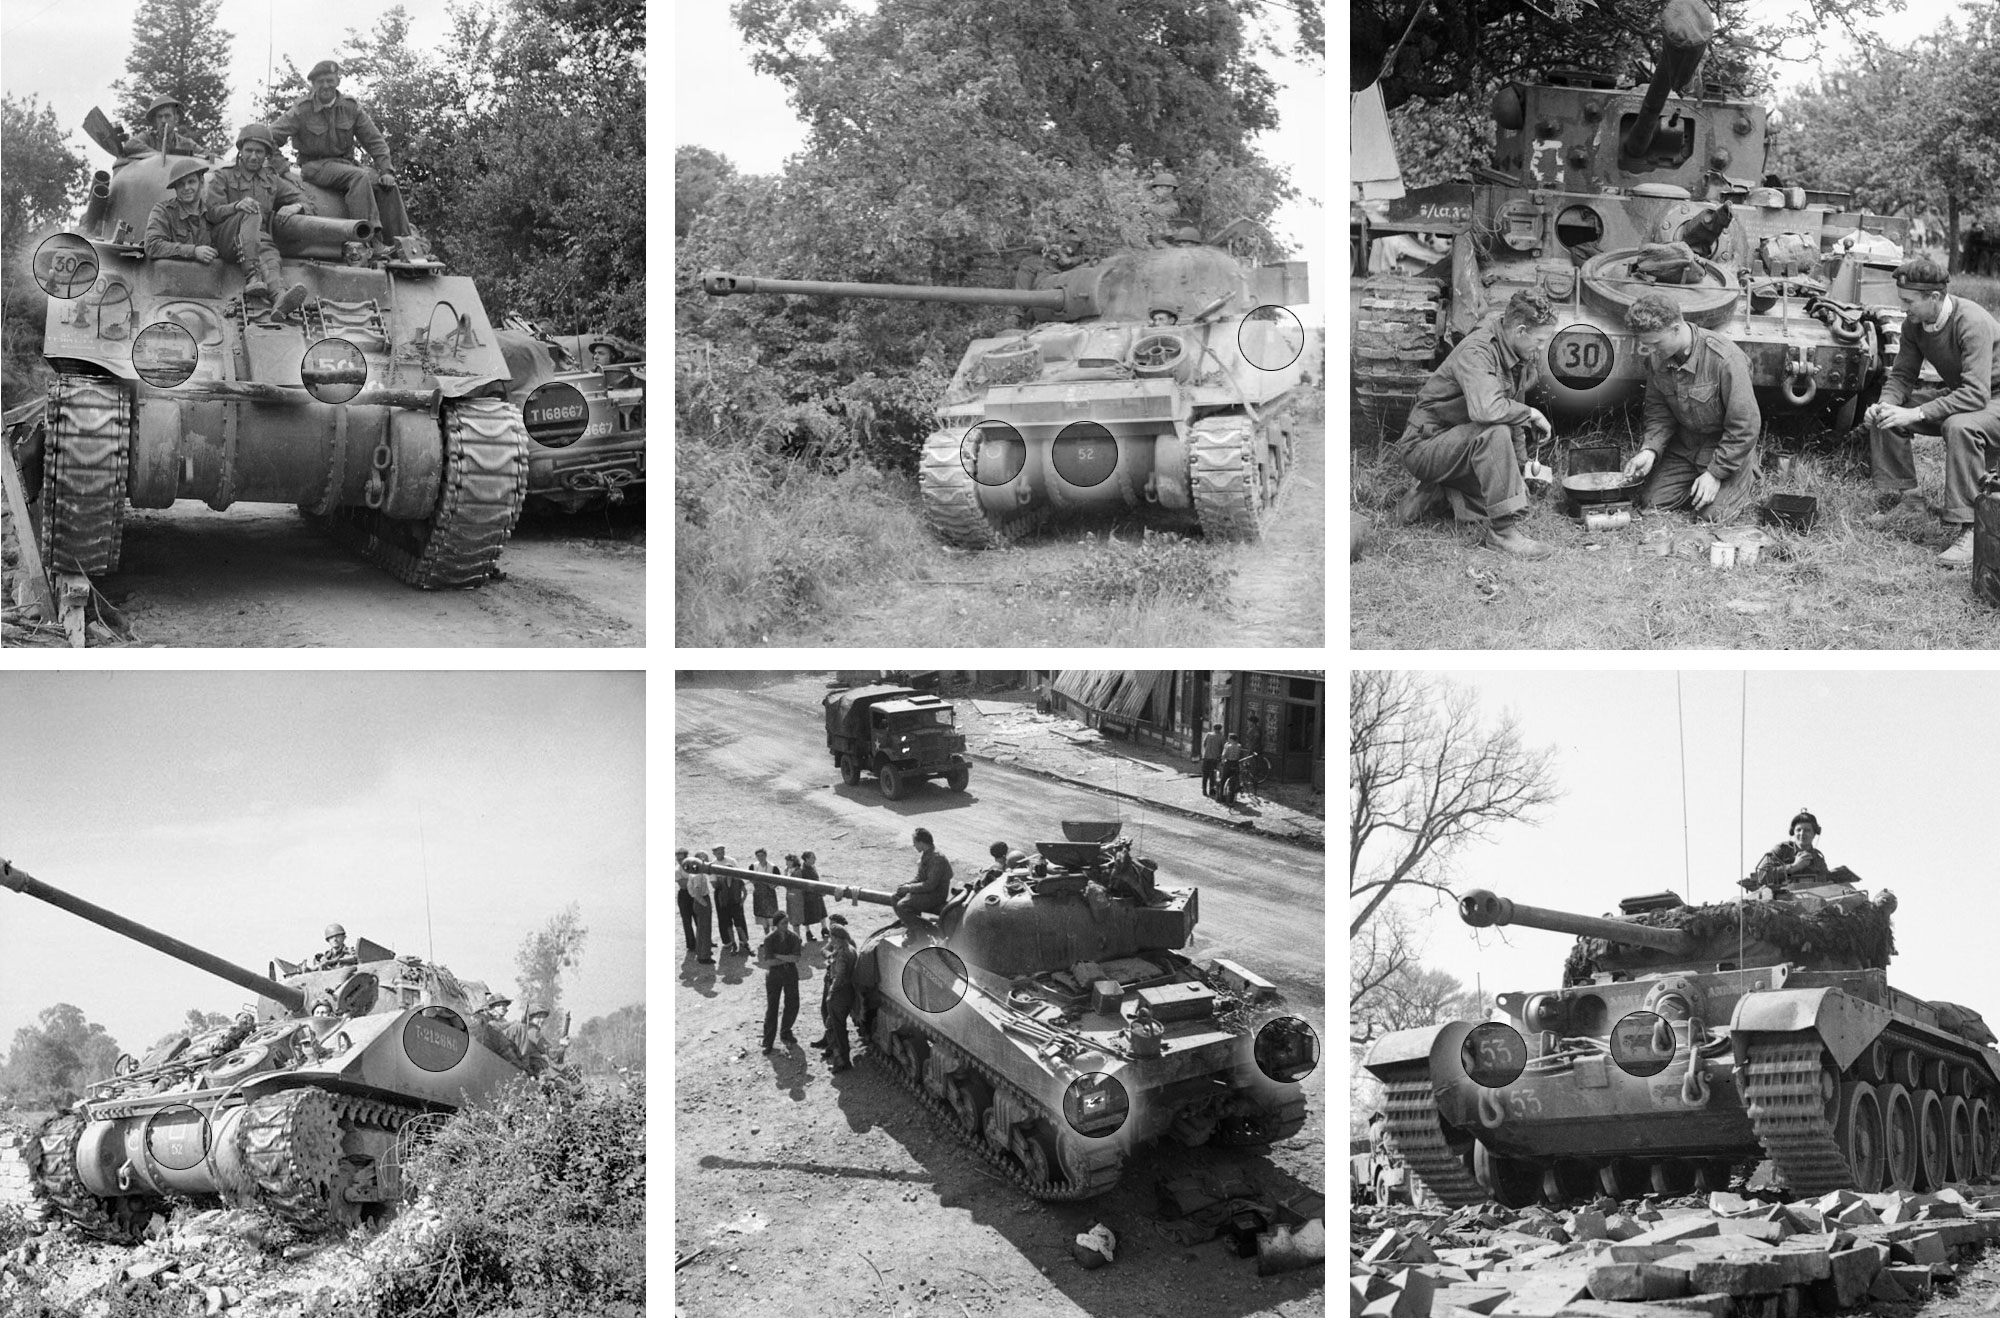 If you don’t have a lot of experience adding decals to models, give it a go, they really make a huge difference. If you want to know more about how to do it, then check out Blake’s guide on our YouTube channel here…