
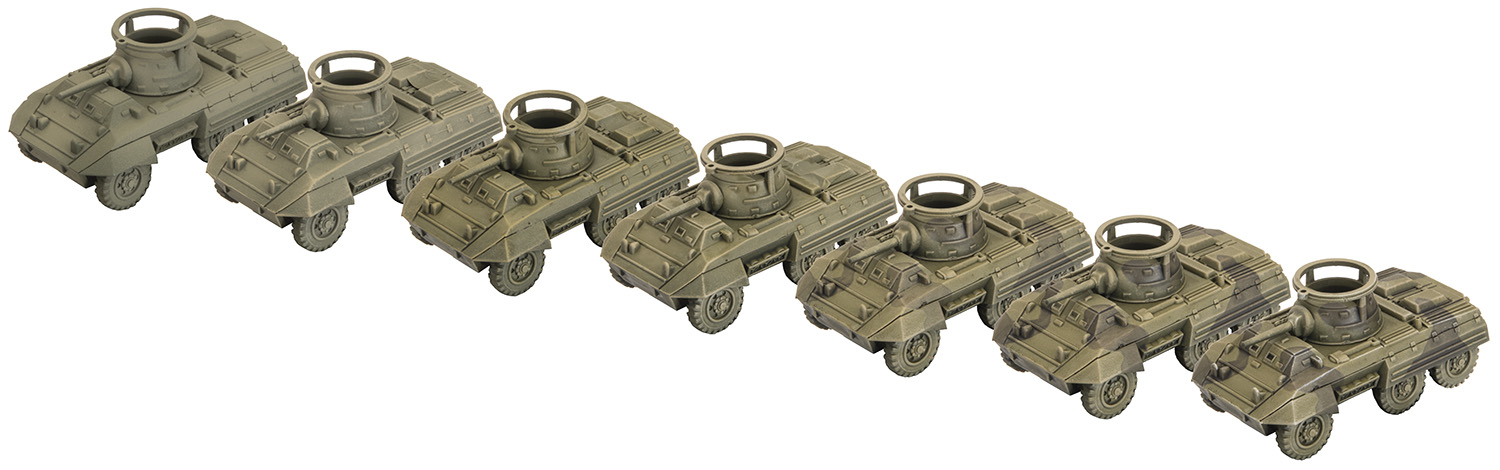
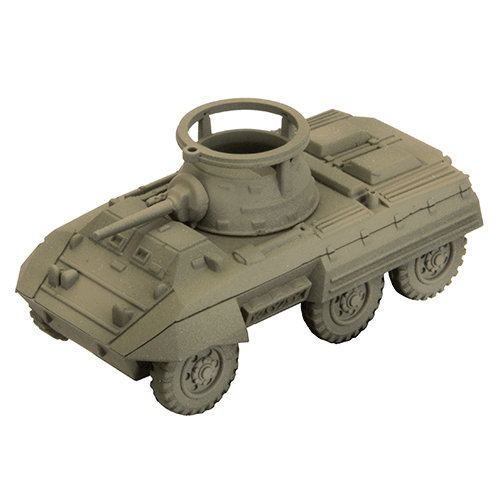
 I’ve had a few requests on Instagram for a painting guide on how I do my American armour and camo. I was holding off until I had a chance to take step-by-step photos of the process, and the M8 Greyhounds seemed like a good candidate for that.
There’s so many ways to paint your tanks, and none of them are right or wrong. This here is my a way of achieving a fast paint job and easy camo, that I think is true to the historical subjects while still popping on the tabletop.
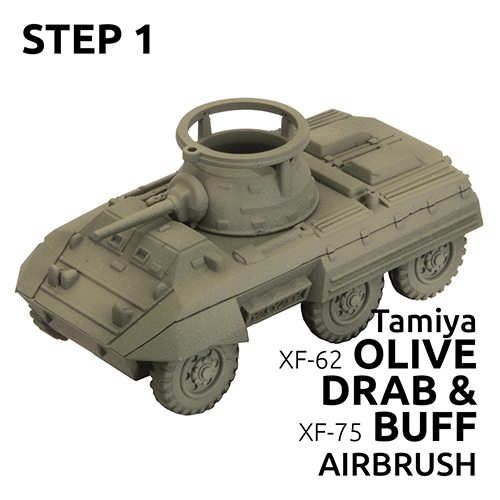
STEP 1
After priming with a flat black rattle can from a DIY store, I airbrush all over with Olive Drab. I then spray from the top with some Buff added to the Olive Drab (about 60/40 OD/Buff). This leaves the lower surfaces quite dark which I like. To finish the airbrushing, I panel fade (focus on the centres of surfaces) with a little more Buff added (about 40/60 OD/Buff). This ends up being quite light and pale, but it gets toned down by the wash later and creates a nice contrast for the black camo.
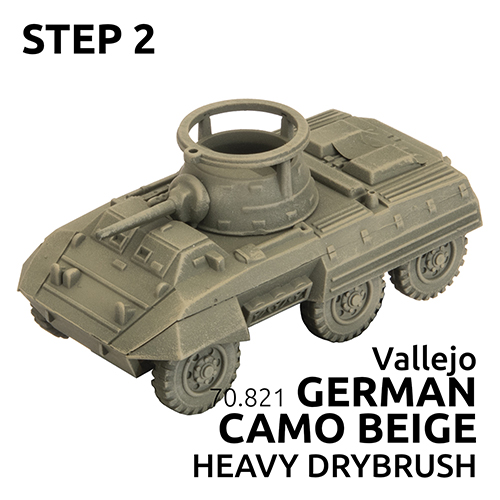
STEP 2
To bring out the details I do a heavy drybrush of German Camo Beige. I tested out a few drybrush colours when I was working out this scheme, and the beige seemed to work best. I think drybrush colour choice can often be the most important step when painting FOW tanks.
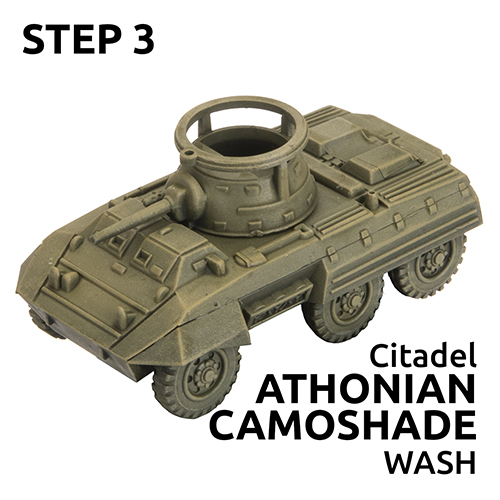
STEP 3
Next I applied an all over wash of Athonian Camoshade. This ties the previous shading together and also adds some vibrancy to the colour while shading the recesses.
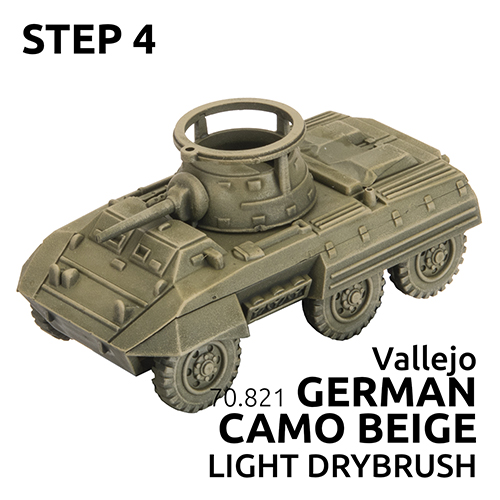
STEP 4
I go back with a second drybrush of German Camo Beige, this time a little lighter. I find doing a drybrush before and after a wash with the same colour helps to create smooth edge highlights and lessen some of the pitfalls of the drybrushing techniques (brush strokes).
STEP 5
This is where the fun begins. Using temples a could find (in my article “Would you like to know more?“) I create a camo pattern using a medium brush and Nuln Oil. The reason I do this instead of black or grey paint is because it allows the previous shading and highlight work to show through and be consistent between the camo and non-camo areas. I try to move quickly so as not to get any pooling or drying marks.

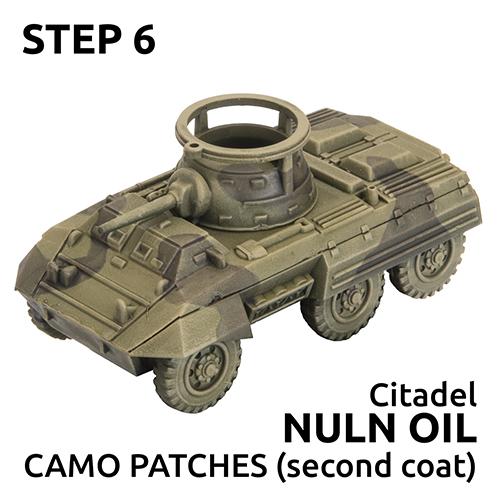
 STEP 6
I now apply a second coat of Nuln Oil over the camo patches to darken them further. This is to taste, but I found 2 coats works well and gets close to the contrast in black and white photos of the real camo. If you like it more subtle stick to one coat, or try a third coat for darker patches.
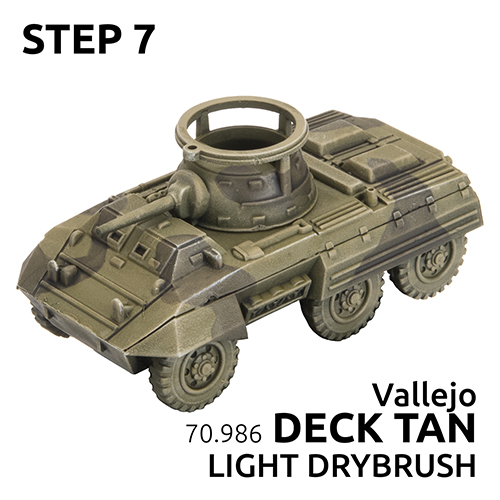
STEP 7
Lastly I ‘tickle’ some edges with a very light dry brush of Deck Tan. This just adds some pop and definition.
There you have it! Simple but effective. It of course starts to really come together with decals, tools, and wheels/tracks completed, so I’ll hope to show you the finished M8’s soon. In the meantime here’s some examples of the same scheme on some of my Shermans.

– Victor