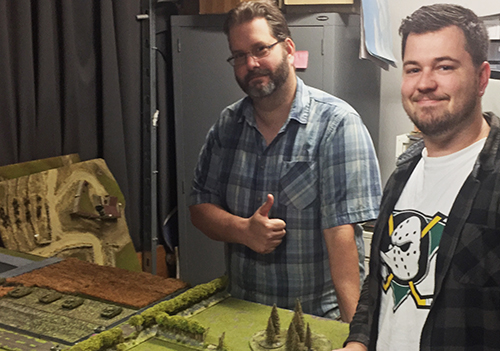
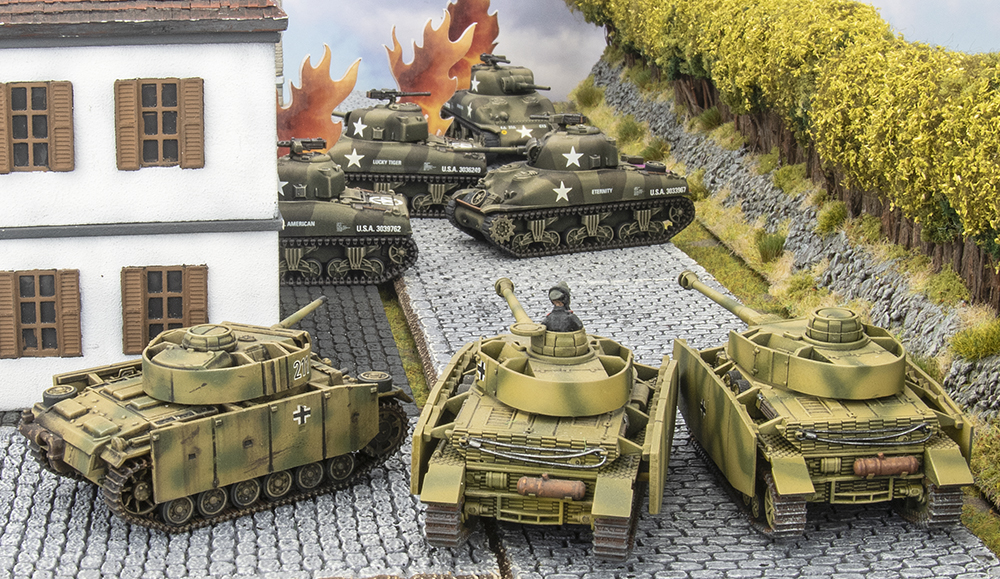
 The first battle of the Big Four took place this weekend, both to celebrate the launch of D-Day: American, and a good excuse for Victor to put his new army to the test.
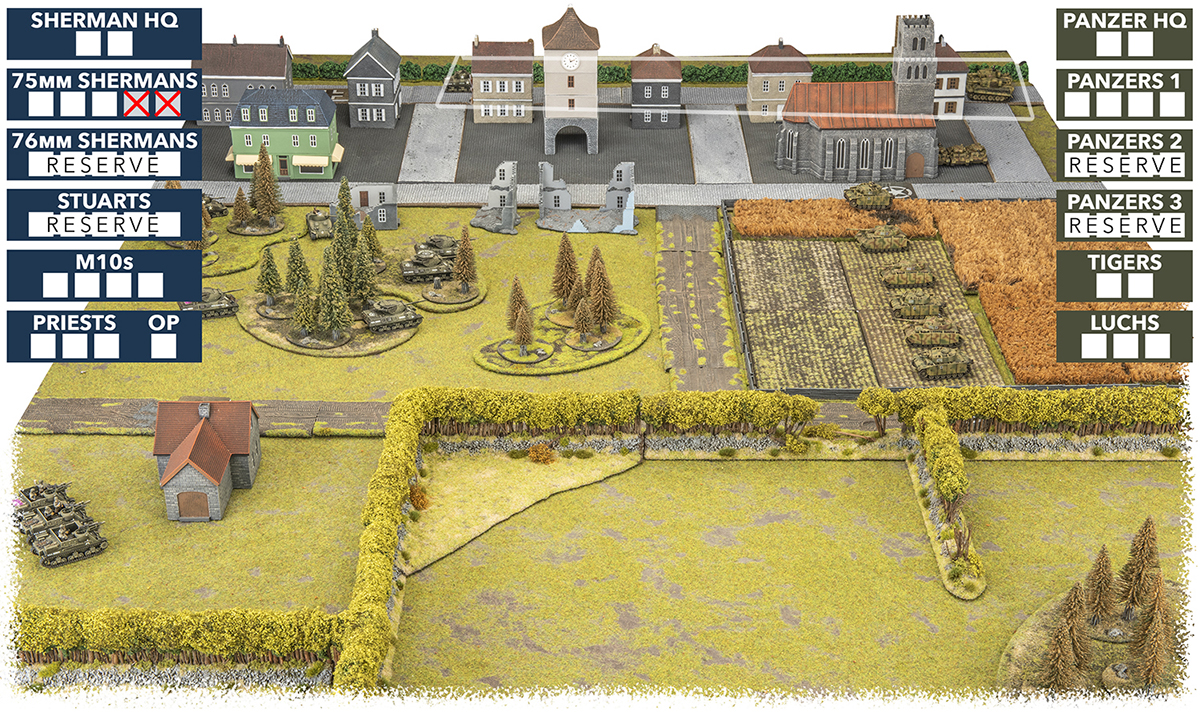
The Forces:
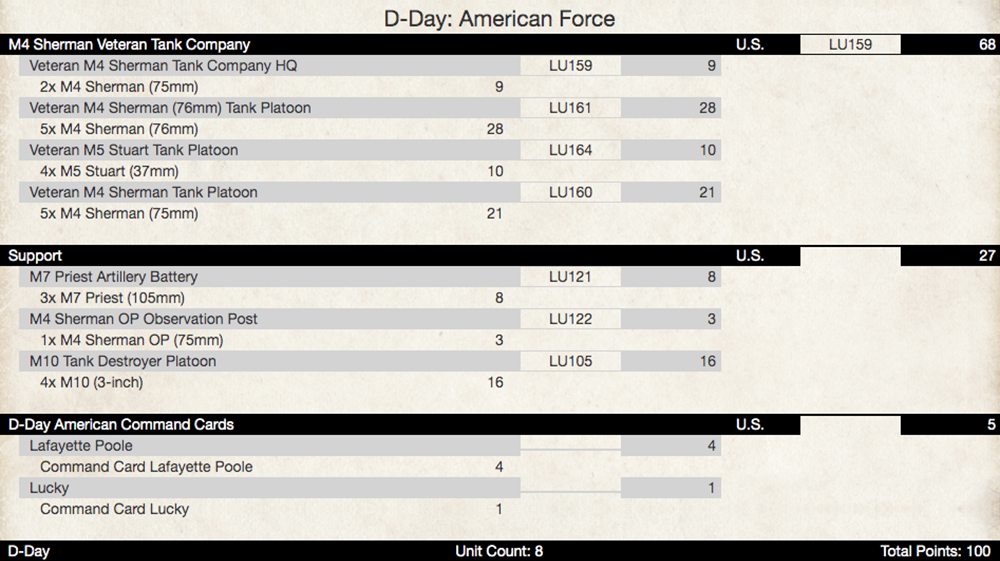
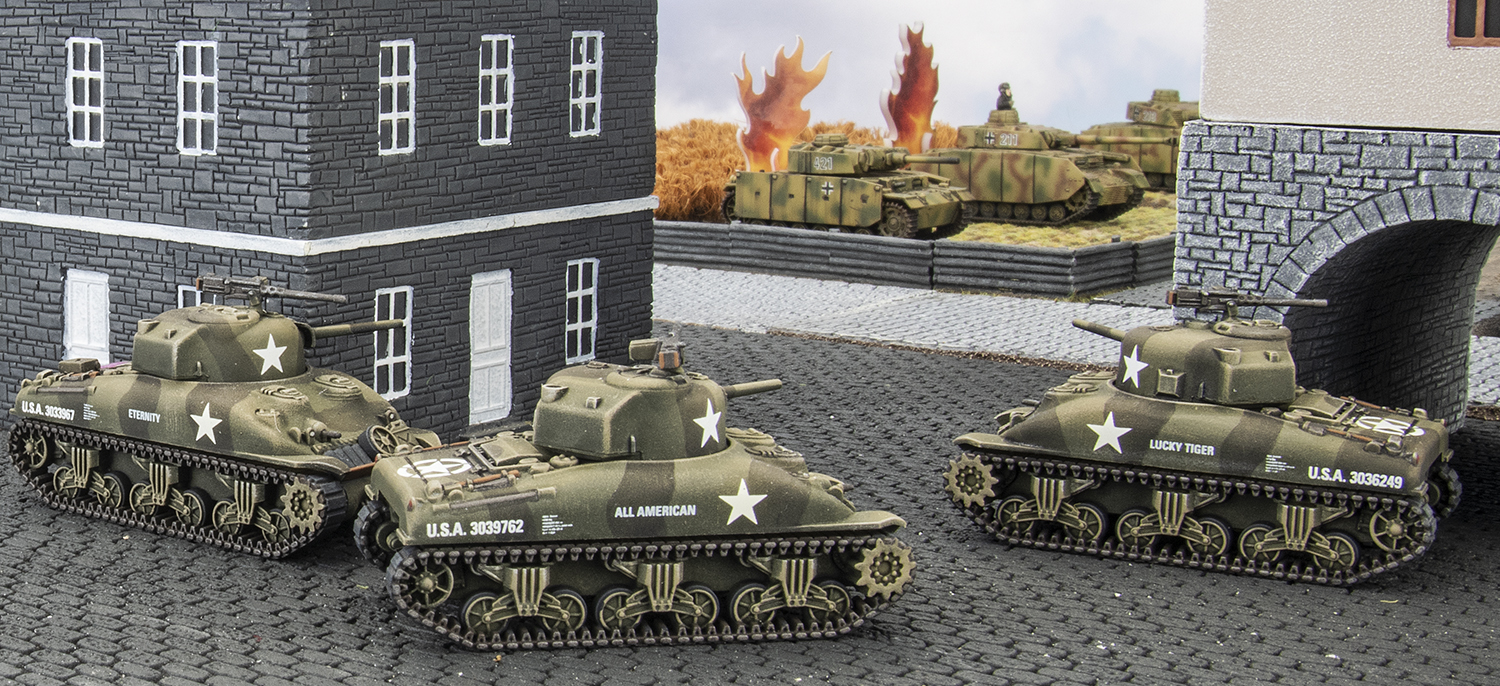
Victor used his recently finished American tank force. He’s hoping it will provide a good mix of tools, and the veteran status 4+ to hit should help mitigate any poor tactical choices.
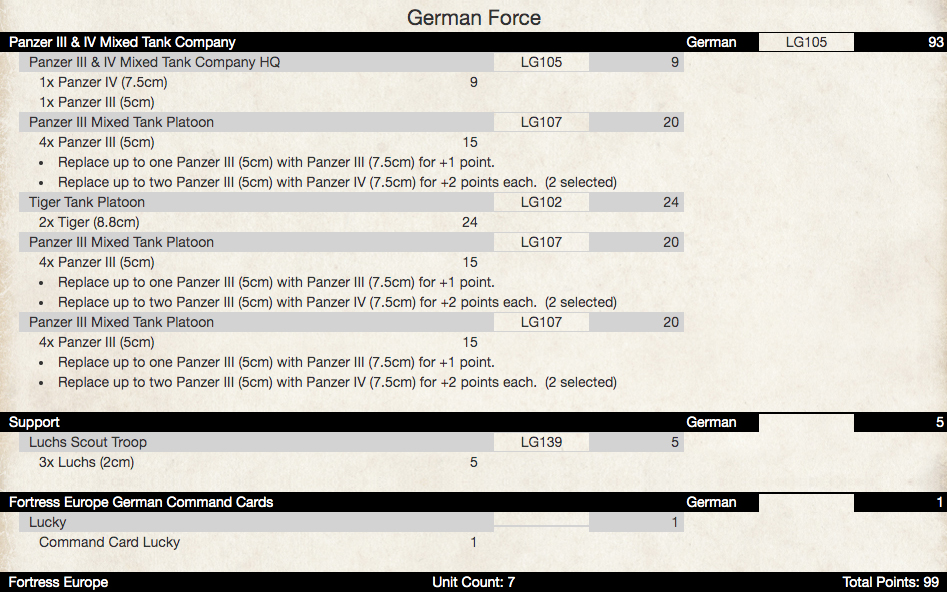
Casey revisited an old force he used to run, based around Hermann Goring Division in Italy. Fortress Europe allows you field a mix of Panzer III & IV’s, so Casey came up with the below list using Battlefronts Studio models.
Setup and Deployment:
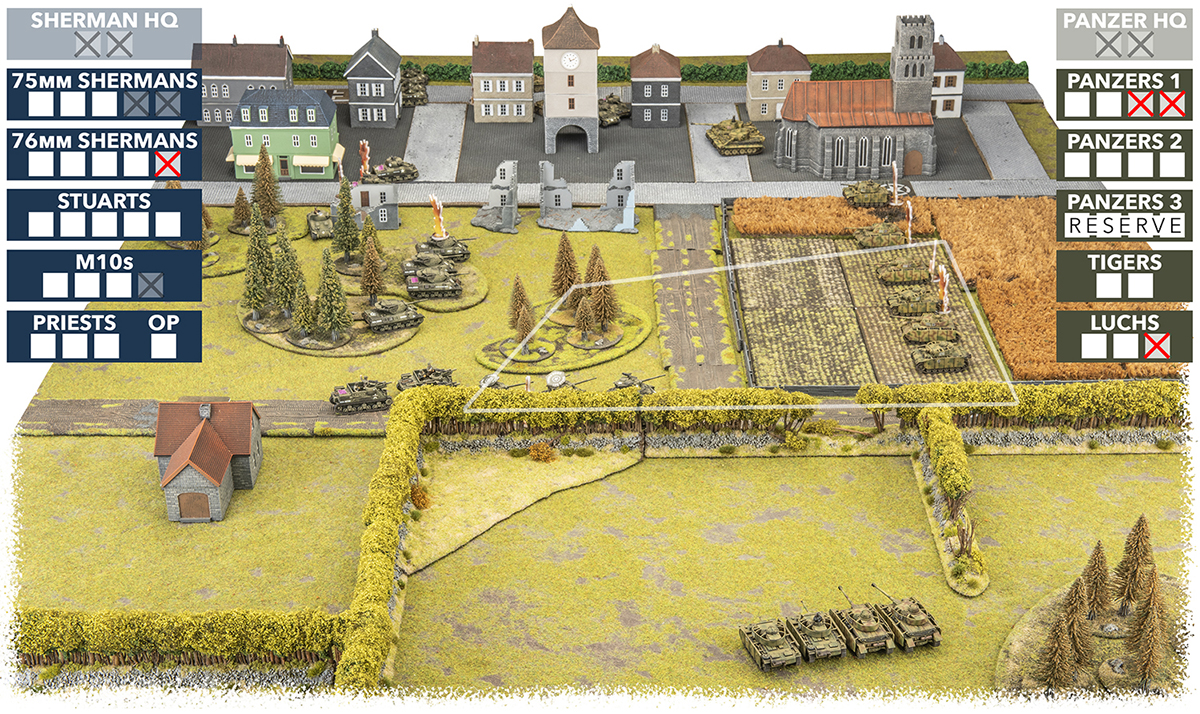
The table was set up with a third being a small town, the opposite third bocage, and the middle forest and fields. The bocage was just played as hedges, but when Casey finishes more of his terrain it would be cool to do a full bocage battle.
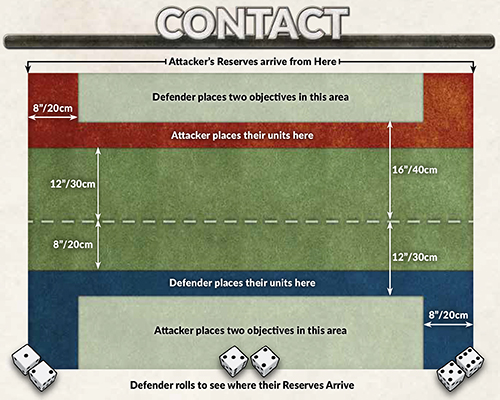
Contact was decided as the mission, and Casey chose to defend from the fields, with the Tigers in Ambush and two Panzer Platoons in reserve. Victor spread his units out to cover both objectives, but he would need his reserves, 76mm Shermans and Stuarts, to arrive quickly to reinforce his initial units.

Turn 1:
Victor failed to bring a reserve unit on, so simply moved his M10’s and 75mm Shermans forward for better firing positions next turn.
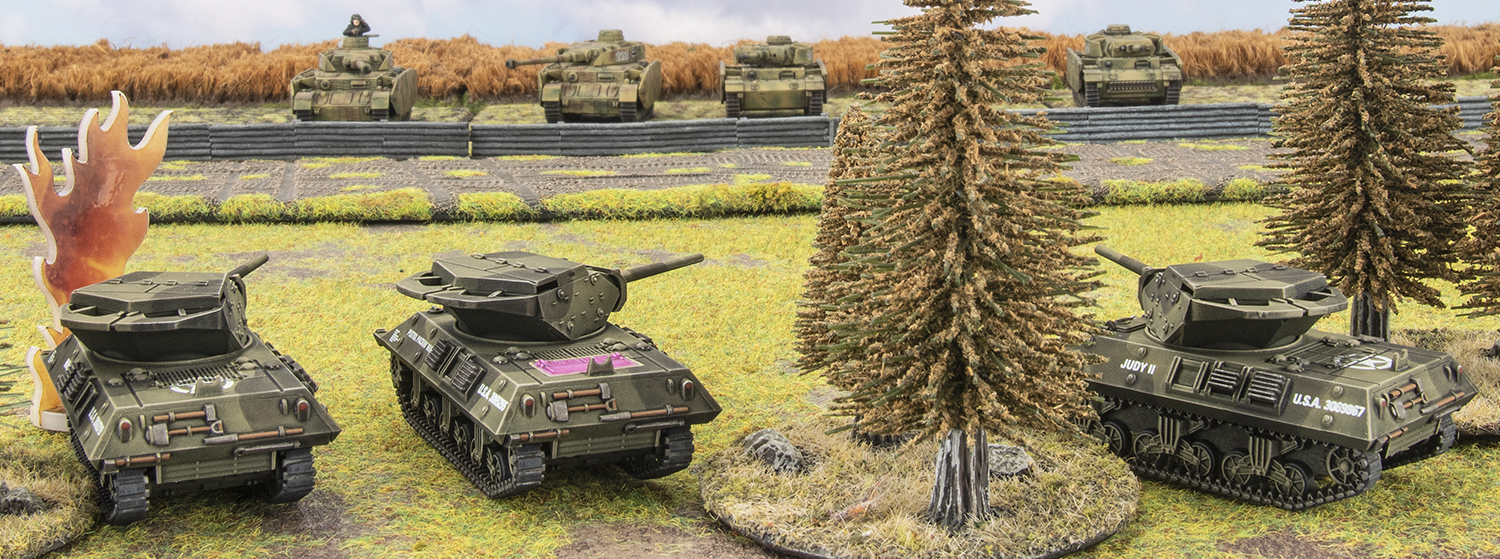
He may have been forgetting something though, as Casey pounced on the Shermans with his ambushing Tigers. They eliminated two of them, while the Panzers in the fields chose to remain Gone To Ground.

Turn 2:
Again no reserves for Victor. The 75mm Shermans were forced to get out of the sights of the Tigers, and instead aiming for the Panzer HQ, as did the M10’s, but both units were unsuccessful in scoring any hits.
Casey’s Tigers, having tasted blood advanced forward and fired on the Sherman HQ but were not as deadly this time. Meanwhile the Luchs pushed for the objective on the far side of the town, and the Panzers in the field punished the M10s for revealing themselves and scored one kill.

Turn 3:
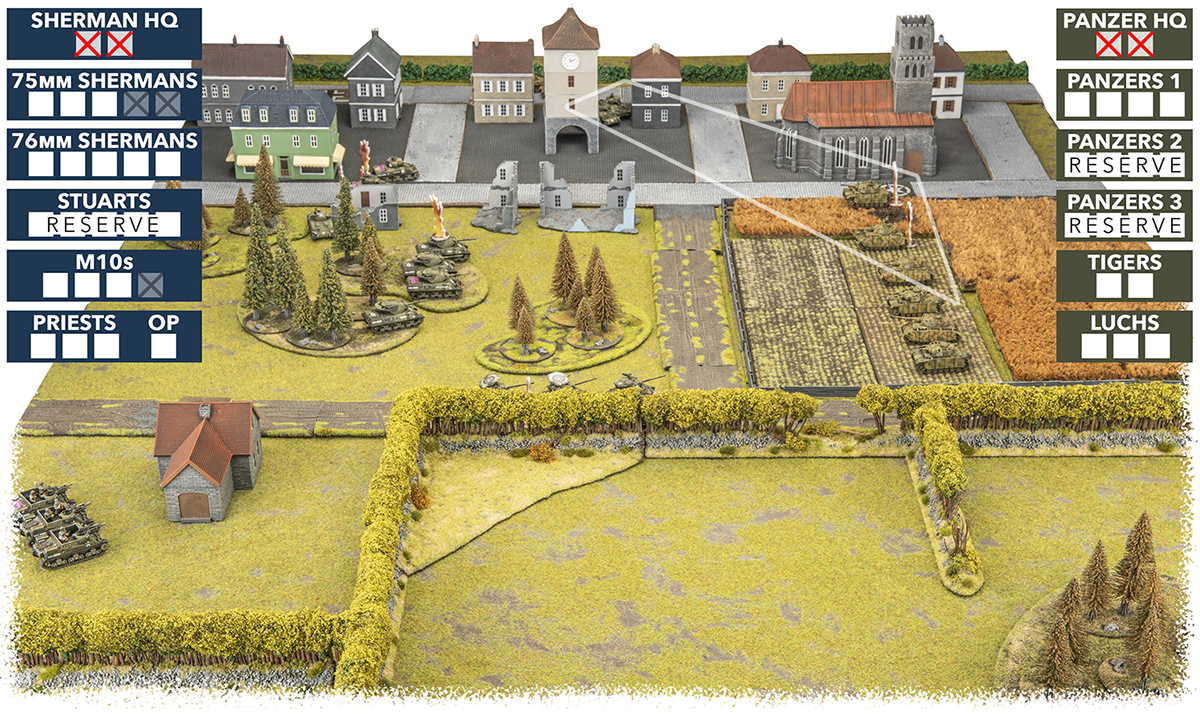
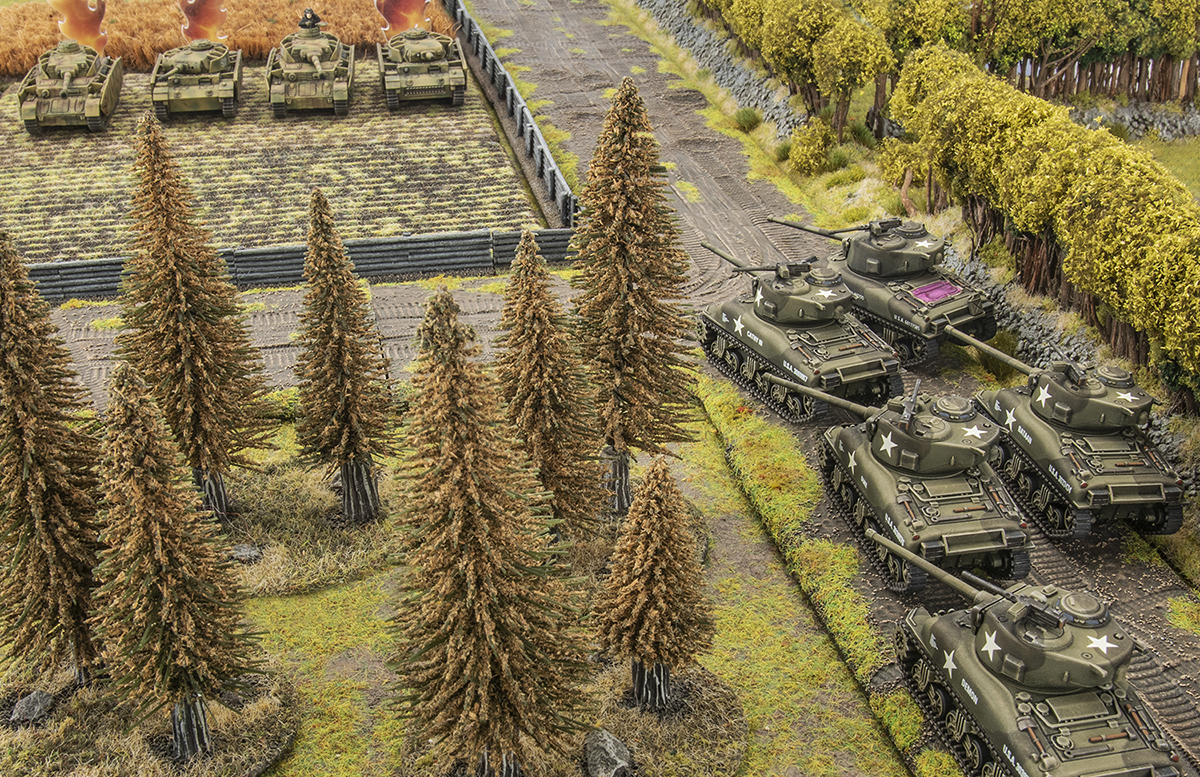
Victor now got his automatic reserve, and choose to bring on the 76mm’s, dashing them up the road to pressure the Panzers. The three remaining 75mm Shermans now in position opened fire on the Panzer HQ and destroyed both tanks. The M10’s however continued to miss the Panzers. It’s also worth mentioning that the Priests had been trying to range in on the Panzers every turn but no luck.
Casey started rolling for his Delayed Reserves now but he’d have to continue to wait. The Tigers returned the favour and killed Victors Company HQ, leaving both forces leaderless. The Luchs drove even closer to the objective.
Turn 4:
The American’s last reserve unit arrived and not a moment too soon. The Stuarts moved on to the objective and engaged the Luchs, killing one. Victor tried something different with the Priests and dashed them up to backup the 76mm Shermans. He used the 76mm Shermans to great effect and killed two Panzers and bailed a third. The 75mm Shermans and M10’s decided to fire on the Tigers, but their armour proved too much.
Casey got his first reserve Panzers and rolled the corner in the bocage. They immediately got to work and killed a 76mm through the hedges, and bailed two more. His Tigers moved forward to get a better angle on the M10s but missed with their 2 shots. The Luchs were also unlucky with the newly arrived Stuarts.
 Turn 5:
Victor knew he needed to close on the Germans, and so moved his M10’s forward. Luckily they delivered, and killed a Tiger. The Priests Blitzed up to the hedges to direct fire on the fresh Panzer Platoon, and scored one kill. The Stuarts and 76mm Shermans were also hot with their shooting, killing a Luchs and a Panzer respectively.
At the beginning of Casey’s turn he had to make Last Stand tests for both the Panzer platoon in the field, and the Luchs. Unfortunately they both failed and sent their tanks and crews running.
However Casey still had one unit to come on from Reserve, his third Panzer Platoon, which arrived in the perfect spot to finish off all 3 remaining 75mm Shermans. The rest of his force wasn’t so lucky, only managing to bail a 76mm.

Turn 6:
The 76mm Shermans drove up the road to contest the objective, and to get shots through the gap in the hedges. They fired on the Panzer Platoon and scored two kills, thanks in part to Lafayette Pool ignoring the +1 to hit with Stabilisers. The M10’s repeated what worked for them before, and eliminated the last Tiger. This left two out of four of Casey’s Formation units destroyed, with a third on the brink.
Casey was forced to make another last stand check, this time for the second Panzer Platoon. Their fate was the same was the others, so with all but one Panzer Platoon destroyed, Casey’s Formation broke. Pool’s platoon was also on the objective, so a convincing American win.


A close game that looked to be in Casey’s favour in the first few turns, but turns 5 and 6 really swung it to the Americans.
 I was glad to get the win here, but I would say I have a lot to learn about running American armour. In a battle like this the Priests would’ve probably been better served laying down smoke while my tanks pushed forward to out flank. Long range and concealment made scoring hits tough going, but the M10’s getting lucky with the Tigers really helped. And of course the hero of the day was Lafayette Pool (when he finally turned up), breaking the German company and securing an objective.
 Well that was a blast. I knew the game was going to come down to getting reserves at the right time in the right place. I was quite happy with the performance of the Panzers that started on the table. I always figured they were going to have a difficult time against the sheer number of tanks on the table. I think if my first reserve had of turned up on the first turn of rolling, and if the second platoon had of come onto the table in a more use full place then I think I would have won.
In hindsight I should have probably waited until the 76mm Shermans arrived and sprung my ambush against them. I was just too eager to get some runs on the board.